
This is it! Our heroes dare to enter The Tomb of the Nine Gods with some surprising new additions to the roster.
When last we left our heroes, after some exciting battles and a tense chase through a Yuan-ti temple, their nemesis, Ras Nsi lay dead. Huzzah! They were also able to rescue the beloved urchin Bucketboy, whom was adopted by the heroes in Session 4 and kidnapped by Ras Nsi in Session 36. Let that be a lesson to you kids. If you care about an NPC, the DM will attempt to destroy them. Sadly, during the excitement, we lost one of our own, when Roland disappeared in a blinding flash of light. If you want to know what became of him, go check out the last session. We’ll wait.
Welcome back. Before we plunge into the Tomb, we got a few housekeeping matters to attend to. Previously, our heroes had cleared out a base of operations for themselves by killing the Red Wizards squatting there. It was here that they had their last good rest of the campaign in preparation for the Tomb. Also at this base is a scout named Orvex, whom the party had stolen away from the Red Wizards. I had intended for Orvex to accompany the group into the tomb, similar to the glorified NPC Grum, who has been with the party since Session 15. But no one seemed interested in taking Orvex. Instead, they left him here to guard the base and protect Bucketboy, who is now stuck here in Omu until our heroes conclude their business down in the tomb.

It’s a shame about Orvex, because I had always intended to play the Tomb in the old school way. In old school D&D, the party was often accompanied by a squad of NPC hireling and followers. I wanted each player to have at least one NPC companion that would help out with combat and maybe become fodder for some of the more vicious traps. Sadly, almost all of the NPC hirelings gathered over the course of the campaign had to be abandoned back in Session 37, due to some poor dice rolls and the inopportune assault upon an exiled princess. Oops. I had hoped that Orvex would fill this NPC gap, as he is an excellent scout and hearty adventurer, despite his aged appearance. But our heroes didn’t want him, so he’s out.

But that is the least of our problems. Last session was Player Roland’s last session. He’s off to college, learning or something. Now the party is down to just three heroes, and frankly they are screwed. Tomb of the Nine Gods is a stupidly deadly dungeon and having just lost 25% of the party is devastating. It is unlikely they will succeed.
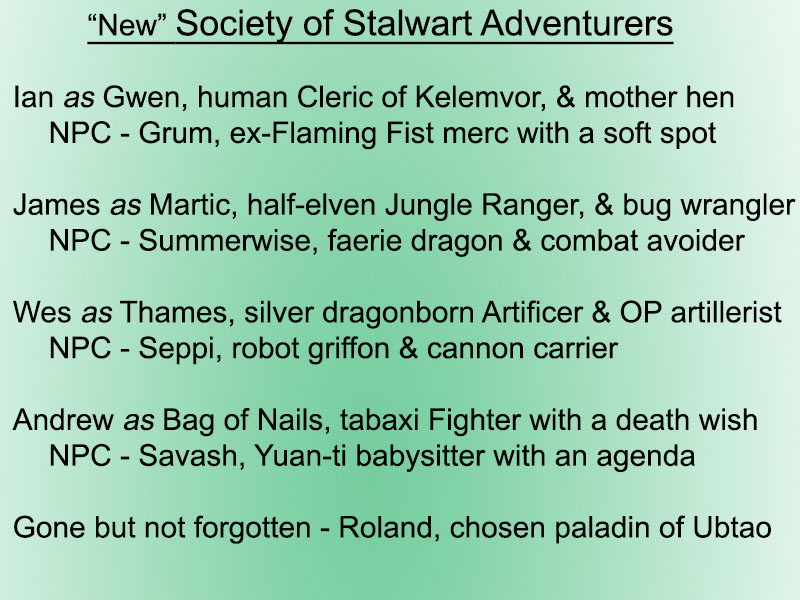
Our remaining heroes awoke the next morning and were surprised to find Bag of Nails standing in the middle of the courtyard. “Where do you think you’re going? You promised me a good death at the hands of these wizards and I’m still alive. You owe me!” This vaguely insane Tabaxi assassin has at various points tried to kill our heroes and saved them from destruction depending upon his fickle feline whims. The furious furball continued, “If you’re going into the Tomb, I want in. If it’s a deadly as they say, maybe that can give me the glorious death worthy of Bag of Nails!” In reality, I had convinced my son Andrew to join the campaign. He loves playing murder hobos, so he was fully on board playing a bad-ass crazy assassin cat.

With our group back up to four, we might just survive the Tomb, if we can keep Bag from running head first into every fight. Good luck with that. Our heroes headed to the Tomb entrance at the northern end of Omu, where they were met with another surprise. The Yuan-ti Fenthaza was there with over two dozen snakeman minions, waiting for our heroes to arrive.
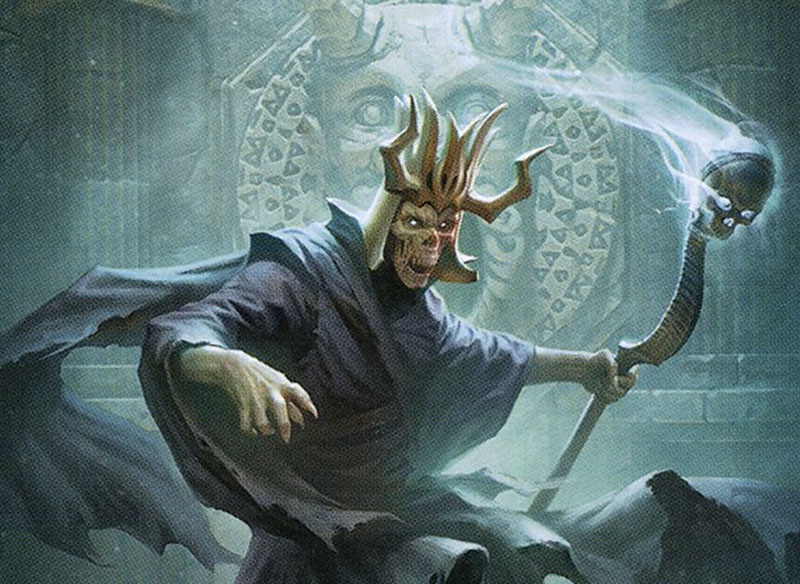
She presented the group with the final puzzle cube and had a few things to say. “As promised, here is the Papazotl Puzzle Cube. Remember you promised to retrieve the Black Opal Crown from within this tomb. To help you keep your promise, one of my best devotees will accompany you within the tomb. Once you find the crown, he will hold on to it for safe keeping. Until then, I promise he will fight by your side as you see fit and he will not betray the group. Savash, come forward.” A nasty looking snake man walked up with the legs, arms, and torso of a man, but the sinister red-scaled head of a snake. He bowed and spoke. “I am Savash. I vow to fight beside you as best as I am able, to retrieve the crown my mistress desires.” Our heroes were in no position to deny this new condition to Fenthaza’s deal and this was the party that would delve deep into the Tomb of the Nine Gods to save the world.
It is my intent to run Tomb of the Nine Gods mostly as written. In the Chult section, I did tons of homebrewed and modified content trying to give my players the best jungle adventure I could. But the Tomb itself is completely different in tone and style. It’s basically a completely different adventure. And like the original Tomb of Horrors, it is meant to be played on Hard Difficulty mode. Can you really claim to have played either Tomb if your DM changes things to make it easier for the players? I want my players to be proud that, live or die, they played Tomb as it was intended. If anything, what changes I will make actually made Tomb even more difficult. But I digress. Let’s dive in, shall we?
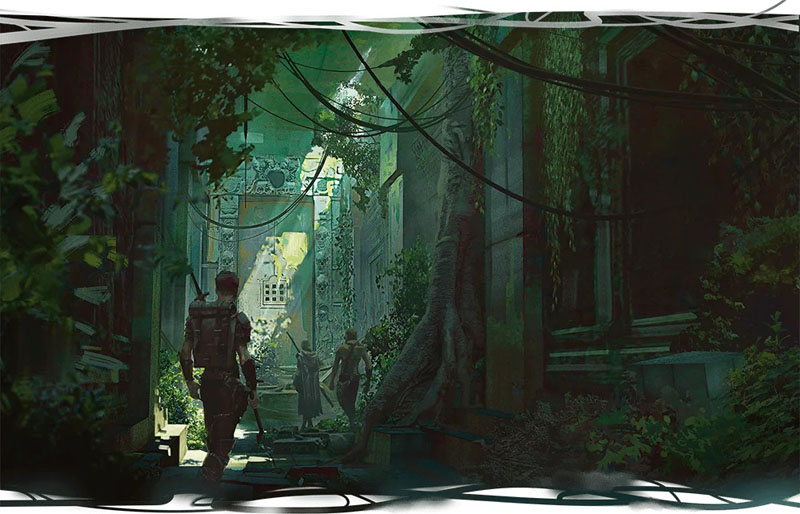
We start at the beginning, outside the Tomb. Our heroes are standing in a small clearing in front of the enormous cliff into which the Forbidden City of Omu sunk centuries ago. Two tunnel entrances have been carved into the cliff face, a large one to the north and a smaller one hidden to the east. There is also a black obsidian monolith that stands in the center of the clearing. What ever you do, don’t knock it over.
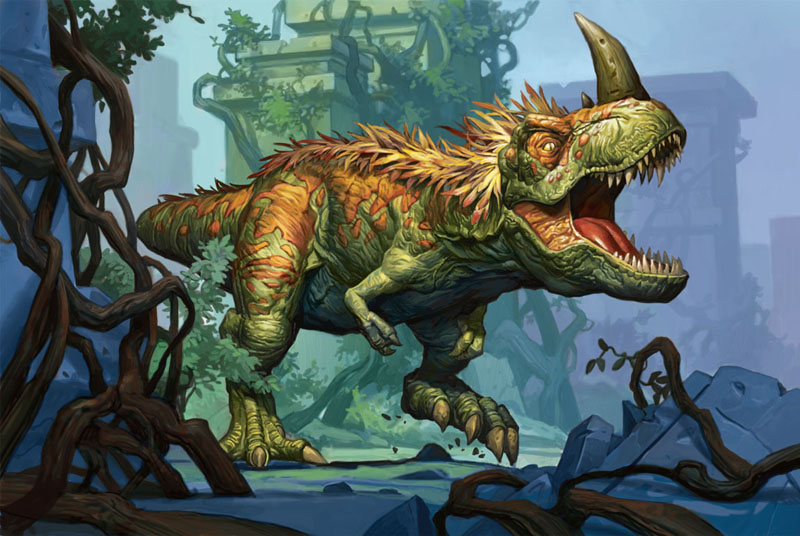
We’ve been here twice before. In Session 37, when we first arrived in Omu, we landed at the top of this very cliff directly above the Tomb. We didn’t know this at the time and fought the gargoyle guardians upon the cliff edge. Their stone bodies still lie shattered on the ground surrounding the obelisk. Later in Session 38, we discovered the Tomb entrance proper and learned about the Puzzle Cubes needed to gain entry. That time, we fought a Zombie Tyrannosaur Rex that had been stalking us around Omu. We barely survived and killed the undead dinosaur, when yet another even bigger T-Rex showed up whom the locals dubbed the King of Feathers. Thankfully, he was content to just eat the other dinosaur, and dragged the body off to dine in private. But not before winking at Roland before it left. Read last Session’s recap to see what that was all about.
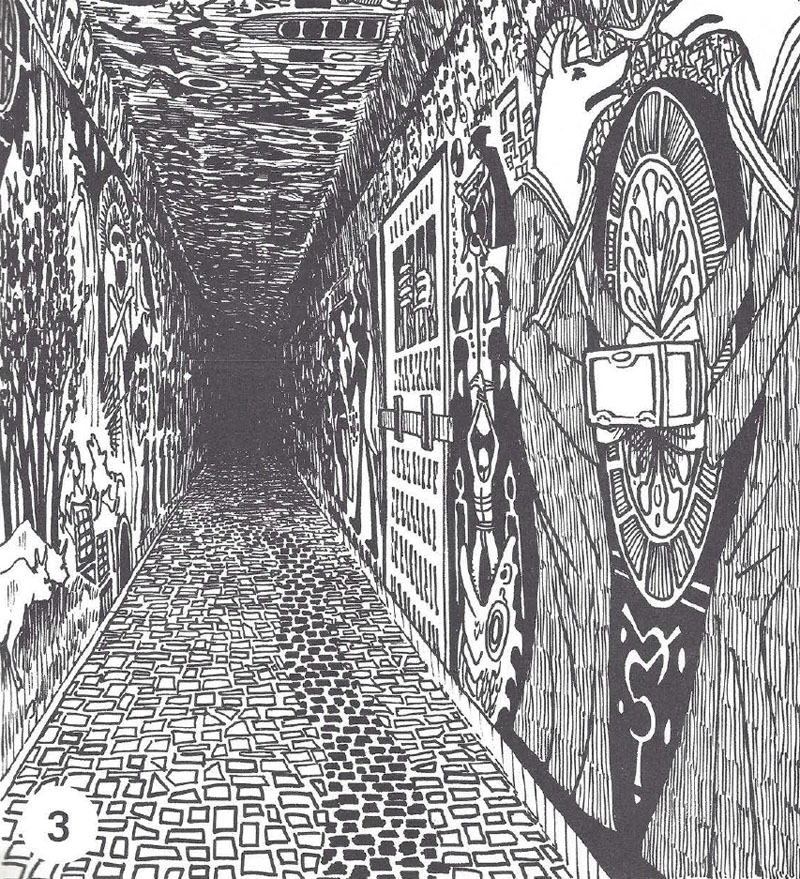
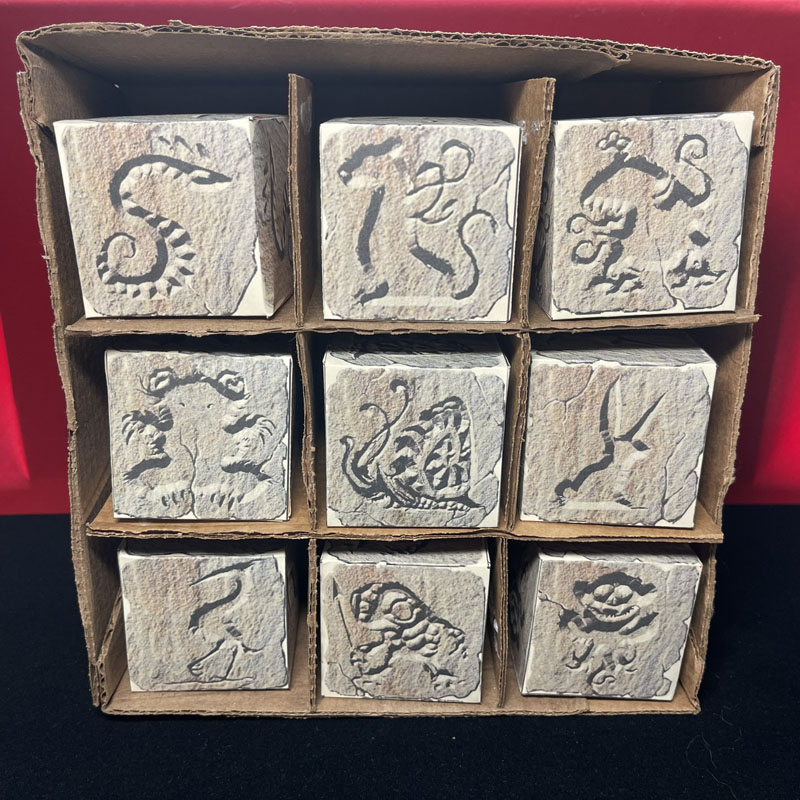
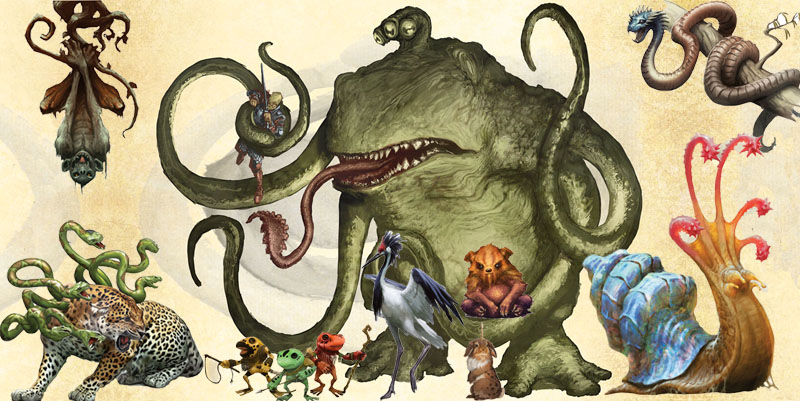
Here we stand yet again, finally able to enter the tomb. If only we can figure out how. Our heroes were pretty certain that the wider northern entrance was the door to the Tomb, so they wanted to check the eastern tunnel first, in case they became trapped inside. Eight alcoves hold eight statues, each dedicated to a different Trickster God. The only problem is that there are nine Trickster Gods. Unkh, the flail snail, is nowhere to be found. The other eight are arranged in pairs, with each pair facing each other as you moved down the hall. This arrangement is yet another clue to solving the Puzzle Cube puzzle. About these cubes, make sure you have a physical prop for these cubes. It can be a simple paper cutout or an actual 3D cube like the ones below. Go to my Tomb of Annihilation Campaign Resource Page for templates to make your own.

We’ll get to these cubes soon enough. For now, this hall offers up an unrelated benefit. As our heroes walk down the hall, the brazier held by each statue lights up, if they have the correct Puzzle Cube. Since they have all the cubes, all the braziers burst into flame. Then when they reach the end of the hall, they see a light coming from behind the rock wall. There must be a secret door. They found it easy enough, but foolishly did not check for traps. Fortunately, this door is not trapped. They will not be so lucky on future doors. The panel opens, revealing the expected statue of Unkh and its flaming brazier. Around this statue hangs a golden pendant shaped like an eye. Always on the lookout for free treasure, Thames grabs it and stuffs it in his magic bag. Thanks, Acererak.

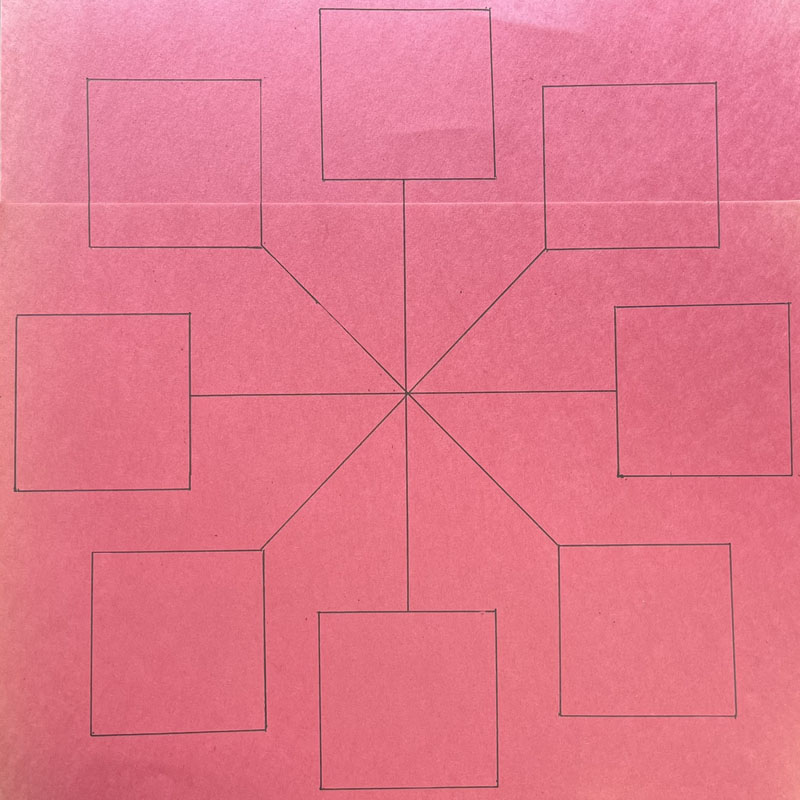
Onto the Tomb. Entering the north hall, it ends at an ornate stone slab festooned with skulls. Gwen feels right at home. I’m surprised she didn’t try to pry a few loose to add to her collection. In the center of the door is a curious pattern. Four lines cross each other creating a star like pattern. At the end of each line is square shaped alcove, eight in all, each just big enough to fit a Puzzle Cube. In addition to having props for the cubes, have some sort of handout to represent this Puzzle configuration. For this puzzle, I simply drew it out on a piece of paper like so:
All right. The first of Acererak’s complex puzzles. Nine cubes, Eight holes. You suck at math Acererak. And the solution is not hard either. If you paid any attention at all here in Omu, you should realize that every Trickster God (except Unkh) is the mortal enemy of another Trickster God. Whether you heard the Legend of the Nine Gods, which I read at least twice to my group, remembered the clue on the obelisk that read “Enemies Opppose”, or you simply copy the arrangement of statues in the room you just came out of, you can solve this puzzle. Which my group does quite easily. It doesn’t matter which cube goes where so long as each is positioned opposite its “enemy”. A rumble is heard from deep within and dust falls from ceiling, as ancient stone gears grind for the first time in forever. This is it!
It’s not it. It’s the first of an endless series of deadly traps in this deathtrap dungeon. Oh, so that where they get the name from. The grinding gears aren’t opening the door. It’s closing the hidden stone slab at the front of the tunnel, sealing our heroes inside. Quick, what do you do? Try to run outside or stay in the room? Thames and Savash, who both refused to enter the hall in the first place, are like “nope” and step out back into the jungle. The others are still undecided. Before the stone blocks seals them in, I tried to give them a break and say that poison gas begins seeping in from those decorative skulls. Here I am nerfing the Tomb already; the book does not give extra hints!
But despite my warning, Gwen says, “I’m staying. We can figure this out.” Dutiful Grum stays by her side. Misinformed Martic says, “Yeah, we got this,” and also stays. Finally, Suicidal Bag say, “I can take it. Bring it on!” Well, this might be a very short trip into the Tomb.
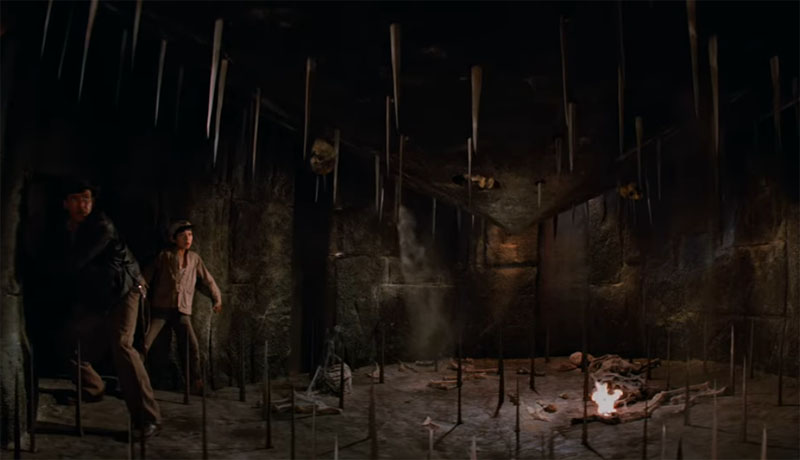
Four adventurers are trapped in a gas chamber and begin dying from poison and acid to the tune of 10 hit points of damage each round. There is a save, but it is high and must be rolled every round. Every single round. They waste the first round trying to find a release lever of some sort. This isn’t Temple of Doom, kids. There isn’t one. They look for a secret door. Sorry, no dice. Or door.
Finally, they start stuffing up the skull holes with whatever they can find; old shirts, candles, moldy rations. There are six skulls and I allow that each clogged skull decreases the damage taken by 2. You’re welcome. James attempts to use his misty step bug ability to teleport into the gas room behind the skulls. Well, that will kill him, so I decree that he can’t see into the room through the skulls, but since you’re standing right up on a nozzle you get a full blast of gas for double damage this round. You’re welcome.
Thankfully, they get all the skulls stuffed and stop taking damage, but they are still trapped. Each round I ask them what they are doing. “We try to lift up the stone blocking the door.” You pull a muscle in your back, and the stone hasn’t moved an inch. “I climb to the ceiling. (Bag can climb walls) What do I see?” More ceiling. “I pull out a puzzle cube.” It is magically stuck in its hole. “Is there a faint mosaic line in the floor?” No. (Someone read the OG Tomb of Horrors) “I smash a skull to the gas room.” To which everyone else yelled, “No!” and no skulls were smashed.
After ten rounds, the book takes pity on them and the stone slab rises back up into the ceiling. Then some magical force spits all the cubes out of their slots where they clatter on the floor. Thames and Savash are standing outside the entrance. Both have that “Are you kidding me?” look and Thames says, “Are you done almost dying yet?”
Bag retorts, “I’m not even close being done dying yet.” Maybe Bag wasn’t the best choice for NPC turned PC. But I’ll give Andrew credit. He is playing this character. And he keeps it up for the rest of the campaign. And he really was the one least close to dying. Bag took 18 points of damage. Gwen took 21, Grum 30, and Martic was down 35. We haven’t even entered the Tomb and half the party is half dead.
So, where is the real entrance? Maybe the obelisk has a clue. Let’s read that plaque again. On that big black obelisk, Acererak had posted a riddle to taunt our heroes. I love that the lich is such a narcissist troll that he’ll give his enemies clues, convinced that it won’t matter; his perfect dungeon will kill any and all so-called heroes. Yeah, well he ain’t seen our heroes yet. Heroes that nearly died before they even get into the tomb.
Seriously, these Riddle Plaques are some of my favorite handouts, and I like that there is a separate riddle for each floor. The original Tomb of Horrors put all its clues in a single long poem that was impossible to figure out which riddle went to which room. This is a little more fair. This first sign starts with the usual bad guy boasting and reads:

That’s great. Enemies oppose. That’s the Puzzle cubes. But where’s the damned entrance? Now, if someone happened to be wearing the Unkh necklace that they just got, it would tug them toward the true entrance. But it is currently stuffed in Thames’ sack and does them no good. My players were truly stumped. What to do? What to do? Ooh, I have something to help here.
I’ve had a running theme of destiny and prophesy throughout the campaign. Our heroes have had prophetic dreams and even had a Nordic Rune fortune reading back in Session 22. Among the predictions they received was: “When all hope is lost, look to the tree of life, the birch tree, to guide you.” I had no real plan about when this would occur, so we’ll do it right now.
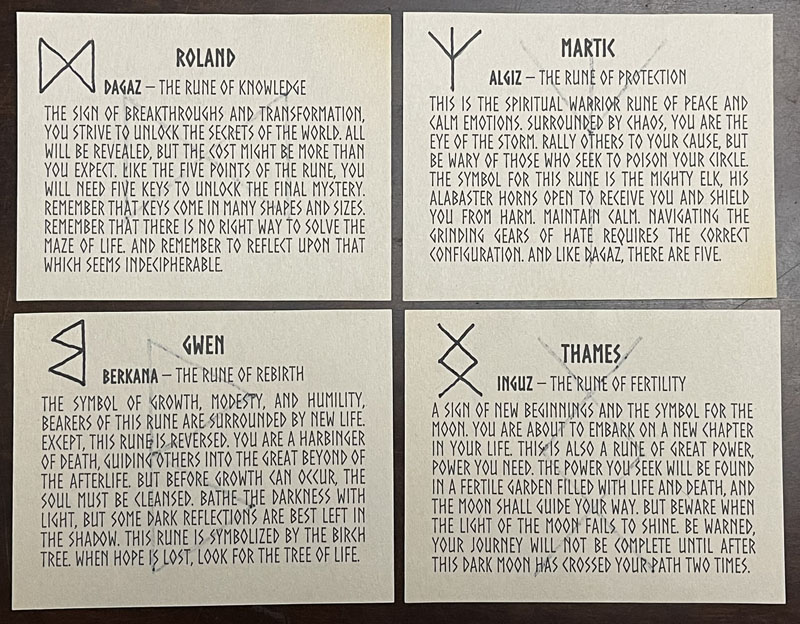
The party is wandering around the clearing looking for any sign of another door. Gwen is near the western edge of the clearing, I tell her, “Gwen, a few yards into the jungle beyond, among the usual palm and kapok trees, you spot an anomaly; a single birch tree, with it’s distinctive white and black bark, grows in this sweltering jungle.” Approaching this tree, you spot another one a few more yards away, and then another. Following this line of trees, they lead you to an unremarkable section of the cliff face covered in vines, moss, and undergrowth. Clearing out this vegetation reveals another archway carved into the rock, with more skulls glaring from the lintel. Acererak does have a certain aesthetic, doesn’t he? He must get his décor from “Catacombs R Us.”
This hallway also ends at as stone slab, and also has an arrangement of puzzle cube alcoves, but this time there are nine of them, placed in a 3×3 grid. Now we’re getting somewhere. For the previous puzzle, I simply drew it on a piece of paper. For this, the real puzzle, I wanted something more. To go with the 3D Puzzle cubes, I made a 3D Puzzle Box that stood upright like the picture in the book. My son eats a ton of ramen, so I made the prop out of 3 ramen boxes which just happen to be 3 cubes wide. Two boxes make up the frame, and four long edges made the octothorpe that went inside. This box was also a nice way to store my cubes.
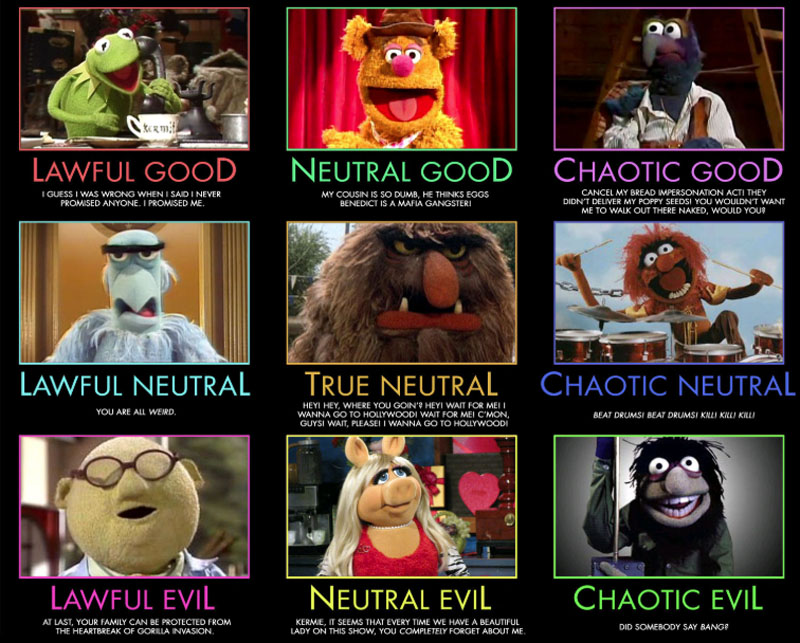
The solution to solve this puzzle is no different from the false entrance, except you add the Unkh cube into the middle square. It technically doesn’t matter where each pair of enemy cubes go, so long as they sit opposite each other. Although it is never specifically stated, the puzzle is actually a standard alignment grid. Each Trickster God has a different alignment. If you arrange them from Lawful Good to Chaotic Evil, then the puzzle is solved. Way back in Session 8, the homebrewed Trickster Trials festival held in Port Nyanzaru was designed to introduce the Trickster Gods into the story, But I also deliberately scheduled each game to match their alignment order. So, any player who remembered this order would also learn the solution to the puzzle. Yes, the puzzle is easy, but I liked this little meta nod to the standard alignment grid.
I was pleased that during the solving of this puzzle, one of my players asked about the order those games were played, which led to a discussion about each game, which god it represented, and sparked memories of who won which game, etc. As a DM, I’m always happy when players recall moments that occurred months ago, or in our case, years.
But in many ways, I was sad to see this puzzle go away. I spent a fair amount of time during the campaign keeping the Trickster Gods relevant. A good amount of work went into designing and creating the physical cube props and laying out the two puzzle patterns. The past three sessions have been dedicated to collecting these cubes. And just like that, the puzzle is solved. The cubes disappear back to their shrines to entice new victims, and the door of the Tomb proper opens to begin a brand-new chapter in the adventure. Thankfully, the gods themselves will remain a presence in the tomb, with mixed results.
Welcome to the Tomb of the Nine Gods, aka Tomb of Horrors 5.0, since there has been a new version of this classic dungeon for all five editions of the game. I cannot stress enough what a dramatic shift in tone this tomb is. The switch from sandbox jungle exploration to deathtrap funhouse mega-dungeon is jarring. Sadly, I, (and my players) preferred the jungle. We’d been exploring the jungles of Chult for almost two years and we were having a blast because it is what we all wanted to do. But now we all felt that this dungeon was something we had to do just to wrap up the campaign. It felt like an obligation. Don’t get me wrong, the tomb was fun, exciting, and we had a blast, but everyone missed the freedom of the jungle. I think we’d all gone native.
Just few more notes about the Tomb before we jump in. This is a very silly dungeon. And deadly, but mostly silly. It is the pinnacle of what one would call a fun house dungeon, packed with zany scenarios, complex traps, and dozens of crazy monster encounters. This was another jarring tonal shift from the pulp adventures of Chult. Even in a fantasy world, this dungeon makes no sense from a logical standpoint, and solely exists at the whims of a madman. From a game perspective, its purpose is to challenge the players’ ability to think outside the box, and come up with solutions that don’t necessarily rely on their PC stat block. And to amuse them with the wackiness of it all, even when they get killed by some ridiculous nonsense.

But this Tomb is also very complex, even more so than White Plume or the OG Tomb of Horror, both of which are quite short. Tomb of the Nine Gods is huge; six different levels of ridiculousness. And incredibly, it is also a sandbox dungeon. Five of the levels are completely open for the players to explore right from the start. This means your players can go virtually anywhere, jumping from level to level, abandoning entire sections, and making it very difficult to plan for each session in advance. In fact, it is conceivable that your group could ignore all the upper floors, get to Level 5, solve two puzzles, fight a single combat, and enter the final showdown with Acererak. Yes, there is the MacGuffin of finding five keys hidden throughout the upper floors to keep that from happening, but you get the idea. To properly run this dungeon, you need to have a general understanding of the entire thing.
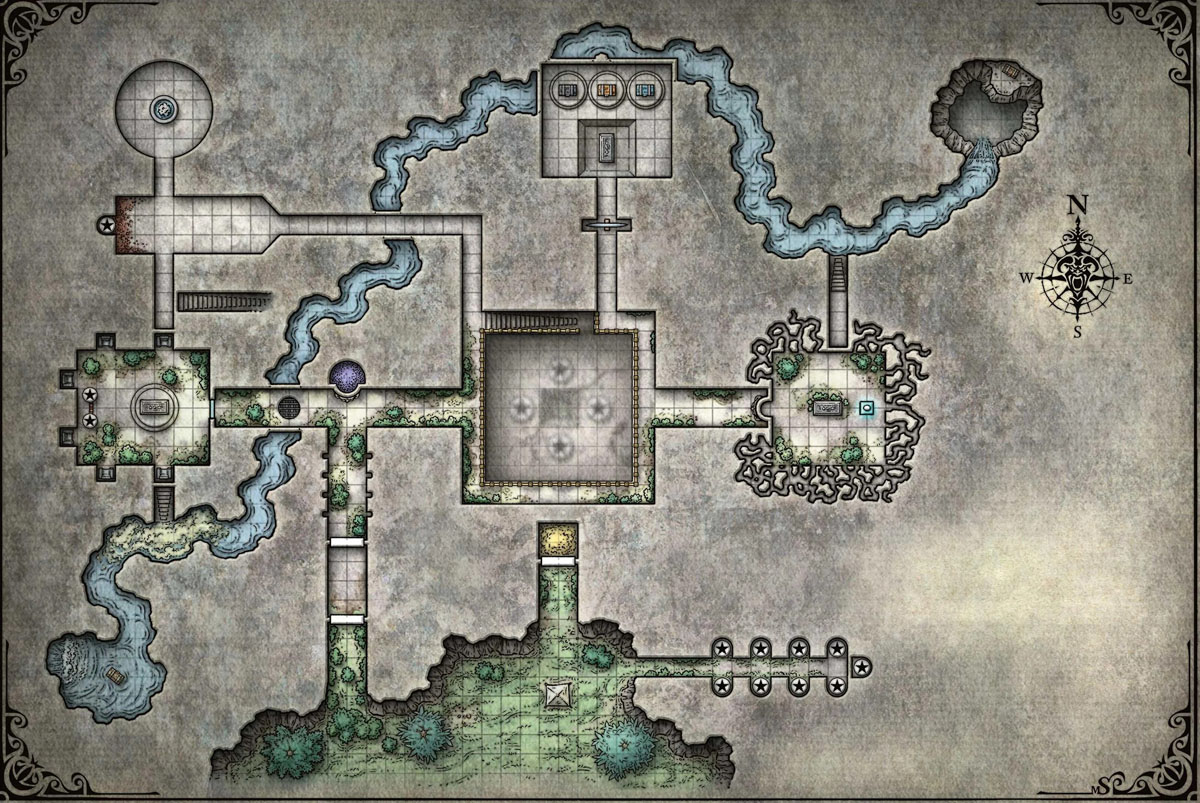
Although they never do, I wish WotC would include a chart with the broad overview of these giant dungeons, to give us a sense of where everything is, what hazards, monsters and treasures each room has, and such. Until WotC brings back this brilliant idea, you can use this chart (as soon as I finish it). Truthfully, I did not start this chart until after the campaign ended and I wish I had. I spent so much time flipping back and forth in the book that it was quite frustrating. There are also three different “collectables” sets (four if you count the keys mentioned earlier), spread throughout the dungeon. I will include them on the chart by their initials and I will talk about each one as we discover them. The three sets are: Trickster Gods treasures (TG), Legendary Treasures (LT), and the Company of the Yellow Banner bodies (YB).
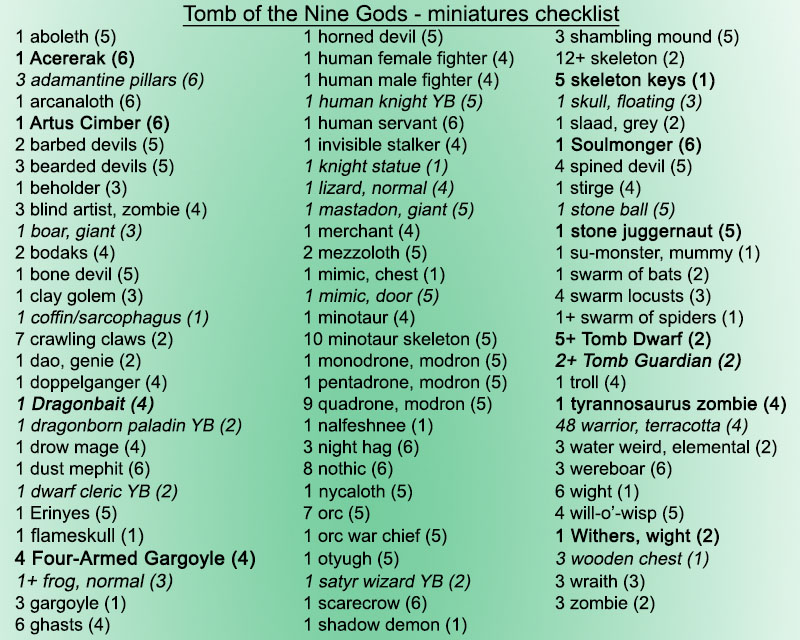
In addition, if you use minis like I do, you’ll need to be prepared. It is impossible to predict where your players will go, and thus you have no idea which monsters will be encountered as they explore. I compiled a list of all the monsters found in the tomb. I included what floor each monster is encounter, so you can gauge when you will need it by. Use it as a shopping list to keep your local hobby store in business: there’s a lot of miniatures. I swear WotC does this on purpose. As we’ll see, I found some creative ways to replicate some of the unique minis, like the 4-armed gargoyles and the stone juggernaut. But you may find other solutions to fill the gaps in your collection, like using pennies for the 48(!) warriors found on Level 4. Let’s go shopping!
Okay, now that your wallet is $400 lighter, let’s delve into the Tomb of the Nine Gods. My players were intent on “completing” the entire dungeon and for the most part, cleared out each floor before proceeding to the next. Thanks, guys. I appreciate it.
Finally entering the Tomb, our heroes are stopped by yet another stone block. Paying zero heed to danger, Bag of Nails just walks down the hall toward the block, triggering the trap. A stone lever and an hourglass appear on the far wall and I begin counting down, 10, 9, 8, … Gwen and Thames yelled, “Don’t touch nothing!”, Martic took too long to think, and reckless Bag said, “Screw it,” and pulled the level; activating the trap, opening the floor into a poisoned spike pit. With his feline agility and claws, Bag sprang to the wall and was safe. No such luck for the rest. Thankfully, Thames cast feather fall, saving them from the severe inconvenience of being poisoned for the entire adventure. As they floated down, Thames yelled, “For the record, I agreed with the human cleric!” Noted.
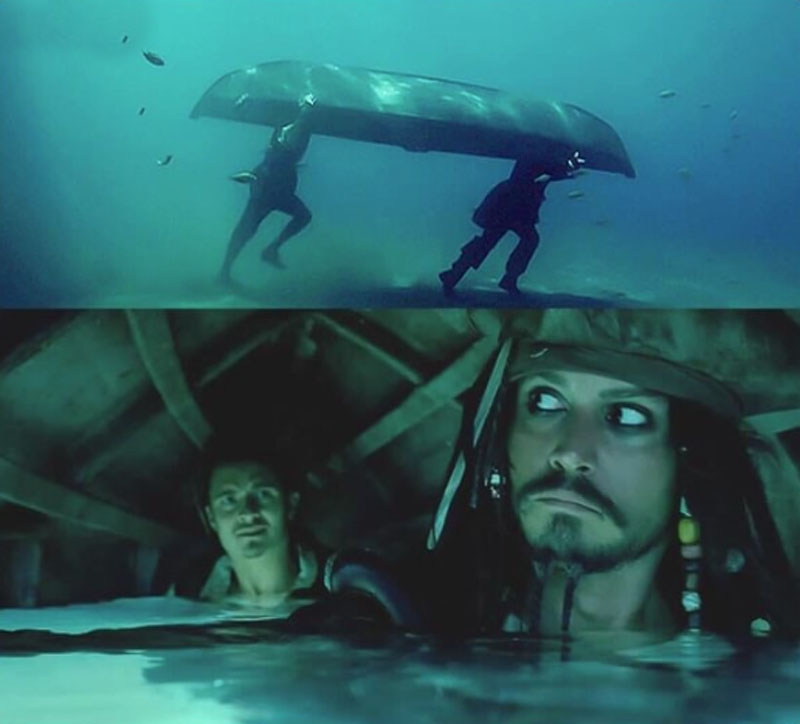
After that trap, the hallway continued on until it reached an intersection. There didn’t seem to be anything dangerous here. Once again, Bag strolled down the hall, tripped another trap, but dodged all 4 poisoned darts. Then he used his climb walls ability to crawl his way down the hall, mocking the rest of the party. “Good luck with those darts, dweebs!” At least he waited at the end of the hall while the rest of the party figured it out. I’m starting to think that Bag of Nails is not going to be a team player. Several ideas were discarded, then the party decided to use their collapsible boat to walk under it like a giant shield. They got this boat back in Session 30, and I never envisioned it be used here. Kudos to them. They duck walked down the hall while the dozens of deadly darts pinged harmlessly off the side of the hull. This isn’t even the last we’ve seen of this boat. It will make another unintended appearance later on.
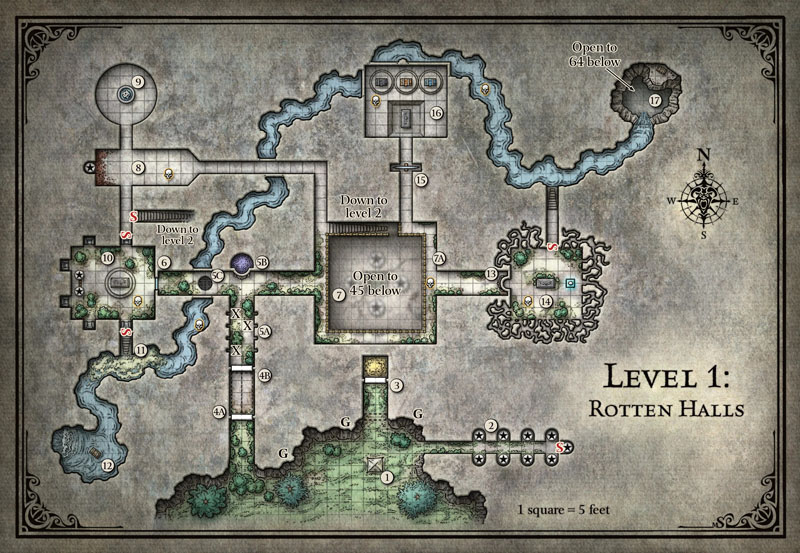
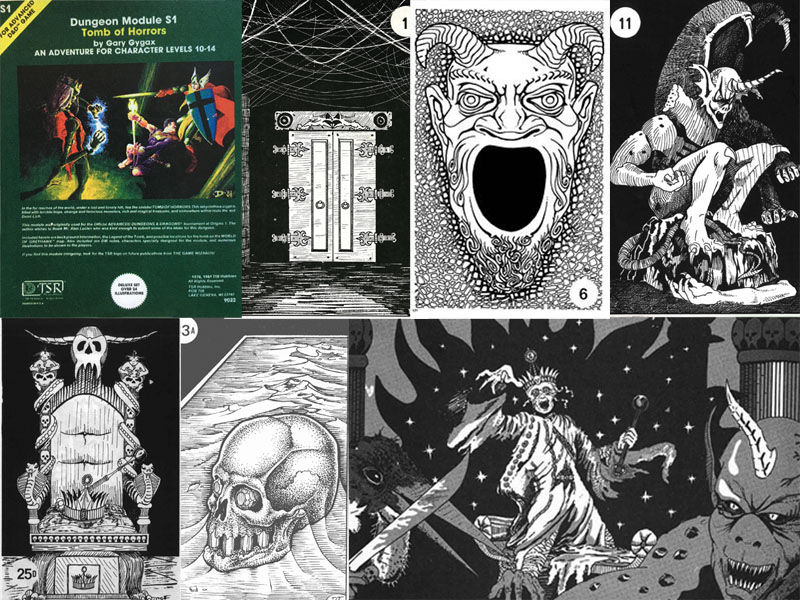
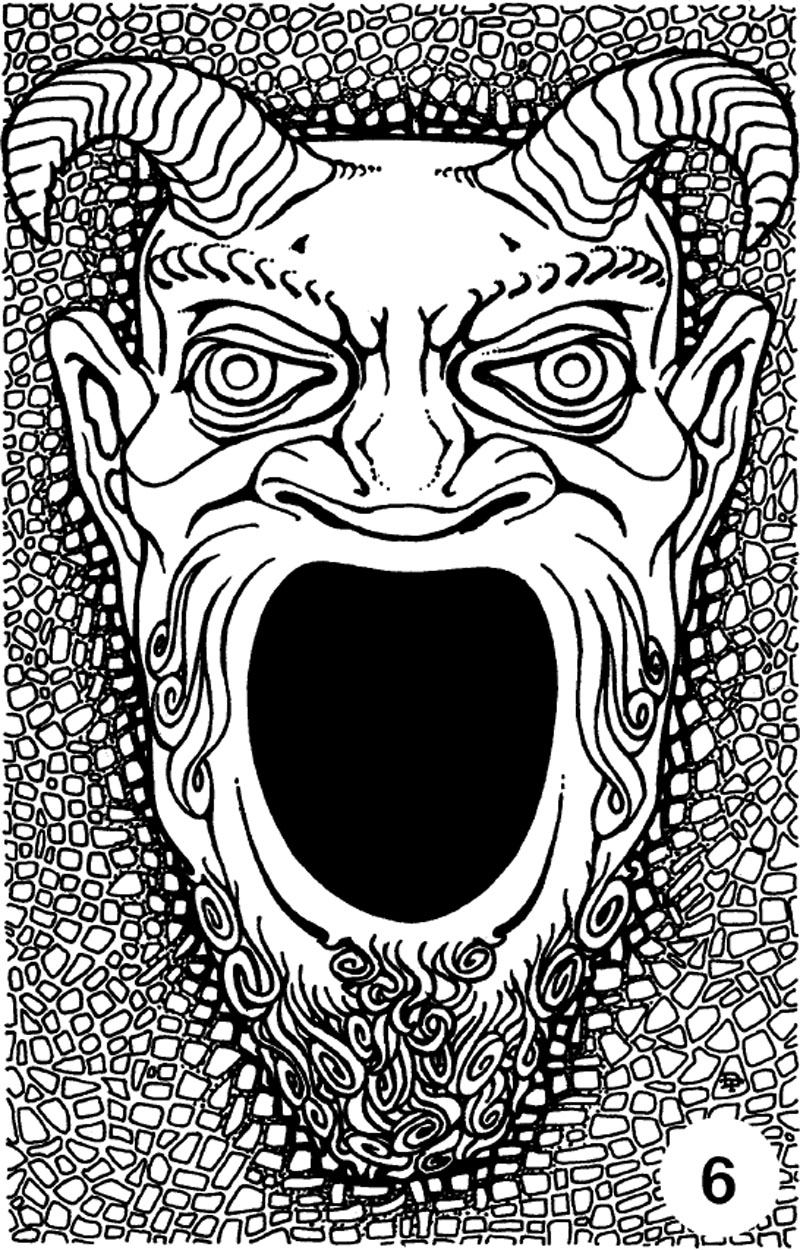
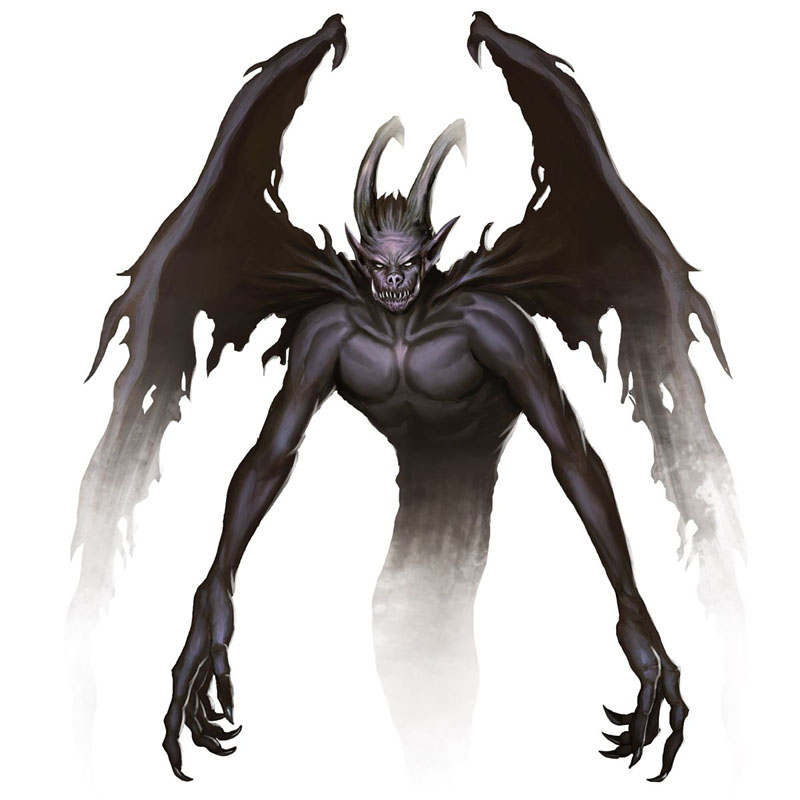
Our heroes reassemble in a T-shaped intersection, and now I feel that we’ve truly entered the Tomb of Horrors. For here in the intersection, leering at our heroes with pure malice, is the infamous, the iconic, the instantly deadly, Devil Face Statue. Offically, it is called the Great Green Devil Face. You all know which face I’m talking about. In fact, you’ve seen it in every Session of this adventure. It’s been there the whole time staring at you, glaring at you, right behind Acererak’s right shoulder. I would argue that in regards to the Tomb of Horrors, this face is even more memorable than Acererak. Anyone who knows about the Tomb of Horrors might not remember Acererak’s name, but everyone remembers this gaping Devil Face. And, more importantly, what is behind it.
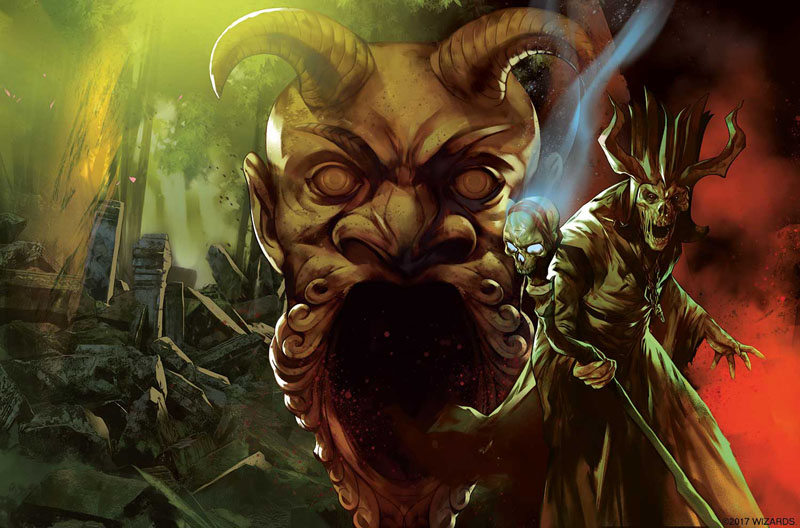
Wes and my kids are new to the game and might not know, but Ian definitely knows the significance of this demon face. In the OG Tomb of Horrors, this unsettling, compellingly curious statue, with its pitch black, wide-open mouth just big enough for a man to crawl through, has been the bane, or rather the annihilation, of countless heroes and adventurers. Beyond this inky void lies a sphere of annihilation, instant, irreversible, no saving throw, annihilation. You stick a hand in there and it instantly disappears, gone forever. You stick your head in there; well, you can start rolling up a new character.
But if everybody knows this secret of the Tomb of Annihilation (oh, so that’s what the title means), how do you include this must-have encounter and still keep it fresh? By throwing in as many gaping Devil Faces as you can. The original adventure actually had three (though everyone only remembers the first). This adventure has four (plus another giant skull you can climb through), but they are spread out through the dungeon, and only one has a sphere of annihilation. But which one? Is it this one right here before us? Why don’t you stick your head in there and find out?
Bag of Nails is dying to find out, and you know, curiosity killed the cat. Bag is about to leap in head first, when Gwen hands him a 10-foot pole and tell him to use it. “Fine,” the annoyed Tabaxi shoots back. “You’re no fun at all.” I really don’t mind this bit of meta-gaming in this instance. It is inevitable, and besides, I’d been pushing the importance of the ubiquitous 10-foot pole since the start of the campaign.
Bag of Nails prods the interior of the inky void with his stick. As Bag begins to pull the pole out, he can see that it is still intact. Bag of Nails chides the cautious cleric, “See it’s fine. Quit being such a baby.” Suddenly Bag of Nails is yanked off his feet, and then the pole and Bag still holding on to it is sucked into the inky void. I tell Bag to give me a Strength save. Since Bag is a Dexterity fighter, he fails. Bag of Nails disappears into the nothingness. One down, three to go.

I asked what all the other players do in response to this. Nobody moved. Thames had never experienced anything like this and was stunned into silence. Martic tried to wave a torch in the gaping mouth, to no effect. Gwen poked the hole with a new stick (we’ll get to that) and when that came back out whole, she tossed in the end of a long rope, just in case Bag was alive and needed help getting back. Significantly, no one went into the hole. But what happened to Bag?
He was not dead. He found himself in a pitch-black room. He could feel the floor beneath his feet but he could not see or feel any walls or ceiling. Suddenly, a whoosh of air from behind caught him by surprise, and he felt searing pain as claws raked across his back, but the 27(!) points of damage was all in his fractured mind. Bag of Nails had been pulled into an impossible fight with an “invisible” shadow demon. Inside this black hole, the demon had all the advantages. The demon could see, Bag could not. The demon could hide at will, gaining advantage every round. Bag could not, and he suffered disadvantage each round as well. A smart player would desperately try to find the exit from this death hole. Instead, the suicidal Tabaxi drew his rapier and said, “This is a good way to die.”

Except he didn’t die! I forgot to mention that Andrew isn’t just a murder hobo. He’s a Min-Maxed Murder Hobo who spent all week watching DM Shorts. Plus, to put him in line with the other PCs, I gave him +2 studded leather, a +1 rapier, and a +1 bow. This made things even worse. Bag of Nails is the most ridiculous Dexterity Tank I’ve ever seen and I don’t know how to kill him. This dueling Champion with his Alert, Remarkable Athlete, and Indominable feats, has a 19 AC, +10 initiative, +10 to hit, +8 to damage, can’t be surprised and negates any advantage given to unseen enemies, such as invisible shadow demons in a magically darkened room. Oh, c’mon!
To start, that 27 points of surprise damage was knocked down to 10, and it all went downhill from there. Even with disadvantage, Bag hit the demon every single round including two crits, except once when he rolled a “1”. Instead of the usual fumble, I decided that at this point in the fight, Bag of Nails was smacked in the side of the head with a stick or something (Gwen’s probing 10-foot pole) and took 2 points of damage. But aside from the initial attack, this was the only damage Bag took during the entire fight. My indestructible, invisible killing machine never landed another blow on this crazy cat and his preternatural spidey senses.
After seven measly rounds of very quick solo combat, the shadow demon evaporated in a wisp of unseen smoke. Bag found the rope lying on the ground, and he struted out of the Devil Face with barely a scratch on him. Looking at the others standing around with their mouths agape, Bag sarcastically said, “Do you three plan on doing any work around here, or do I gotta do it all? And which moron hit me in the head with a stick? It was you, Gwen, wasn’t it?” Ignoring the insult, Gwen said, “Well, that explain the third line of the riddle, “In darkness, it hides.”” Without missing a beat, Bag said, “Ha! More like, in darkness, it dies!” As frustrating as this feline is going to be, at least he’s funny.
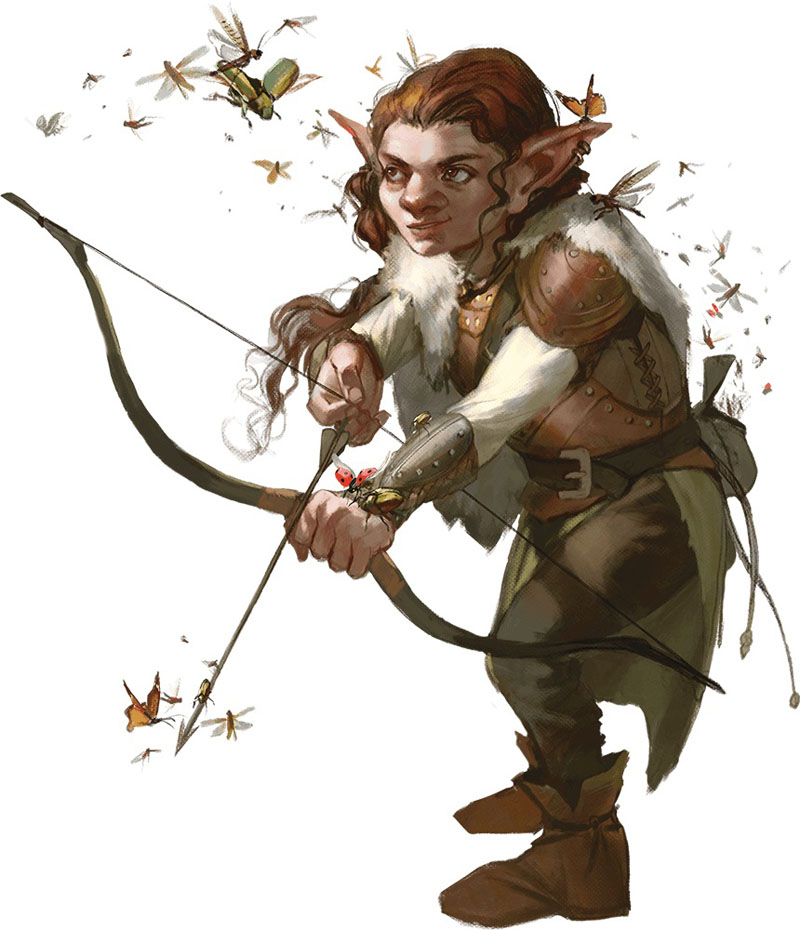
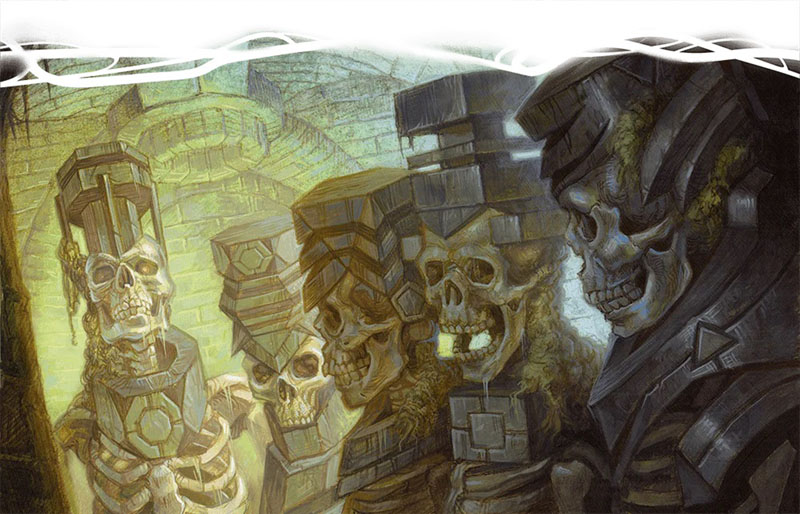
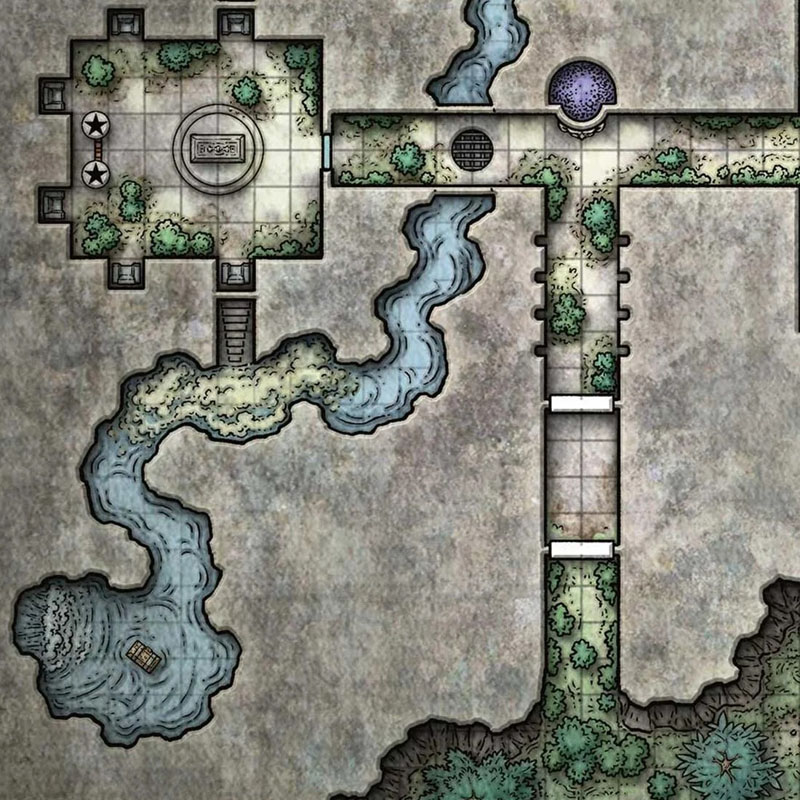
Moving on and taking a left at the intersection, our heroes find the unmovable grate in the floor. It’s movable, but my players never tried. Instead, the Swarm Keeper ranger, Martic, used his newly acquired gaseous form ability to become one with his bugs and seep through the holes of the grate and down into the rough-hewn passage that looked like a sewer. A filthy, brackish stream of water flowed sluggishly from the southwest to the northeast. Following the flow, Martic came upon a tall, lanky creature walking away from him down the stream. In the gloom, Martic couldn’t see clearly, but it appeared to be a skeletal figure wearing an odd geometric hat.
Not wanting to dispel his gaseous form, Martic did not engage with the monster and checked the other passage. Moving southwest, he was blocked by a cloud of sulphureous gas and didn’t want to proceed at risk of being poisoned. He returned to the group and reported his findings. Player Ian was disappointed.
You should know that Ian has played Tomb of Annihilation before. This was never a problem in Chult because I made so many changes and added so much content that Ian never knew what was going to happen next. But here in the Tomb, I have less room to make changes. Fortunately, Ian’s first trip did not visit every room and he has no idea how I will actually play out each scenario. I can always tell when Ian knows something because Gwen suddenly stops giving suggestions, which make Ian a good, honest player. Thank you, Ian for being so trustworthy. Here, Ian knew that Martic had just stumbled upon a very important item and who knows when I’ll let them have another crack at it. I will, eventually. And Gwen stayed silent, for now.
Back down the hall, our heroes discover the first of the Trickster Gods tombs that are scattered around this dungeon. But it is all a tease. They can see the room, but they cannot get to it. They are overlooking the room via a seemingly unbreakable window. Our heroes don’t know this yet, but they are looking upon Obo’laka’s Tomb. Peering through the glass, they see the sarcophagus, the six corpses seated around the room and the twin bear statues holding a golden disk covered in moving eyes, forever scanning the room.
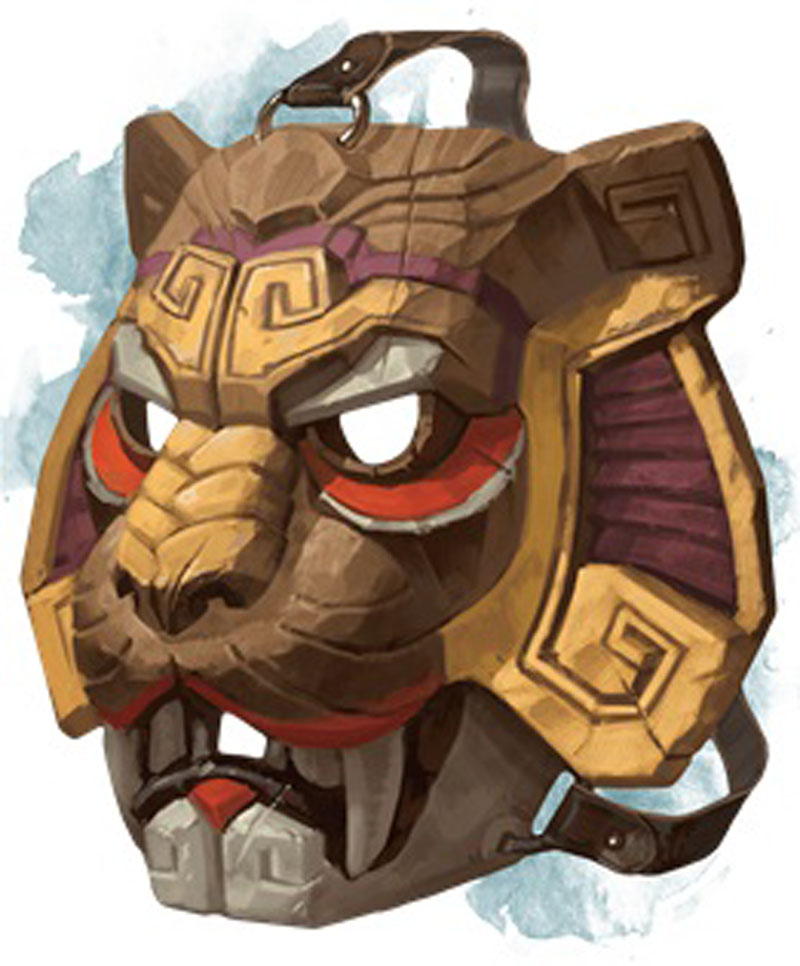
Bag is convinced that he has solved the room already. It’s the next line in the riddle: “Don the mask or be seen.” Inexplicably, Bag of Nails had been given the monkey mask found back in Session 26, and he has actually been wearing it since the beginning of the tomb. Bag wants into this room so badly. He tries to bash the glass with the hilt of the sword, to no avail. I tell him, he is never going to break the glass. Bag takes that as a challenge. For several rounds, he smashes the glass with a club, slashes it with his sword, even throws his body fully against the glass. For all is effort, he is rewarded with one tiny crack, but the window remains whole. Bag is desperate to get in the room. “I can get you in,” says the annoyed artificer Thames, “But if you get in trouble, I won’t get you out.”
“Do it!” Bag growls. Thames casts vortex warp and Bag of Nails is teleported into the room right on top of the sarcophagus. Bag was essentially correct. Being seen by the disk is bad and one of the ways to avoid it is to be wearing a mask. Technically, it is supposed to be one of the masks that the six corpses in the room are wearing. But I don’t punish creative thinking, so this monkey mask works too. However, only one of the corpse masks will open the coffin, so he’ll have to figure that out on his own.
This is when having all those sending stones came in handy. Thoughout the campaign, the party has been collecting sending stones, a magical item that Ras Nsi used to communicate with his minions. With the death of Ras Nsi, they now have five. They are interconnected and each hero (plus Grum) has one. They are still restricted to a 25 word message once a day, but they were useful here. Everyone (except Gwen) had advice on how to get the sarcophagus open. “Push harder, lift it up, look for a button, say “open sesame”, take all the masks off the dead guys, now put them back on, use a crowbar, oh wait never mind I have the crowbar,” etc. None of these worked. Finally, true to character, and despite the fact that none of the corpses had yet moved, Bag said, “Screw it. I’m killing everything in the room,” and he stabbed the nearest corpse.
This caused all the undead to jump up and attack. Bag was expecting zombies, but what he got were Wights. He might be in trouble here. Despite his earlier threat, Thames said, “I’m getting you out of there.” To which, Bag replied, “No! Break down the glass if you can, but leave me, I got this.” While Bag defended himself from a half-dozen undead, the rest of the group tried to smash through the window.
I am a huge proponent of making a bad situation worse; out of the frying pan and into the fire encounters, and since I didn’t want this to just be the Bag of Nails session, it’s time for the rest of the group to have some action. All the players in the upper hall heard an ominous groan come from behind them. Turning around, they saw an enormous hulking figure, clad in rusted plate mail armor, lumbering toward them. This was the first of many deadly and terrifying Tomb Guardians our heroes would encounter while roaming these halls.
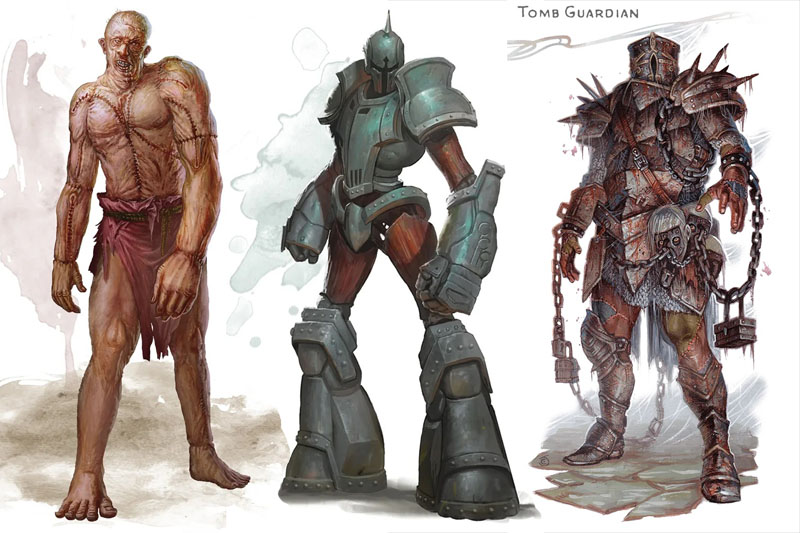
Now our heroes are fighting on two fronts, similar to the classic portcullis trap, where the heroes are divided and can see each other but can’t help them while they deal with their own combat. These tomb guardians are particularly nasty. They’re just a flesh golem, but boosting their AC from 9 to 17 with the plate mail armor makes them exceptionally hard to put down. Plus, my heroes were expecting these guys to be undead, so none of the usual cleric salvations did them any good. But my favorite moment came when Thames cast shocking grasp, which usually gets a boost from enemies wearing metal armor. He thought he was going to do some serious damage, but was “shocked” to find that the lightning had actually healed the creature. Flesh golems thrive on lightning.
Meanwhile back in Obo’laka’s Tomb, Bag was doing fine. I had managed to get more hits on him at least and had even slapped him with a couple of life drain damaging hits, but Bag was still at half health. This was going to take forever to kill him. Then right in the middle of combat, he got the idea to wear one of the masks off one of the corpses. Brazenly, despite there still being five wights “alive”, he stopped fighting long enough to grab the mask off the dead dead corpse, put on this new mask and open the sarcophagus. Inside were the dusty bones of a Zorbo and a shiny little ring. A precious golden ring that sparked another great moment of the night.
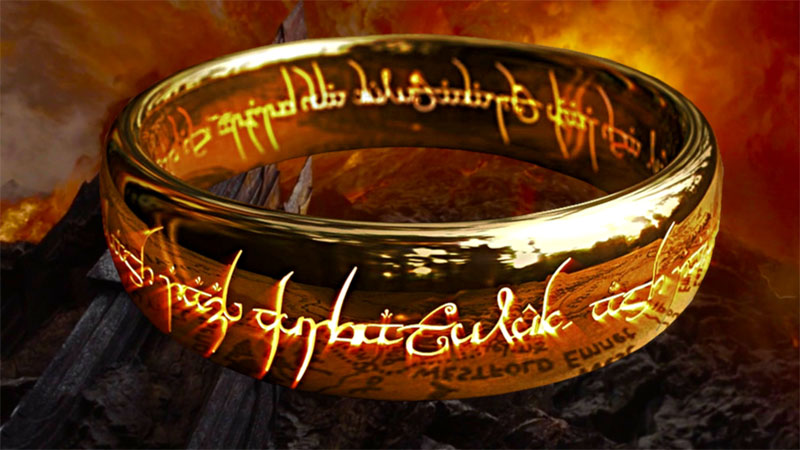
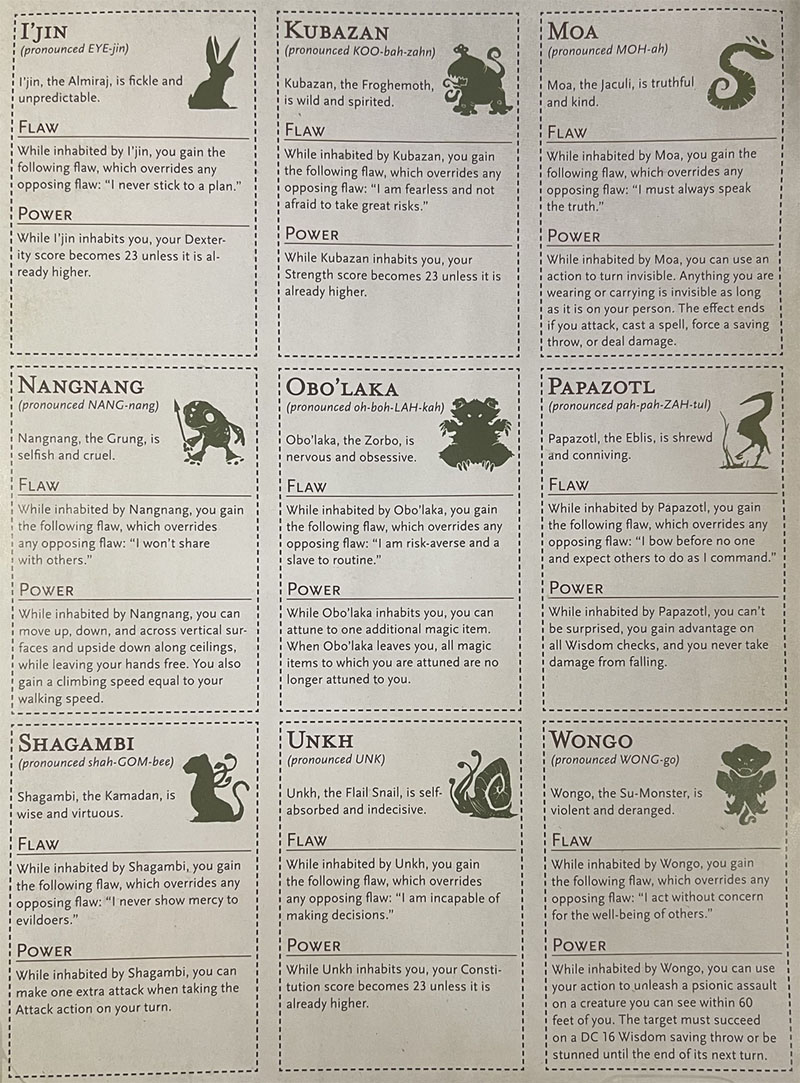
No one saw Bag as he grabbed the ring and slipped it on. But the spirits of the Tomb saw, and they got some adverse side-effect from touching their stuff. My favorite element of the Tomb of the Nine Gods are the treasures received from each of their tombs. Touching any one of these treasures does three things. First, it is a magic item that can be used normally in the adventure. Second the player receives a positive boon of some sort, such as increased stats or a special ability. But my favorite, the third, is that the spirit of the Trickster God inhabits the body of the PC, imparting its will, demeanor and usually an interesting flaw upon the character. Essentially, the PC is possessed with a completely different personality.
In the case of Obo’laka, the item is a ring of protection, making Bag even more difficult to hit in combat. His boon allows him to attune to an additional magic item, frankly one of the weakest boons. But his flaw is priceless. Obo’laka’s spirit animal, the Zorbo, is weak, timid, risk-adverse, and indecisive. The exact opposite of Bag of Nails. Andrew was not happy to have drawn this terrible flaw, but to his credit, he played it up to the hilt.
Back in the upper hallway, our heroes had finally put down the lumbering juggernaut when they heard a frantic banging coming from the window behind them. A panicked Bag of Nails was pounding on the glass, silently screaming, “Get me the f*ck out of here!” A wight’s arrow barely missed the no longer bad-ass Tabaxi, sending it scampering for cover.
The remaining heroes redoubled their efforts to break down this annoying window. But it wasn’t until Thames cast shatter that it finally gave way. The companions scrambled into the room to join the fight and save their new feline friend who apparently no longer wants to die. Fortunately, once the battle was joined, it was a rather simple affair to mop up the rest of these undead, especially when Gwen cast one for her more devastating undead destroying spells that obliterated four of them completely.

While she went about healing the party of their rather significant damage, including the almost dead Bag who had to beg for it, Gwen admonished her brash companion about the Rules; rules learned over the course of long arduous months in the jungle. Rules such as #1 – Everything is a trap. Rule #4 – Don’t rush, #8 – Don’t pick fights you don’t need to, #13 – Don’t split the party, and #14 – Don’t deliberately trigger traps! Now what did we learn Bag?
All this risk-adverse cowardly lion learned is that he just wants to go home. But they’d been in the dungeon for an hour now. The front door had sealed shut and there is no way to open it from this side. Our heroes (and Bag) are trapped in this Tomb of Horrors and will have to see it through to the bitter end.
Next week, we meet the maintenance crew, a cat and a snake form an unlikely bond, we abuse a spell, and Seppi dies. Again.
As always, being a murder hobo is fun, but only in moderation and Game On!
What’s up Bag of Nails? Why you being such a scaredy cat? – A gleeful Thames, relishing at the chance to mock the once bad-ass tabaxi, now brought low by the power of a simple ring.
Don’t forget to check out my Tomb of Annihilation Resources Page, filled with all the stuff I use to make this epic campaign even more epicier: My full Campaign Diary, plus Handouts, Maps, Charts, PDFs, Images, and more to use, abuse, or ignore at your peril. All the templates and instructions for my Trickster Cubes are found here as well.
And written specifically for this adventure, read my Explorer’s Guide to Chult to delve into all the legends, lore, history, religion, and culture that I used to bring even more life to this adventure.


Oh, friction in the group! Perhaps Bag will only survive while he’s useful to the others.
Do you use the rule that Life Drain cannot be undone while the curse is active – the loss of max HP is permanent? I can see this as pretty crippling for characters.
My group are only a few sessions away from the Tomb. Some of them will not survive. I’m not sure yet how to introduce replacement characters once they’re sealed inside. I’ll definitely need a plan for this.
LikeLiked by 1 person
Yes life drain would cripple the party. It can be cured after a long rest. We’ll see if Bag’s new personality will improve his standing with the group.
As for introducing new characters, they could be in a cage in Withers workshop waiting to be turned into a tomb guardian, or lost in the alternate dimension dungeon both on level 2. They could be injured at the bottom of the 60’ pit on level 3. They may be members of the Yellow Banner, creating a new hook for that subplot. My favorite new PC intro would have him trapped in the mirror on level 4. That PC could be hundreds of years old with a crazy backstory to be told.
Keep me posted on how your time in the tomb goes. I’m dying to find out.
LikeLike
I didn’t comment last time but I got a little emotional with the conclusion of Roland. I am quite invested in this campaign since you released part 1. I am very excited to see the tomb though.
LikeLiked by 1 person
Thank you very much. I glad to have kept you entertained. You have to let me know you feel we did in Tomb and the finale. Our bittersweet and heart wrenching finale.
LikeLike
I had a feeling Andrew would join, but I never would have guessed he would play bag of nails! It’s also so funny he got Obo’laka’s spirit. Rich, which is your favourite spirit?
LikeLiked by 1 person
I thought it would be hilarious to drag Bag in the Tomb trying to kill himself. But once Andrew cut loose I was like, Uh oh! Obo’laka spirit was funny, but Andrew hates it. My favorite spirit was I’jin especially when combined with his magic item and the fact that the rest of the party couldn’t figure out why the PC who had it kept screwing up their plans.
LikeLike
The item for Ijin (wand of wonder) has the absolute best synergy with the chaotic nature of her. Also, that 23 Dex is insane. I personally love Shagambi since a) Extra Attack b) She’s fun to roleplay and imagine, and she’s very, very good for College of Swords bards and c) Kamadans are adorable.
LikeLiked by 1 person
Shagambi is my number 2 and they are adorable.
LikeLike
An update for you on my campaign (had a bunch of trouble scheduling sessions with christmas and half the party going down sick over the past 2 months)
We rescued the ranger from the temple. They stopped the ritual at the last second before it was completed and as the priestess was about to strike to complete the transformation they landed a crit to kill her (they couldn’t have done enough damage with a normal hit). Now they are running away through the jungle. Like you did after the temple encounter Im going to make the death curse go live but I have a party member who has been revivified before(prior to the start of the campaign). Any suggestions on how to handle this in campaign? 1hp per day loss seems pretty brutal disadvantage.
Great read as always and I look forward to seeing how you handle some of the more obnoxious puzzles/traps/tricks the dungeon has for the players
LikeLiked by 1 person
I love it! Thanks for stealing my stuff. I played that Death Cursed players could not heal. But strickly speaking the 1 hp loss per day only comes of their max hp. Conceivably that can still heal but only up to their ever decreasing max, For your player, every time they level up would reset their max hit point level. Example, player has 40 hp at the start of the death curse. He loses 1hp per day off his max hp. Let’s say that 15 game days later he levels up. His max hp is down to 25 but the new level resets that. His max hp goes back up to 40 plus lets say 10 hp for the new level, now he’s at 50. He’ll still get to stay comparable to the other players but he will be constantly reminded that he is dying. And if the gap between his next level is over a month he’s really going to be praying for that next level up. The hike down to Omu wil be terrifying, can he make it in time? Just before entering the tomb, my players leveled up from 8th to 9th level. Then they leveled up to 10th after they defeated Withers on level 5. This would give your player a fair chance to make it to the end since at best your players should only spend 3-4 days in the tomb until the end of the adventure. Let me know how this works out. I would like to add this scenario into my overview of the adventure.
LikeLiked by 1 person
Ian/Gwen here. In Obo’Laka’s tomb there was the disk that was covered in searching eyes. All the way back in Session 2 we acquired the journal of one Sir Ambrose Alphonse. This was 2 years ago real life time. One of the pages of the journal was nothing but a clutter of searching eyes. We had been warned of this trap over 2 years ago.
LikeLiked by 1 person
I had totally forgotten that. Thank you.
LikeLike