
We discover the tomb’s warehouse, learn more about the Yellow Banner, and drown our sorrows in a ridiculous amount of wine.
When last we left our heroes, we wandered in circle around the Tomb of the Nine Gods determined to solve all its mysteries before taking on the task of ending the Death Curse. Along the way, we plundered the tombs belonging to two of the nine Trickster Gods; the cautious zorbo, Obo’laka, and reckless su-monster, Wongo. Thankfully, the equally reckless hero, Bag of Nails, has now been possessed by the cowardly spirit of Obo’laka. This has dramatically curbed Bag of Nail’s murder hobo tendencies, much to the relief of the other players. Naturally, Andrew hates it.
We are perplexed by the mechanics of the dungeon. Rooms seemingly reset themselves, there are strange skeletons and other minions that actively avoid being caught, and someone or something keeps sending armored, hulking golems to attack us, wearing literal signs that urge us to “Quit stalling”, “Move it along”, and “Just Die, Already.” We assume the troll is Acererak himself, but it’s not. We can’t wait to meet this jerk, and thank him properly for sending us this welcoming committee. Oh, and Seppi number 3 died, but no one cared about that except for Thames who is mad at me for not providing him with another expensive gem to replace it. Not my problem, dude!
Last session, our heroes all voted to skip the rest of Level 1 and move on to Level 2. Cautiously exploring down the stairs of the Grand Staicase, they come upon Acererak’s Second Warning. These are a series of plaques that the main villain had installed to taunt annoying heroes with clues that will do them no good. Oh sure, smart heroes will use the clues to defeat Acererak’s brilliant traps, but it won’t matter because the lich will kill anyone who makes it to the end of the dungeon. Until then, keep struggling in vain to survive, he feeds off their suffering.
Area 19 – The Gravity Ring– From the landing, our heroes headed to Area 19. As I stated last session, when we reach a new significant area, I will first list any changes I made to the area and then discuss how it played out in our game. In the book, these curving tunnels lead to a pocket dimension where Acererak tested his traps. This dimension is an exact duplicate, a mirror copy, of the actual dungeon. All the rooms, traps, and monsters are just as lethal but they are actually illusions, replaced each day by Acererak’s magic. My only change is that all the stuff in this alternate reality is, in fact, real.
The Tomb Dwarves use this alternate tomb like a warehouse that stores whatever needs to be replaced by any destruction caused by the heroes. So if your heroes break down the window in Area 6 like mine did, then the dwarves harvest the window in this pocket world and re-install it in the real world. My only caveat is that if the heroes break something twice, then it will take about a week before Acererak’s “magic” restocks everything. Until then, this could lead to some funny scenarios where various rooms are in a state of disrepair, caution tape could be placed to mark off construction zones, and you could even have a scene where the party comes across a group of dwarves carrying an object or leading a monster from this warehouse to whatever room the heroes recently trashed.
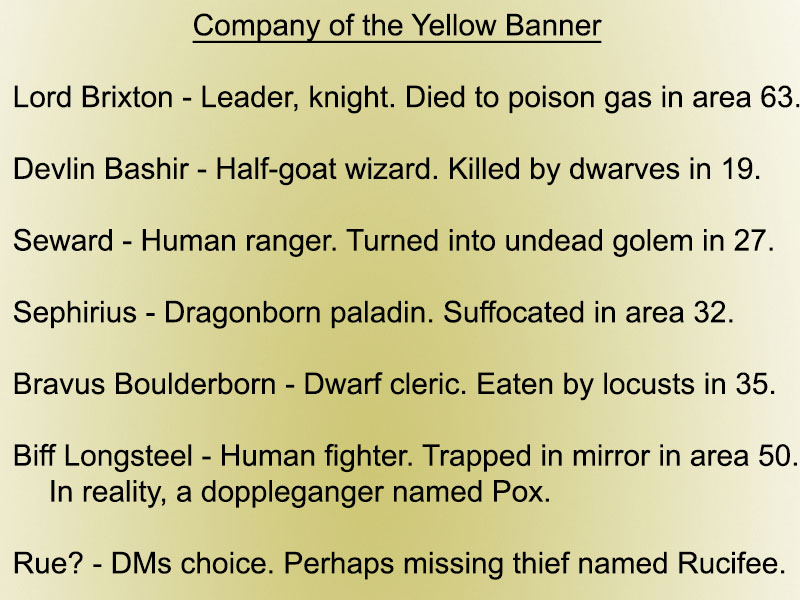
Back in our game, our heroes found the body of Devlin Bashir, deceased member in the Company of the Yellow Banner, without any issue. They also found his letter, read it, then desecrated his corpse. In a far too common occurrence, Gwen cast speak with the dead to interrogate the poor half-goat wizard. Knowing my players, I expected this, so I had my answers ready. First, they asked Devlin, What was the incident with the four-armed gargoyles? Devlin’s severed head replied, “At the bottom of the stairs, as we tried to leave the room, four gargoyles each with four arms attacked and we fled.” What is the Starfallen? “A magic lantern held by our our Ranger, Seward.” (I did not mention the spirit held within the lantern. I gotta keep some secrets.) What is the eye? “It is a ruby called the Eye of Zaltec.” What does the staff do? “It is a staff of striking but it is cursed.” What killed you? “A gang of undead dwarves wearing green masks killed me.” (Tomb dwarves). Oddly, they didn’t ask about the elf princess or the doppelganger. But as expected, Gwen did keep his skull. Maybe we’ll ask those question later. Then Thames used mage hand (again) to stuff the staff and Devlin’s spellbook into his very crowded magic sack.

Also, the book does a terrible job of mentioning who else is involved with this Company of the Yellow Banner to which Devlin was a member. Aside from Lord Brixton, and some guy named Seward, you’ll be hard pressed to find out who else is in this adventuring party that met its demise here in the tomb. Seph is a dragonborn paladin, and there’s a dwarven cleric named Bravus, a human fighter named Biff Longsteel who never gets mentioned at all, and a thief(?) named Rue who probably did not enter the dungeon, since their body is never found. The letter also mentions a doppelganger within the ranks, but this detail was ignored by all my heroes, except one, as we’ll learn later. For now, here is the roster of the entire Yellow Banner Company to help you keep track of this doomed band of adventurers.
As to the mirror Tomb, our heroes spent a long time trying to figure it out. They went back and forth along the tunnel, split up the party, some in the real world, some in the fake, they left copper pieces on the floors, trying to leave a trail of breadcrumbs so to speak, and they marked the floor with chalk to identify which dungeon they thought was real. They eventually decided that the two tombs were identical but not completely. For instance, the body of Devlin is only in one world. They decided that the Tomb with Devlin in it is the real tomb, so they went back into the “real” tomb and continued onto:
Area 20 – The False Tomb. (A false tomb within the real tomb? No, this isn’tconfusing at all.) I did not make any changes to this trap, but I did make one mistake that effected how it operated. The text of the trap says that there is a stone plug that blocks the wine from flowing out of the cisterns hidden in the walls. I incorrecetly thought that the plug was at the cistern itself, leaving the tiny crawlways open until the trap is sprung. But upon closer inspection of the map, I see that the wine is already in those crawlways, so the plug must be at the very entrance into the room proper, behind the mouths of the gargoyles adorning the walls. Inexplicably, one of those crawlways is open to another room even though gravity would force the wine into that room too. Ugh, don’t think too hard about it. I put the plugs at the cistern, leaving the crawlways open.
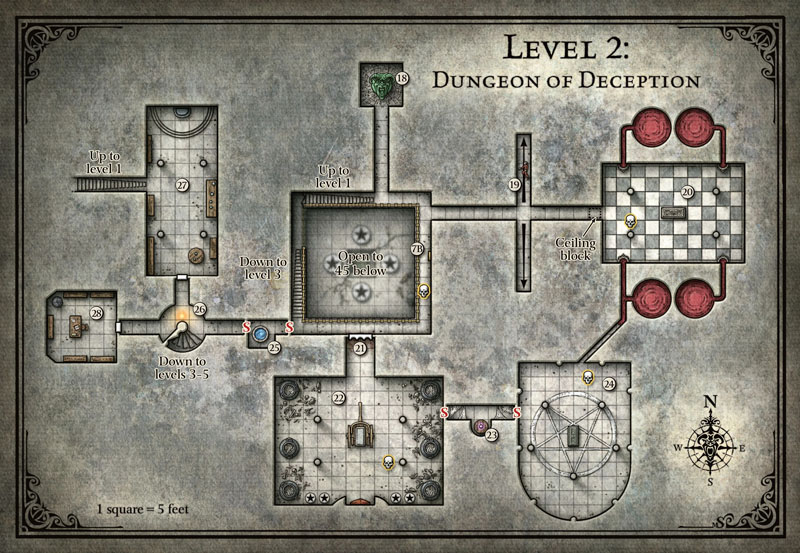
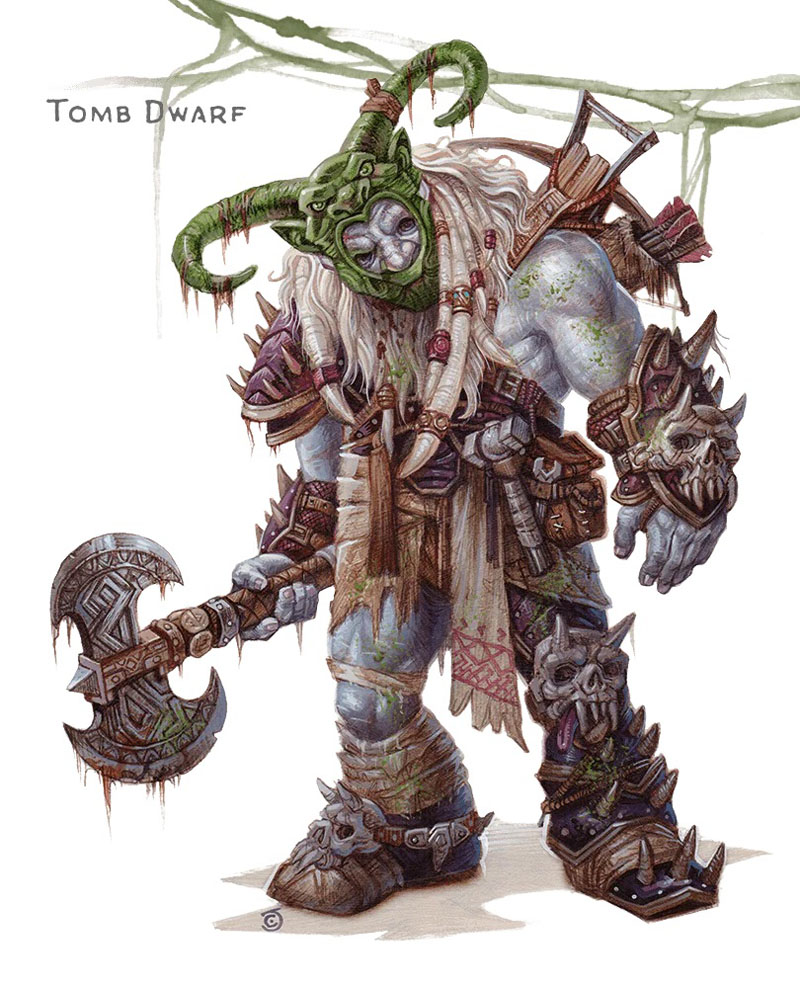
It is this crawlway that our heroes spot something climbing into as soon as they enter the room. They just manage to see a bony foot pull itself into the maw of one of these gargoyles before it disappears. This is yet another one of the skeleton keys that our heroes must collect in order to unlock the door that leads to Acererak’s lair. There are five in all. Martic saw his first one in Session 41, but he was alone when he spotted it and he did not want to mess with it then. This is the first time the entire party has seen one at the same time.
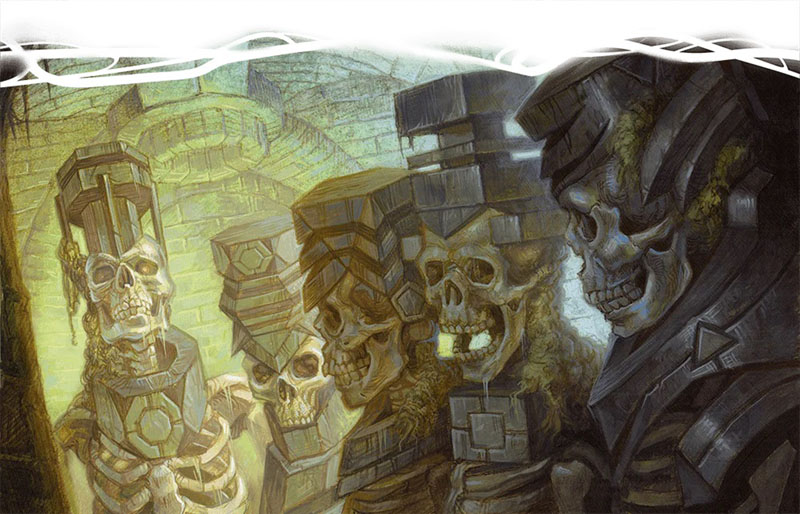
These Keys have a peculiar instruction to wander the various levels and to evade capture by any means necessary. This is the only thing that keeps your party from running down to the final level and taking on Acererak immediately. Because the Keys are spread throughout the dungeon, it forces the players to explore and ultimately engage with most of these otherwise easily avoidable traps and puzzles. Since the Keys sole purpose is to evade your heroes, I ruled that the skeletons are smart enough to know how to set off traps and use secret doors if it would help them escape. Also, if you use minis and are able to do so, I would get special minis to represent these guys. Each skeleton key has his skull carved into a different geometric shape. I happened to have a cheap set of oversized skeletons made of soft plastic, that allowed me to carve the five shapes into my skeletons’ skulls, giving each one a unique look
Our heroes debated whether to follow the bony foot, investigate this room, or check out the strange grinding noises they keep hearing coming from back out in the Grand Staircase area. The noises are the zombies in Room 21 messing with the door, but our heroes don’t know that yet. Furthermore, since only Bag of Nails is possessed by any spirits and we have not had recent spirit advice, I gave Moa’s listed advice to Obo’laka and told Bag that his trickster god tells him that he does not recognize any of the symbolism in the room, hinting that this is a false tomb. I’m hoping that if I keep giving Bag of Nails all the cool spirit warning then some of the other players will want in on the fun.
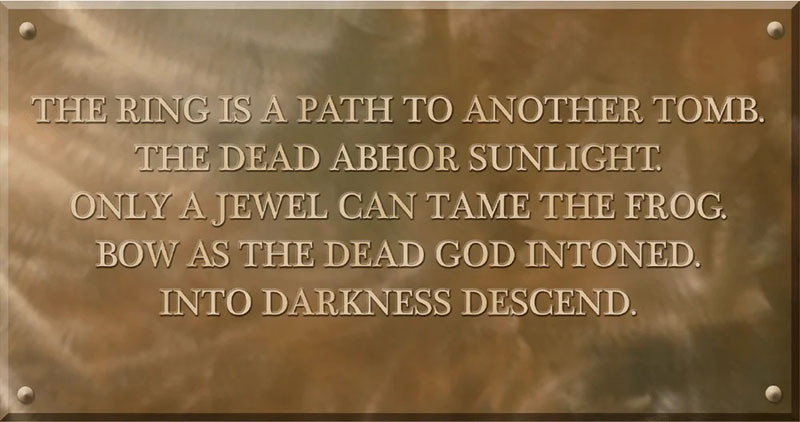
Our heroes decide to stay in this false tomb, allowing the skeleton key to escape. Without taking any precautions, they rip open the lid to the coffin and set off the trap. Wine pours in from the gargoyle’s mouths while our trapped heroes read Acererak’s delicious “Drown your sorrows” plaque inside the coffin. No one tries to escape past the collapsing stone block into the corridor, so all our heroes are trapped in the room. I glad they all stayed together this time for once, although they picked one of the deadliest traps to do this in.
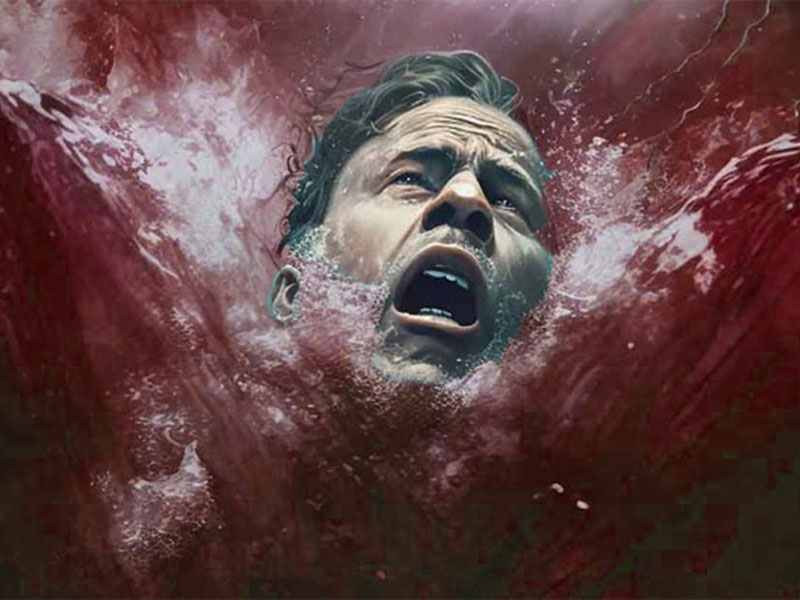
I do love that it is wine that fills the room, because that completely foils the obvious solution to cast water breathing on the party. Wine is not water. This is exactly the type of subversion one would expect in the original Tomb of Horrors, and I appreciate that. The room will completely fill in just over a minute and remain sealed for another ten, lasting far longer than any character could hold their breath. As if that weren’t bad enough, three wine weirds, monsters identical to water weirds but made of wine, attack the party. Oh, and these monsters happen to be functionally invisible while in wine, so add that to you list of problems. This is the first pure death trap in this death trap dungeon.
I generally don’t try to predict how my players will solve problems, since they often surprise me with their ingenuity. But the only way I could think of is to try and climb into the crawlways that the wine flows through. Which is exactly what our heroes try to do. They are unable to get through while the wine is flowing, so they have to wait until the room is completely filled. They have a few rounds before the wine is over their heads, so those wearing metal armor begin striping down. Meanwhile, Bag of Nails and Savash spend the time filling up their wineskins with free wine. At least Martic casts faerie fire on the gargoyle that the skeleton was seen crawling through which will make it more visible once the room is full of wine. Great idea. My players assumed the escaping skeleton was my way of giving them a hint about escaping the room. It did play out that way, but that was not my intention; I just wanted to have another frustrating moment where these elusive keys slip out of their grasp again.
When the wine is up to their waist, the wine weirds attacked, which elicited a frustrated chorus of, “Screw you, Acererak!” from the party. I wish I could say that there was some brilliant underwater action with unique spell and weapon combos to counteract this weird environment, but there wasn’t. It was just a dozen rounds of rather dull “combat” with every player rolling to hit with disadvantage. Bleh. No wine weirds died, no heroes died, though everyone was injured. I did allow Thames to use his breath weapon before the room filled to “freeze” a block of wine with one of the weirds inside it, taking it out of the fight. I did not allow Thames to do this a second time after the room was filled, since there was no longer any air with which to breathe any breath weapon.
Finally, the room put us out of our misery and filled with wine. Everyone took a deep breath and swam for the glowing gargoyle. Everyone made their athletic/acrobatic checks and Constitution saves and squeezed into the tight crawlway. Gwen was in front and found that this small tunnel ran upwards into another room. But as each hero shoved their way into this tiny air-filled corridor, Gwen was pushed into:
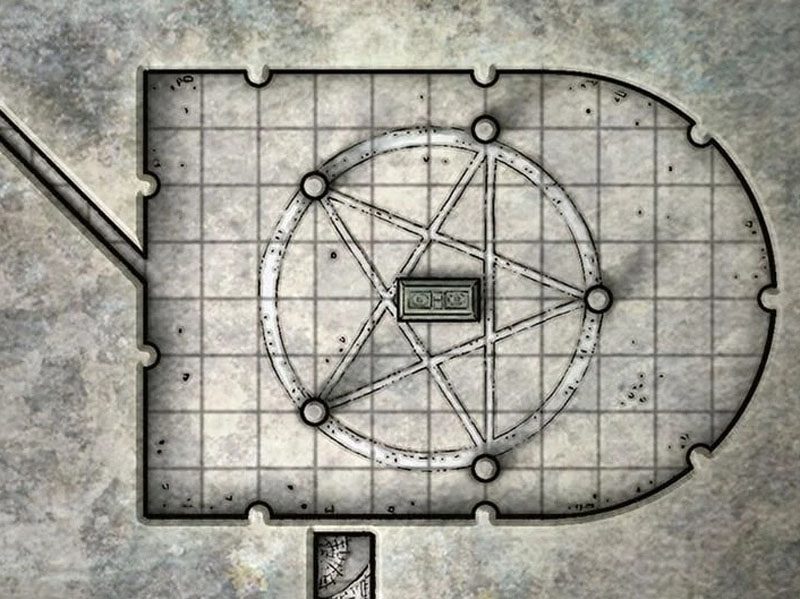
Area 24 – Nangnang’s Tomb. I made no changes to this room, though I did add that the tiny tunnel the PCs are in, empties into this room ten feet off the ground. When Gwen was shoved into the room, she failed her Dexterity save and landed on her face for (1d6) 4 points of damage. Thankfully, she managed to avoid the pentagram made of salt that I’m sure is not being used to keep some invisible inter-dimensional thing trapped inside. For now.
I expected everyone to enter into the room and explore it together. But you know what happens whenever I expect something. After reading the box text, Gwen wanted nothing to do with the room, and attempted to leave by getting back into the crawlway she just fell out of. Gwen is the absolute worst when it comes to anything physical, but the others in the tunnel are attempting to help her scale up the wall; so I let her roll an Athletics check with advantage. She rolled two “3s”. Sigh. Alright, give me an Acrobatics check (her slightly better stat) to avoid the circle of salt again. Nat “1”. As Gwen falls into the circle she hears a hoarse, croaking laugh. But what could it be in ths frog-themed tomb?
Gwen lands into the circle, disturbing the salt ring, lying flat on her back in the middle of the pentagram. The whole room shakes as a gravelly voice cries out, “Freedom!” Do slaads speak common? Do they even speak? Who cares, mine does. What kind of slaad is it? Gwen is immediately hit with two claws and a bite attack as everyone else tries to scramble into the room. Roll initiative. No scratch that. This time, the initiative is the order in which you are lined up in the tunnel and the prone Gwen can go last. The unknown creature that attacked Gwen is still invisible. What do you do?
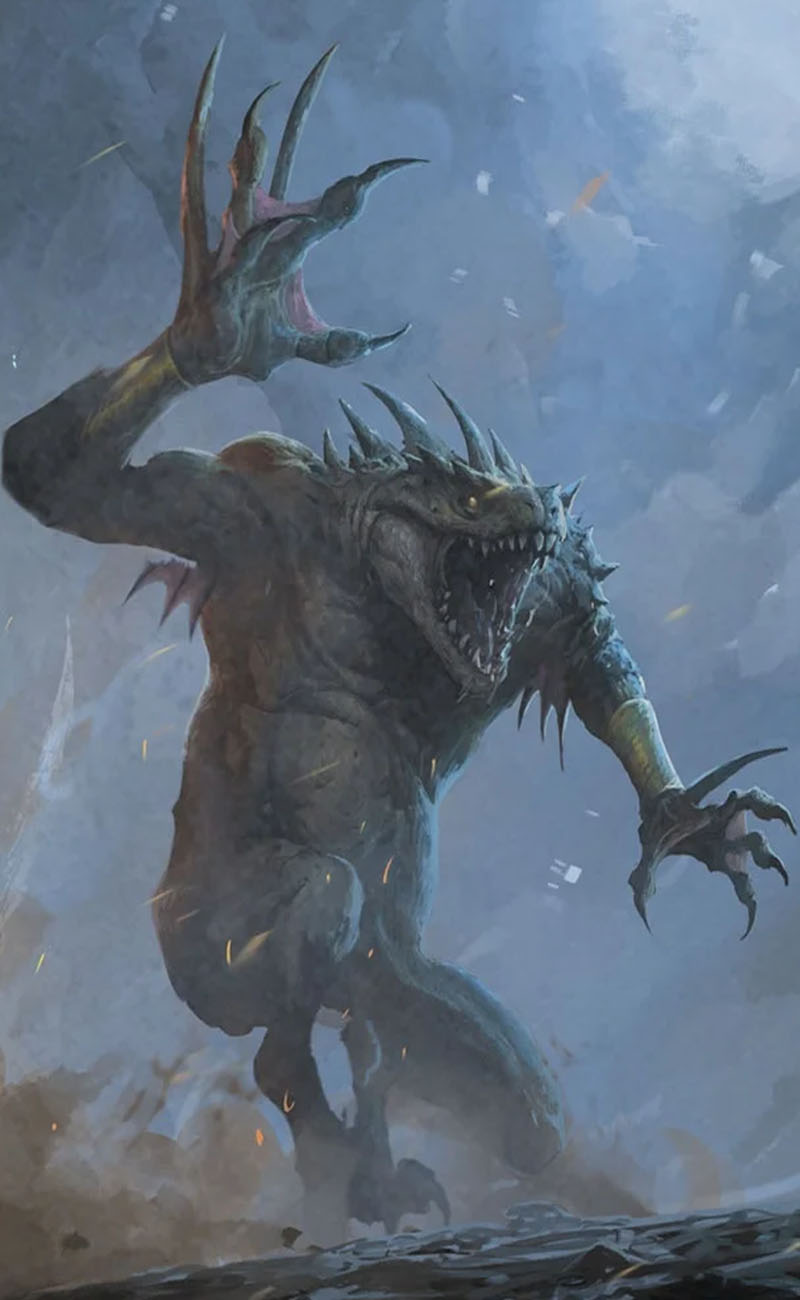
Bag of Nails drops into the room first, and following the advice of his possessed god, begins frantically searching through his bag looking for salt to spread onto the circle. He ultimately tried to spread out the existing salt to reform the circle, but it was too late. Savash enters next and takes the dodge action. Next up is Grum who immediately runs to pick up Gwen and protect her. Aww. Martic drops in and casts faerie fire into the middle of the room, hoping that the creature is still there. It is. Suddenly a monstrous form that can only be described as a huge bipedal toad with razor sharp talons appears before them, standing outside the circle in the far corner of the room. Thames drops in next and having read the clue “Only a jewel can tame the frog”, he begins searching the room for this all-important gem. Sadly, the needed gem is in a different room. And honestly, I think Thames only wanted the gem to rebuild Seppi again.
Finally, Gwen gets up, dusts herself off, and gets to use her newly acquired 4th level spell. She casts banishment on the beast, praying that this thing is teleported back to whatever hell spawned it; at least for the next minute to give our heroes time to escape. Well, she did more than that. First, the slaad is from another dimension, so the spell has at least a chance to work. Second, despite its magical resistance, the slaad rolled a 7 & 13, failing it’s saving throw. Instantly, the monster winks out of existence, forced back to its plane of origin. Or so they thought. Because, Third, casting any sort of teleport spell within the tomb triggers an interesting event.
All teleportation spells automatically fail inside the tomb. Instead, anything teleported get magically chucked into the dreaded Room 57 – The Oubliette. This room is the garbage dump of the dungeon and another funny meta explanation of what the tomb dwarves do with all the dead bodies and broken debris that this dungeon creates. Don’t worry, our heroes will end up here soon enough and we’ll get to see the room for ourselves. For now, just know that anything in here has a 50/50 chance of making it out of the room alive. I secretly rolled for the Slaad to see if he might return to exact his revenge, and… You’ll see.
Thinking that they only had one minute before the invisible frog returns to kill them, our heroes quickly looted the room. Martic grabbed the wooden grung statuettes from the top of the coffin, because of course he did. Once again, Thames used his mage hand spell to lift up the spell-trapped urn and smash it to the ground. See, this is a good use of that ridiculous spell. Then he used the spell again to shove the Nangnang-possessed grung egg that acts as a pearl of power and would have allowed me to infect another player with the funniest part of this whole dungeon. Quit being a wimp, and touch something, dammit! Meanwhile, Gwen pocketed the grung skull, because of course she did, and she also grabbed the potion of healing that is really a potion of poison. Acererak is a dick.
They did not find the secret door that led to the trapped genie, so the skeleton key was able to get away for now. The party was convinced that the skeletal foot they saw earlier was an illusion to trick them or guide them somehow. It wasn’t, but whatever. Speaking of the genie, this was the only section of the dungeon that my player never explored. They never found either secret door leading to it and missed this entire encounter.
Frankly, I’m glad that they did not find this genie in a bottle, even though I have the perfect prop for it. I didn’t mind the added chaos that she could inject into an already chaotic and deadly dungeon. I just don’t like having NPCs within the party that are of a higher level than the party. This inevitably leads to the players expecting the NPC to handle all their problems. The genie even promises to do just that, though I would expect her to twist and distort any request put upon the genie. The only change I would have made here is that the genie speaks Common. In the book, she only speaks Terran, but nobody speaks Terran. Have her speak Common.
Crawling back into the False Tomb, the door is open and the wine is gone, though there are still puddles of it on the floor that run all the way down the hall until it presumably flowed over the edge of the grand staircase and cascade down at whatever bottom this room has.
I expected (there I go again) that our heroes would explore at least one of the other areas on this floor before the session ended. But they were determined to figure out the nature of these dual tombs. So, they wrecked everything in this wine trap room, including the stone gargoyles and the wooden coffin, keeping the bronze “Drown your sorrows” plaque as a souvenir. Then they went back into the mirror tomb and redid this entire room again.
This time, Martic, Thames, Gwen and Grum stayed in the room itself. Summerwise flew into the connecting crawlspace and stayed in the dry section. Bag of Nails and Savash stayed in the outer hallway. As a cat, Bag didn’t want to get wet again and Savash was annoyed since this was just wasting time and not helping him find his Black Opal Crown. Every session I obnoxiously remind our heroes that this is the only thing Savash cares about. Ironically, these two that tried to stay out of harm’s way were the only two that very nearly died from this second version of this trap.
Inside the room, the group reactivated the trap. Surprisingly, they never tried to block the sunlight from striking the inside of the coffin by any means. They just tore open the lid again. But they did prep a few spells, specifically spirit guardians which was lethal to the wine weirds once they arrived. Martic also used his bugs to levitate above the surface of the water, keeping him out of danger for most of the fight. This time, all the wine weirds were killed off pretty quick and once the room was filled, they repeated swimming into the safe crawlway like before.
They waited ten minutes for the door to reopen and then the fun began. Savash and Bag of Nails were standing in the nice, dry hallway, complaining about how stupid the other heroes were, when the sealing block lifted back into the ceiling and a torrent of wine surged down the hallway, sweeping both of them off their feet and washing them straight toward the balcony and the 80’ drop-off to their impending doom.
I was not trying to be mean, so I set the DC for all the following saving throws at a resonable 12. Bag failed the Strength save to avoid being swept off his feet, then he failed a second save to avoid being pushed over the edge of the balcony. Fortunately, he made his Dexterity save to grab the railing before he plummeted to his death on the floor below. Savash was not so lucky. He failed all three saves and was about to fall to his death, when Bag made two more saves; a Dex save to grab the snakeman and a Strength one to hold on to him as they both dangled over the abyss.
Back in the false tomb, our not-holding-on-for-dear-life heroes smashed up the room again, walked out and found Savash and Bag of Nails sitting in the hall, drinking a flask of floor wine, and laughing about their near-death experience. The bond between snake and cat was now complete, and Savash became an honorary member of the Society of Stalwart Adventurers.
Next week, still on the second level, we get split up, and a new member joins the party, but no one knows about it.
As always, if your players want to press their luck and have second go at a death trap, let them and Game On!
“Here’sh to my beshtest buddy, Savash. Whatsh the matter? Cat got your tongue? – A very inebriated Bag of Nails toasting his slithery comrade.
Don’t forget to check out my Tomb of Annihilation Resources Page, filled with all the stuff I use to make this epic campaign even more epicier: My full Campaign Diary, plus Handouts, Maps, Charts, PDFs, Images, and more to use, abuse, or ignore at your peril. All the templates and instructions for my Trickster Cubes are found here as well.
And written specifically for this adventure, read my Explorer’s Guide to Chult to delve into all the legends, lore, history, religion, and culture that I used to bring even more life to this adventure.


Really clutch fairie fire there or else no possibility of the banishment!
As always a great installment. Are there any clues that you have given the players that the ring version is the fake tomb? As written in TOA once they are inside there is no indication that it is the fake version which i think is kind of mean and petty. They seem to at least have realised that it is a second version. If they hadn’t gotten it initially would you have given any clues?
My campaign is going along and my party reached camp vengence and almost TPKd themselves with the traps in the shrine. They finally got it after 2 people tried to walk solo on the tiles.
LikeLiked by 1 person
I agree the faerie fire was key. I think what told them the second tomb is not real is that there was no body of Devlin in the second tomb. If they needed more, I would have steered them toward investigating the 2nd Obolakas tomb. They would have found the window missing and the room empty since it was used to replace the damage in the real tomb. Hopefully that would make it obvious.
I happy your group finally learned the lesson of the Crocodile Man and learned the value of teamwork. Love it! Keep me posted.
LikeLike