
Where we search for the final puzzle cubes, go to war with the red wizards and get “captured” by the Yuan-ti. Again.
When last we left our heroes, they were wandering around the Forbidden City of Omu dodging roving gangs of yuan-ti, red wizards and batty catty called Bag of Nails. All the while they collected a few more puzzle cubes for an unknown reason. Later on, they learned that these cubes would unlock the front door into Acererak’s Tomb and their date with destiny. Along the way, they picked up another NPC minion, learned of a competing band of adventurers that may have entered the tomb ahead of them, and ran afoul of a really foul zombie tyrannosaur that proved to be no match for our hearty heroes. And they met an even bigger T-rex dubbed the King of Feathers, which may be an ally or has an eye infection, because it definitely winked at Roland as they parted ways.

In their quest to find these cubes, our heroes know that they can be found scattered around the city hidden in various shrines dedicated to a group of pseudo-deities called the Trickster Gods. They know that there are nine such gods, each represented by a particular jungle creature that embodies abilities and traits that parallel those found in humans. Some are wise and good and brave while others are selfish, cruel and nasty. In fact, there is creation myth called the Legend of the Nine Gods that their new NPC ally, Orvex, insists on retelling the tale over and over. He’s some sort of archeology nerd but he fights like an assassin, which is peculiar.
As for the cubes themselves, the current tally stands at 6 cubes found by our heroes, one cube in the hands of the Red Wizards of Thay and two shrines left to explore. Their current To-Do list is: complete two shrines and get two cubes, steal the last cube from those pesky wizards, then find a way into the Yuan-ti temple, rescue a kidnapped kid from the clutches of that bastard, Ras Nsi, find a way into the Tomb of the Nine Gods, kill the ancient immortal lich, Acererak, and save the world. Oh, if only it were that easy.

Before we get to the shrines, I just want to touch upon two minor events that occurred during the session as they wandered around the Forbidden City. First, they came upon the kobold’s encampment in its proper place at the ruined bazaar. I really wanted my group to have this encounter with the selfish kobold “king”, Kakarol, because he is hilariously naïve, and I am always on the lookout for more factions in case I have the chance to have another massive faction war. Sadly, the various traps to enter the bazaar, including the time a swarm of centipedes dropped on the head of the swarm ranger Martic, leading to some fun bug-on-bug action, were too much of a nuisance, and my group decided it wasn’t worth the effort to talk with these adorable kobold mechanics. Well since they chose to not negotiate with them, I guess these kobolds will have to side against our heroes when the inevitable massive melee occurs.
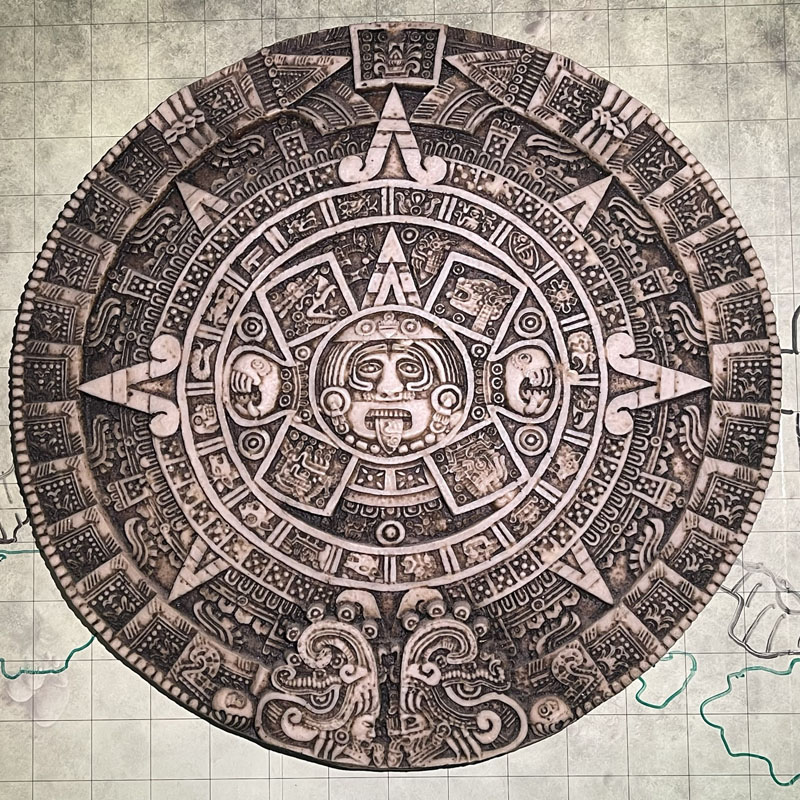
The second encounter was the chwinga wagon at Location 11. The purpose of this location is to provide another way for the players to translate the Omuan runes in the shrines, allowing players to read the riddles and have any chance of solving them. Our heroes already have Orvex in the party who performs this same function, so this location is irrelevant, but I have an amazing prop that I wanted to show off to the group. When the party discovers the stone disk in the mud under the wagon, I hand over a real stone disk covered in Mayan ruins that I picked up in a souvenir shop in Central America. This prop has nothing to do with the adventure, but it looks cool and it’s a fun coincidence since I bought this thing years before I even read Tomb of Annihilation. I’d hoped that the party would lug this giant rock around, but they just took a rubbing of it and left it.
Onto the shrines. The first shrine of the day is Location 12 which should be Wongo’s Shrine, but I’d swapped it out for Obo’laka’s Shrine. I’d also decided that this was the second shrine that had been plundered by the red wizards. So, they weren’t surprised when they entered the central chamber and saw the petrified wizard. In the book the wizard is reaching for the puzzle cube on a pedestal. But now he is reaching for another wooden one, telling the players that the traps have been reset by the kobolds but the real cube is “In use elsewhere. Try again later.”
Despite the lack of any reward, my players still wanted to solve the puzzle of the shrine. We all enjoyed the teleportation pools and the conundrum of moving lit torches through water. They checked for secret doors but they rolled poorly and didn’t find it at first. They could not come up with any solution that involved the water and they were convinced that there must be a secret door. They even measured out the dimensions of the shrine and knew there was an unfound hallway somewhere. To reward their investigation, I gave them another check with advantage. They passed, found the secret passage, moved the torches to the proper brackets and collected the fake puzzle cube. I was disappointed that they did nothing with the wizard statue. It would have led to another combat, but it would have given them a very useful item, an immovable rod that would be very handy within the tomb.

Onto Location 16 and the last of the Trickster God shrines; this one dedicated to the conniving Papazotl. Our heroes actually saw this shrine early on, but at the time they were low on health and choose not to fight the half dozen crocodiles guarding the entrance. This time, those crocodiles are all dead along with the body of a Yuan-ti malison, one with a human body and snake head. Looks like another faction has decided to collect these cubes as well.
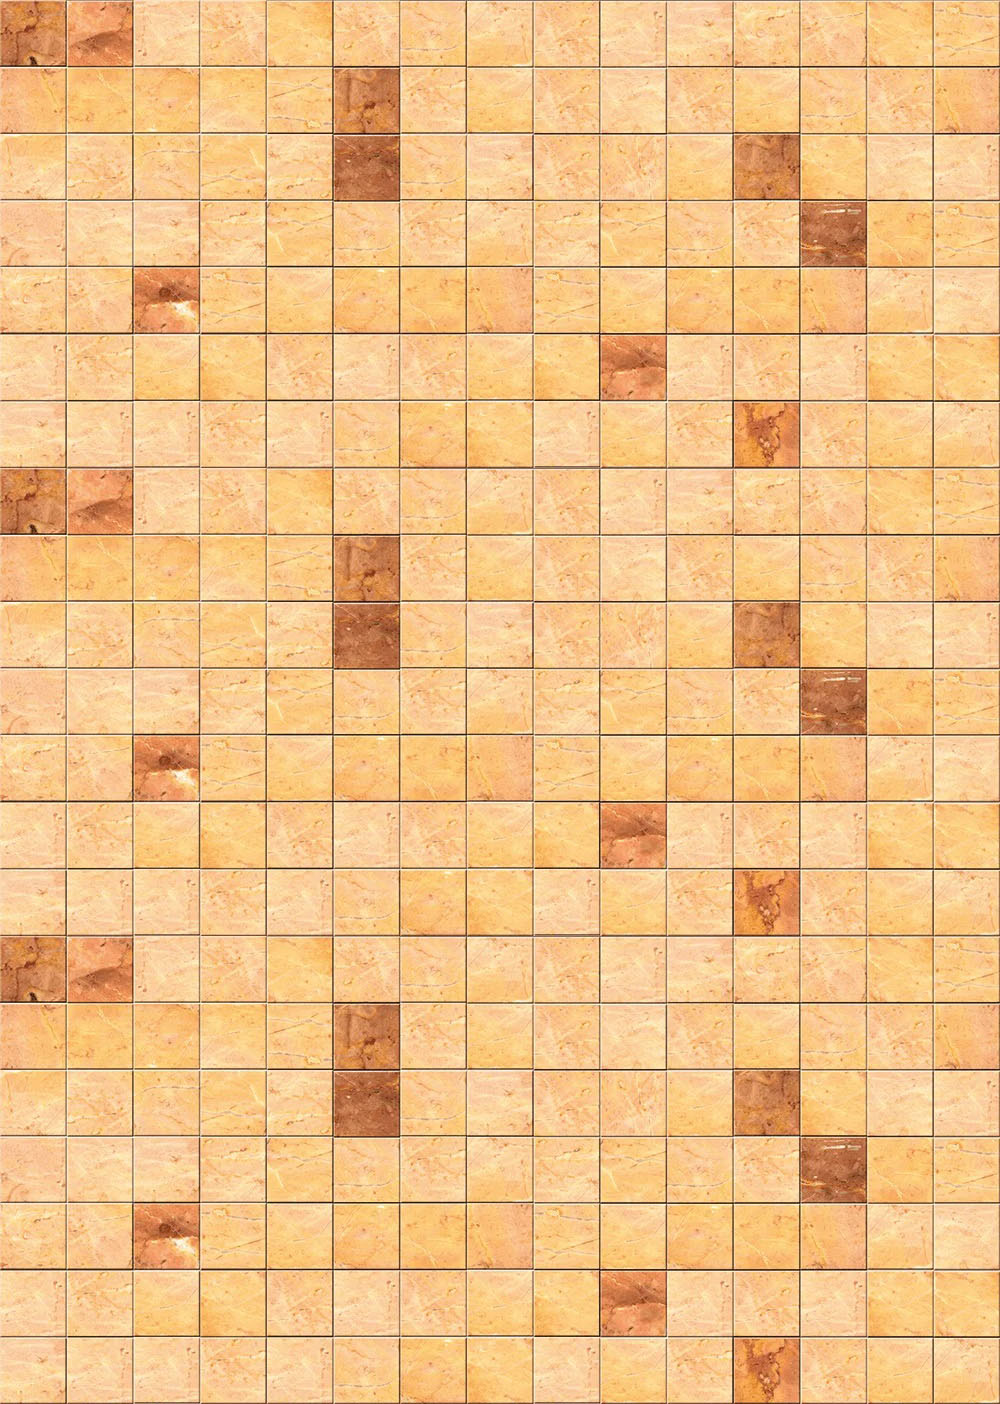
The shrine itself doesn’t have a trap per say, but it does have an interesting word puzzle. Just to be able to say that they solved them all; my players gave it a go, even though they knew the puzzle cube would be gone. When they found the hidden room with the mosaic wall, I further described the stone to be that of slate and there were smudges all over it and they found a lump of chalk on the floor. My players guessed right away that they would need to write something on these tiles, and they eventually reasoned to write down the riddle in the earlier room. This gave them the secret to unlocking the pedestal and after blindfolding the various statues, the pedestal opened up to reveal an empty cavity. There wasn’t even a wooden cube inside. This cube had been removed just mere moments ago.
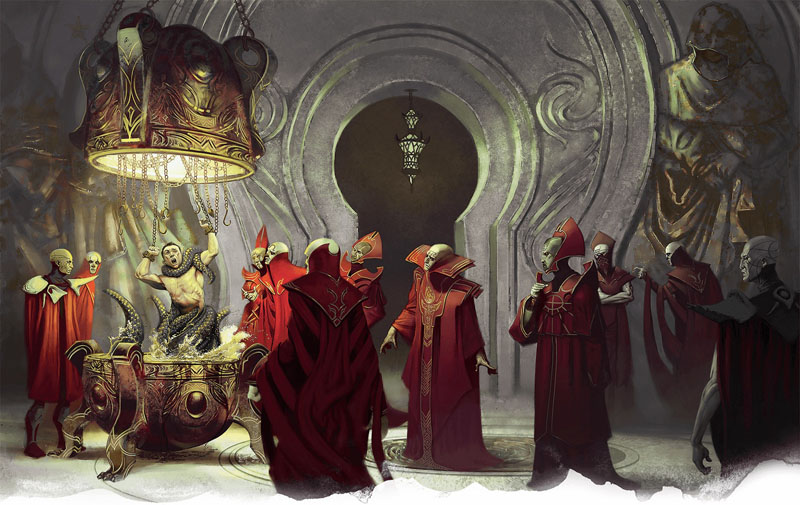
When they exited the shrine, a lone Yuan-ti was standing there waiting for him. He spoke to our heroes with no fear in his voice. “Do not be alarmed. I come in peace. My name isss Savash and my misstressss wants to ssspeak with you. It isss not sssafe here. Pleassse follow me.” Savash moved off, leading our heroes to a secluded spot away from the Yuan-ti Temple area. Our heroes were wary of an ambush, but this didn’t feel like a trap. They arrived at a small courtyard and inside were a half dozen Yuan-ti, on guard but not in defensive positions. In the center of the group was an incredibly beautiful woman with piercing yellow eyes, and the tail of a giant constrictor snake. She spoke in a dulcet hypnotic cadence. “Hello, my name is Fenthaza, and I have a proposssition for you.”

One of the many things I like about the book is that for the next part of the adventure, it gives several options about how to enter the Yuan-ti Temple. They could attempt to walk in through the front door posing as Yuan-ti Purebloods, they could be captured, or they could sneak in the hidden back entrance. Once inside, there are options to work with either Ras Nsi or Fenthaza in the growing conflict between these two leaders. There’s even an option to side with the red wizards and the spy they have planted within the temple. There’s a ton of choices here and that’s always a good thing.
While I like the prospect of sneaking in pretending to be snakemen, this route is risky and hinges entirely on passing several difficult Deception checks. For me, the best roleplay potential comes from being caught, enslaved, and playing both sides of the civil war brewing between Ras Nsi and Fenthaza. But my heroes were already captured by the Yuan-ti in the memorable TPK Session 11. To force them to get captured again by the very same monsters just feels like the same thing all over again. But what if I could convince my players to volunteer to be enslaved? That would be different. And pretty funny. Let’s do that.

I also need to move this plot line along because I only have two sessions left before Theo needs to go off to college and out of the campaign. Fenthaza cuts right to the chase. “I am the Speaker of the Yuan-ti, what you would call a shaman. Ras Nsi is our current leader but he no longer represents the true path of the Yuan-ti. I do not know what deal he made with the Master of the Tomb, but it does not benefit our people. Ras Nsi must be killed. But I cannot move directly against him. You seek to enter the Tomb, don’t bother denying it. I am willing to help you, but you must help me first.”
“You seek cubes to enter the tomb. You have six. Those annoying red robed mages have two. I have the last. Go kill those pathetic wizards, gain their cubes and come back to me. I will sneak you into the temple as our prisoners. You will need to surrender your gear, but I will allow you to hide small weapons on your person. You will act as slaves until the opportunity presents itself. You will make your way to the storeroom where the armorer is an ally of mine. There you will find your equipment. Go to the Throne Room and kill Ras Nsi. Once he is dead, I will give you the final cube and safe passage from the temple to the tomb. Once inside the tomb, there is an item that I want retrieved. You will get me that item. Do we have a deal?”

Our heroes had a few questions. “Ras Nsi has a captive boy with him. Is he alive? We will want his safe return as well.”
“The urchin is alive. Ras Nsi keeps him close. I do not care what happens to him. You may keep him.”
“What is this item you seek?”
“It is called the Black Opal Crown.”
“What do you need it for?”
“That is none of your concern. Your only concern is that you have the item for me when you exit the tomb. Do we have a deal?”
“How do we know you’ll keep your word?”
“You don’t. Do we have a deal?”

Since this was the first deal they’d been given that didn’t end in the words, “or die”, (although it was heavily implied) our heroes took the deal. This is pretty much how it would play out if the heroes had been captured first, enslaved for a few days, and then introduced to Fenthaza. But by holding the encounter outside the temple, I don’t run the risk of the players panicking and doing something rash before I can have the encounter as written in the book.
For our game, it had to be Fenthaza that my players sided with. My group hates Ras Nsi way too much and I’d already played that he knows about the Death Curse and is willing to die to succeed in his mission. I hate that as written, Ras Nsi is being played for a fool by Acererak, despite the fact that Ras Nsi is older than Acererak and is no fool. Also, this way I really enjoy that both Ras Nsi and Fenthaza both want to destroy the world but bicker about how to do it.

But first things first, and the main event of the session; going to war against the Red Wizards of Thay. There is an interesting option that the players might agree to work with these arrogant necromancers, but I knew that my group hated these guys almost as much as Ras Nsi. Plus, they knew that the wizards would betray them the first chance they got (totally true) and it would be easier just to take them out now (also totally true).
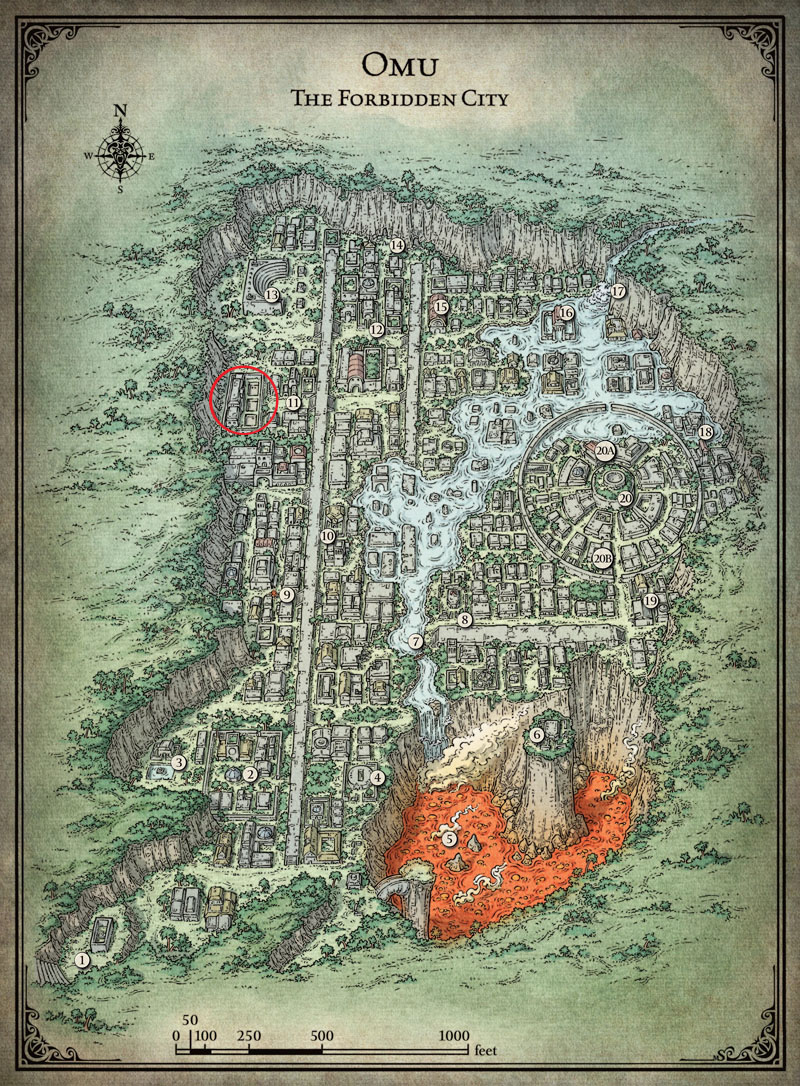
One glaring mistake in the Omu map is that there is no location for the Red Wizards current camp. They have a ruined camp at Location 2, where our heroes picked up the archeologist NPC Orvex, but no mention of where they can be found right now. Scouring the map, I chose the walled compound just to the west of Location 11. When my players explored the chwinga wagon earlier they also saw red wizard activity to the west and now they know where they are holed up. I like this location because it has a good-sized courtyard with three large pits in it, providing an open area with dangerous narrow sections for combat and unknown surprises in the pits. There are two buildings that could lead to some stealth encounters or possible enemies barricading themselves inside. And it’s in an isolated area so I can do whatever I want. Lots of options.
I never got to run the Heart of Ubtao location within the jungle of Chult, where I expected to provide a memorable conclusion to the red wizard storyline begun in Session 28 with the pompous git, Atticus Shetfield Smythe III. This will be my last chance with these guys, so I need to make sure this one is sufficiently epic. There are four red wizards listed but they all use the same generic mage stat block. This was going to be the first, and likely only pure wizard battle in the entire adventure, so I made a unique spell list for each one. Zagmira is the leader, so I boosted her stats to give her access to 6th level spells and a few more hit points
They also travel with eight mercenaries. I had four of them be generic thugs but the other four are named veterans that act as a personal bodyguard for each wizard. Their names were Therbin, Erolin, Durgan, and Moe. I also gave them a bunch of magic items because it made sense that this evil adventuring party would have collected a few items. I have been pretty stingy about handing stuff out to my own group and they were about to enter a dungeon that requires magic weapons just to even fight some of the horrors inside.. And although they aren’t listed as part of their posse, I threw in a few skeletons and zombies since everyone is a necromancer in this adventure.

They learned all this info from their new best NPC ally Orvex, who seems to have no problem betraying his old bosses after they left him for dead at their last camp. But he would not accompany them on the assault for two reasons. If the attack fails, he doesn’t want to be seen as the one who betrayed them and this is supposed to be a hero vs bad guy battle, not NPC vs NPC.
But, fear not. I didn’t leave them without any allies. They still have Grum, who really only exists to give Ian an attack in combat, since Gwen. is the epitome of a support character. Plus, Thames has his homunculus Seppi, and Martic has his pseudo-dragon, Summerwise, which will come in very handy today due to its ability to grant magical resistance to all nearby allies. In fact, I think this single benefit saved our heroes lives today. And I have a very special guest star in mind.

That’s right. Bag of Nails is back in the show. I got a plan for this guy, but I need to see what he looks like in combat. When my players were throwing out suggestions of potential allies for the fight, one of them suggested Bag of Nails. And I was like, “Hell, yeah. Why don’t you go ask him?” They found him easy enough at his river ambush and after dodging a few arrows, the group was able to remind Bag who they were. “Oh, yeah. You’re the wimps who won’t fight me. What do you want now?” Bag was very interested with the offer of a glorious death at the hands of an evil band of necromancers and agreed to help them. With all that out of the way, let’s go over my new red wizard camp.
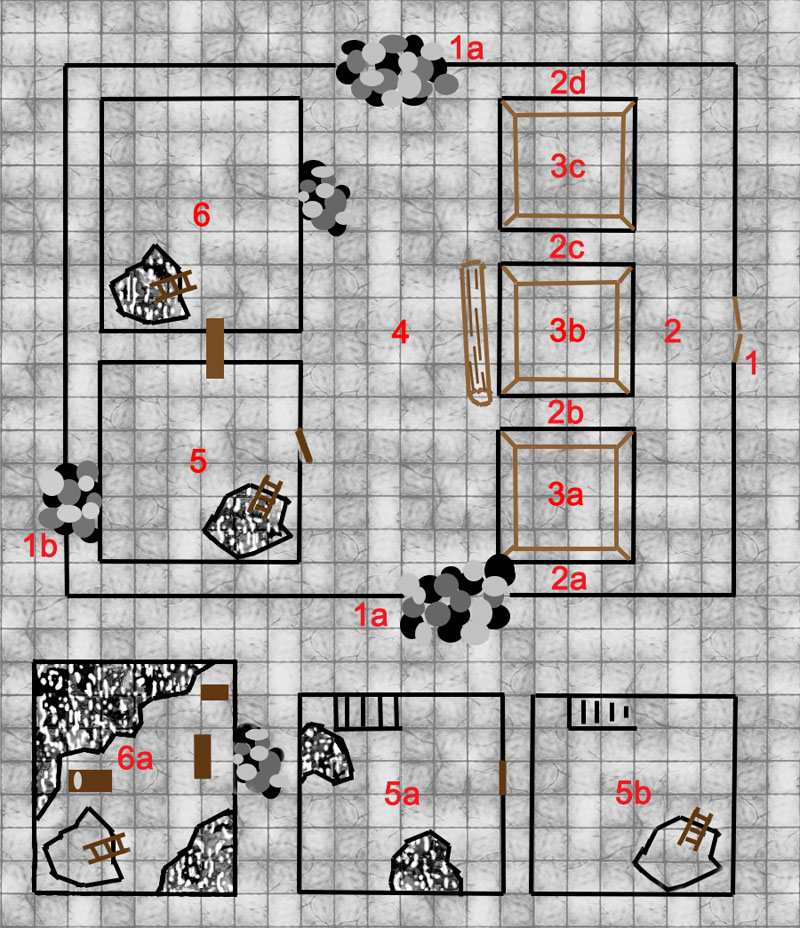
Assault on Precinct 11A – Red Wizards
The walls of the outer compound are 15’ tall and 3’ thick with several sections that are collapsed into a mound of rumble roughly 10’ high. See Location 1A. The two building are each 20’ tall with a 2’ wall around the edge of the roof. This roof wall provides 1/2 cover (3/4 if crouching). There are two sentries on the roof who have a 360-degree view of the area. The sentries can be spotted with a DC10 Perception check. Unless stealth is used the sentries will spot any who approach and the camp will be silently placed on alert. To approach using stealth, each PC must roll a DC7 for the south building or a DC 14 for the north one. If the sentries are spotted and care is taken to avoid their search pattern, the Stealth roll is made with Advantage.
Location Key
1 – Main Gate. The double door gate is 12’ tall and made of interlaced bamboo trunks. The bamboo poles are spaced with 1’ gaps that allow either side to see through the gate. A small creature could slip through these gaps. The gate is secured with an arcane lock, the password is “Valindra”. During the day, anyone approaching or opening the gate will be seen by the sentries (and the gate creaks when opened normally). At night, if the gate can be unlocked, PCs roll a DC12 Stealth check to open the gate silently.
1A – Wall Breaches. There are two main sections of the wall that are reduced to rubble. As stated, they are 10’ high mounds of rock and debris. The mounds are difficult terrain for movement and require a DC8 Athletics or Acrobatics check or the PC falls prone and fails any stealth attempts. At the top of both mounds there is a glyph of warding (DC 14 perception to spot. South glyph delivers 5d8 fire damage. North deals 5d8 lightning damage.) If either glyph is activated, the entire camp is alerted.
1B – Hole in the Wall. At the rear of the camp the wall has a small pile of rumble that has created a small hole in the base of the wall. On a DC10 Perception check the PC will observe a vegepygmy entering the compound via this small hole. Fifteen minutes of work (DC10 Stealth to do this quietly) will expand the hole so that a medium sized creature can squeeze inside. This leads to a small tunnel under the rubble that leads to Location 5a in the south building. Each PC rolls a DC12 Acrobatics check to crawl though safely or more rubble falls on that PC for 1d6 bludgeoning damage and possibly (50%) collapsing the tunnel behind them, blocking their escape. Even with a collapse, the vegepygmies can still use this entrance.
2 – Outer Courtyard. This large open area is dominated by three large pits on the eastern side. Each pit is 20’ square and 15’ deep. A narrow 5’-wide path separates the three pits from each other and the compound wall. The southern path (2a) is blocked by debris from a collapsed wall. Path 2b & 2c are protected by an invisible glyph of warding (DC 14 perception to spot. Both deliver 5d8 thunder damage and the PC must make a DC10 DEX save or be pushed into a pit. 50% chance for either side.) Path 2d is the only safe passage to the other side of the courtyard.
3 – Pits. Any one falling into a pit takes 1d6+2 bludgeoning damage and lands prone inside the pit. Each pit is 15’ deep and made of hard packed dirt with no apparent means to escape. Each pit has a different occupant. Pit 3A has a Shambling Mound that was just recently captured. It will attack anyone that falls into the pit, but it only wants to escape. If given the means to escape it will run toward the broken southern wall, attacking anyone in its way and triggering the glyph there if it is not already activated. Pit 3B has 2 ghouls inside the pit. If combat occurs and they are able, the Red Wizards will push the tree trunk into this pit releasing the ghouls who will attack the nearest PC. Pit 3C has a saber-tooth tiger that is half starved with only 40 hp. If released it will attack the nearest red wizard. There are also 3 Batiri goblin skeletons within the pit that the red wizards may try to animate if needed.

4 – Inner Courtyard. There is a lot of activity going on in this courtyard. 2 thugs are patrolling the area in a loop that goes around each building. 6 skeletons armed with bows are standing guard, two watching the gate, while the others watch the mounds of rubble.4 zombies are mindlessly shuffling about. 1 red wizard (Yamoch) is sitting on a crude chair at the SE corner of Building 6. He is flanked by his bodyguard veteran (Durgan). Yamoch, like all the wizards in camp, carries a Dagger +1. Durgan carries a Crossbow of Bolts +1 which is slung over his back. Yamoch is lazily throwing rocks at a zebra that is tied to a post in the middle of the courtyard. Another veteran (Moe) is in front of the zebra attempting to swat the rocks from hitting the zebra. Moe is wearing a pair of Boots of Elvenkind. Yamoch and Durgan laugh every time a rock hits the zebra. The zebra is the red wizard Dyrax, who was polymorphed into the animal in Wongo’s shrine. The door to Building 5 is slightly ajar. There is no door to Building 6. It is blocked by a mound of rubble that may be climbed to reach a hole in the wall of the second floor.
5 – South Building. On the roof of this building is 1 thug. He is keeping watch but he is doing a poor job of it and anyone sneaking near his section needs to pass a DC7 Stealth check. He can also be distracted by noises from inside the building or objects thrown over the wall. There is a wooden plank that connects the roof of this building to the roof of Building 6.
5a – South Building First Floor. Gear and supplies including any standard equipment you feel like handing out, plus 12 javelins and 3 quivers of arrows with 20 arrows each (Roland and Martic are running low) are stored in the room, which is otherwise empty. A set of stairs lead up to the second floor. Several holes in the floor lead to a crawl space under the floor. Living in this crawlspace are 12 vegepygmies. They are afraid of the heroes and cower in a corner. They can be calmed with a DC5 Persuasion check and they can be enlisted to make a distraction for the party with a DC10 check. If the PC offer to kill or make the wizards leave the area which is the vegepygmy home, they make this check with Advantage.

5b – South Building Second Floor. Several bedrolls are laid out here. During the day the room is empty. At night, there are 1 thug, 1 veteran, and 1 red wizard (Either Yamoch or Thazma) sleeping in this room. A ladder leads up to the roof. A set of stairs leads down to the first floor.
6 – North Building. On the roof of this building is 1 veteran (Erolin). Erolin carries an Oathbow. He has stationed his lookout point just over the gap in the wall with the rubble pile leading to the second floor so he can easily jump down to the rubble and enter the second floor if need be. He is very alert and any Stealth in his area will need to pass a DC14 check. A ladder in the SW corner leads to area 6a.
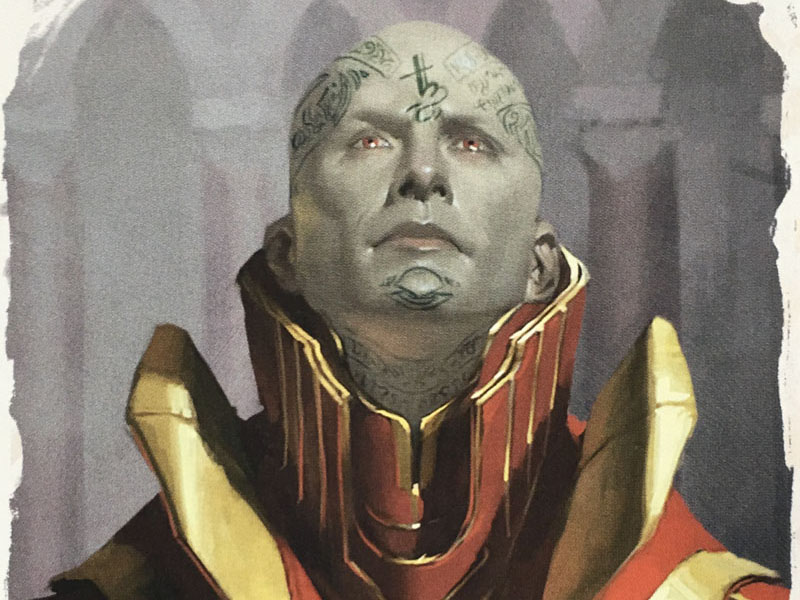
6a – North Building Second Floor. Much of the floor of this room has collapsed into the First Floor which is completely choked with rubble and virtually unpassable. This room has a bed near the ladder, a desk in front of the collapsed wall over looking the courtyard and a chest in the corner. The furniture is crudely made of crates and lumber. Sitting at the desk facing away from the ladder is 1 red wizard (Zamira). She is the leader of the red wizards with 54 hit points and the ability to cast 6th level spells. (See chart above). She also carries a Staff of Healing +1 and will use it on herself as needed. She appears as an 18-year-old girl but half her face is that of an old crone. Zamira attempted to assume the body and soul of her own granddaughter to extend her life, but the spell did not function properly.
Zamira is currently talking to someone via the sending spell. “Valindra. Found Omu. 150 miles south southeast of Heart. Heavy Yuan-ti presence. Another group seeking Tomb. Send reinforcements. I’d even appreciate that fop, Atticus, now.”
Inside the unlocked treasure chest is a veritable horde. 729cp, 4055sp, 1938gp, 110pp, an ivory statue of Shagambi (250) a silk robe with gold embroidery (200) and a silvered sword with a jet inlay of Moa (750). There are also 4 spell scrolls; Remove Curse, Greater Restoration, Leomund’s Tiny Hut, and Tenser’s Floating Disk. Next to the chest is a wine crate which holds several potions; 8 potions of healing, 6 potions of greater healing, and 4 potions of superior healing. (The Tomb is stupidly deadly, I have been cheap with magic up to now, my group is about to lose its paladin, and I want them to have a fair shot of completing it.)
On the desk there are 2 Puzzle Cubes, of your choosing (my campaign used Wongo and Obo’laka.) Also on the desk, is Zamira’s journal. It details the botched ritual with her granddaughter, Zamira’s jealousy of her boss, Valindra, and her mission to find an item the Red Wizards call the Soulmonger. This is the device that the Red Wizards claim is stealing all the souls of the world. The Red Wizards want the item to not save the world but rather to feed their own undead phylacteries. They tracked the Soulmonger here to Omu and are certain that it lies somewhere in the Tomb of the Nine Gods.

She goes on to write about her hatred of the Yuan-ti and her irritation at the loss of her fellow wizards and her translator, Orvex, in the assault mentioned at Omu Location 2. She brags about her brilliance in planting a spy named Ishmakahl into the ranks of the snakemen. The journal ends with a mention of some other group of stinking adventures that probably have some cubes already and she wishes she had killed them earlier. She muses about tricking this group into working together to find the cubes, and then murdering them once they are all found.
Complications – At some point, either while the PCs are sneaking about or after a few rounds of combat, a red wizard scouting party returns. This consist of 1 red wizard (Thazma), 1 veteran (Therbin), 1 thug, plus 2 zombies, and 3 skeletons. Thazma carries a Dagger of Dancing and Therbin wears a Heward’ Handy Haversack. (In my campaign, This item is solely for Thames, who has dreamed of obtaining a Bag of Holding throughout the entire adventure. I refused to give it to him because I am convinced that he wants to somehow create a trans-dimensional rift with it. But he can have the next best thing. Let’s see what he does with it.)
As a further complication, near the end of the battle, the zebra polymorph spell can end and suddenly the red wizard Dyrax is standing where the zebra once stood, still with the rope around his neck. Dyrax can easily remove the rope and join the combat. He is at full health but he is down two spell slots for every spell level. Thus, he can cast two 1st level spells and one spell of 2nd, 3rd, and 4th level. As a zebra he never had access to regain those spell slots. Other than his spellbook and his Dagger +1, he has no other treasure.

Here’s how this played out for us. After some good stealthing by the ranger, they got a good layout of the location. They found the hidden entrance in the back, they could tell which guards were alert and which weren’t, they even noted that anyone who went from one side of the courtyard to the other only took the northern path past the pits. They did not discover the glyphs of warding but they decided that an initial assault over the piles of rubble were just as deadly as an attack on the front gate. The plan was to sneak in via the vegepygmy door and once our heroes began their attack, then Bag of Nails would flank them from the southern rubble pile entrance. Since this was the most exposed option for Bag, he was all in, saying, “I better bag me two wizards before I get killed or were gonna have words after this.”
Our heroes managed to sneak in via the collapsed tunnel that led into the crawlspace beneath location 5a. Thames went last due to his size and I had him roll his Acrobatic check with Disadvantage. He failed and the tunnel collapsed behind him, trapping the group within the compound. They easily befriended the vegepygmies inside after agreeing to get rid of the red wizard squatters. I decided that after adventuring with the Druid, Qawasha, and his vegepygmy companion, Weed, that they knew enough of the vegepygmy language to hold this conversation. The vegepygmies agreed to create a distraction on the north side of the wall to help the heroes get the drop on these wizards.

They snuck up into the empty first floor where Roland grabbed a few more javelins and they moved up to the second story. Just as they reached the top of the stairs, I had the guard on the roof coming down the ladder. Both groups froze for a moment in disbelief. Just as the guard was about to sound the alarm, he was hit with a silence spell from Gwen and got obliterated by the rest. In Chult, no one can hear you scream. They snuck up onto the roof and waited for the vegepygmies to do their thing.
Right on cue, just north of the perimeter wall, the jungle seemed to come alive, as volley after volley of rocks and stones flew over the wall, apparently thrown by the plants themselves. Several landed on the roof of the north building, some striking the sentry on guard. He scanned the area, looking for a target, giving our heroes the chance to sneak across the plank connecting the two buildings and down the ladder that led inside. At the same time, the scouting party returned. Fortunately, they did not see our heroes, but now our heroes realized that they were committed to fighting more enemies than they had anticipated.
Inside Zamira’s room, our heroes overheard the message sent to her boss and they could see the two puzzle cubes just sitting on the desk. Our heroes considered attempting to subdue Zamira and make her talk but something happened and there would be no parley. Bag of Nails mistook the confusion caused by the vegepygmies as the sign to attack. From outside, our heroes heard, “You bald headed bastards! This city is mine and mine alone to hunt. Now die!” This was quickly followed by an explosion which was Bag of Nails setting off the fireball glyph, although our heroes didn’t know this at the time. Zamira stood to look out the broken wall to see what was going on. It was now or never.
Thames and Roland stayed in the room to attack Zamira with surprise, while Martic and Gwen ran back up to the roof to take out Erolin the sentry. It was highly probable that with a high-level spell and a smite. that the paladin and the artificer could have taken Zamira in a single round, but I think they both still wanted to capture her, so they only used normal attacks. It did some good damage but allowed Zamira to throw a death cloud spell at them and jump out into the courtyard. Death Cloud is the same spell as cloudkill except it does necro damage instead of poison. I will often change the damage type to create new spells that are more thematic with the wizard that is casting it.
Meanwhile, Martic and Gwen had their hands full with Erolin on the roof. Our heroes got off two good attacks on the cagey veteran, but when Erolin cried out, “Swift death to you who have wronged me,” then began attacking Martic with Advantage and doing an extra 3d6 damage, Martic knew he was in trouble. Martic also knew that he really wanted that bow. But Erolin wasn’t going to make it easy for him because he jumped off the roof to join the rest of his evil party in the courtyard.

Mean, meanwhile, the courtyard is in disarray and almost all of the red wizard’s attention is focused on the south wall. Inexplicably, Bag of Nails is not dead. His fur is a little singed but he is alive and furiously firing arrow after arrow into the undead minions, taking out half of them single-handedly over the course of the battle. He never took down a named enemy, he is still an NPC after all, but he definitely used his poisoned arrows to seriously wound them and allowing the more important heroes to claim the killing blow. On top of all that, he barely got hit. I could only take 37 hit points off his max of 78(!), and most of that came from the fireball. If this guy ever shows up again, I’ll have to seriously nerf his abilities.
As for the rest of the battle, it was another gloriously chaotic roller coaster, that was impossible to record each action and worse impossible to portray to you how fun, silly, and exciting it all was. Stuff was happening everywhere. Thames and Roland ran away from the death cloud and up onto the roof. There the party got to enjoy a few rounds of combat, launching all sorts of attacks into the courtyard while enjoying the benefit of the cover meant to protect the wizards. But then a few good AOE (area of effect) spells like ice storm, clouudkill, and fireball from those annoying red wizards made them split up and abandon the safety of the roof. For much of the battle, my red wizards focused on their AOE spells. And every time I cast a subduing spell, like hold person or web, the Advantage provided by Summerwise’s magical aura saved them. At least I got to use a few counterspells and misty steps to annoy my players. Ha! Not so fun when it’s on you, is it?

Roland jumped off the roof and waded right into the thick of things. Over the course of the battle, he took out a couple of zombies, a skeleton, then one of the thugs with a massive single critical blow and he took down the red wizard Thazma with a huge well-timed Smite. Despite him being the entire front line, he was the least damaged of all. I just could not hit him and he dodged almost every spell attack. Roland was very proud of himself.
The same could not be said for Martic. He was getting decimated by Erolin’s Oathbow which in addition to the extra damage, ignored all the roof cover that should have protected him. And since this wasn’t a spell, he received no benifit from Summerwise. He too had to jump off the roof and attempt to take Erolin down before it was too late. He didn’t make it. Erolin knocked Martic down to zero hit points, but fortunately Gwen was there to put Martic back into the fight. But before he fell, Martic was finally able to introduce Skuld into the campaign.
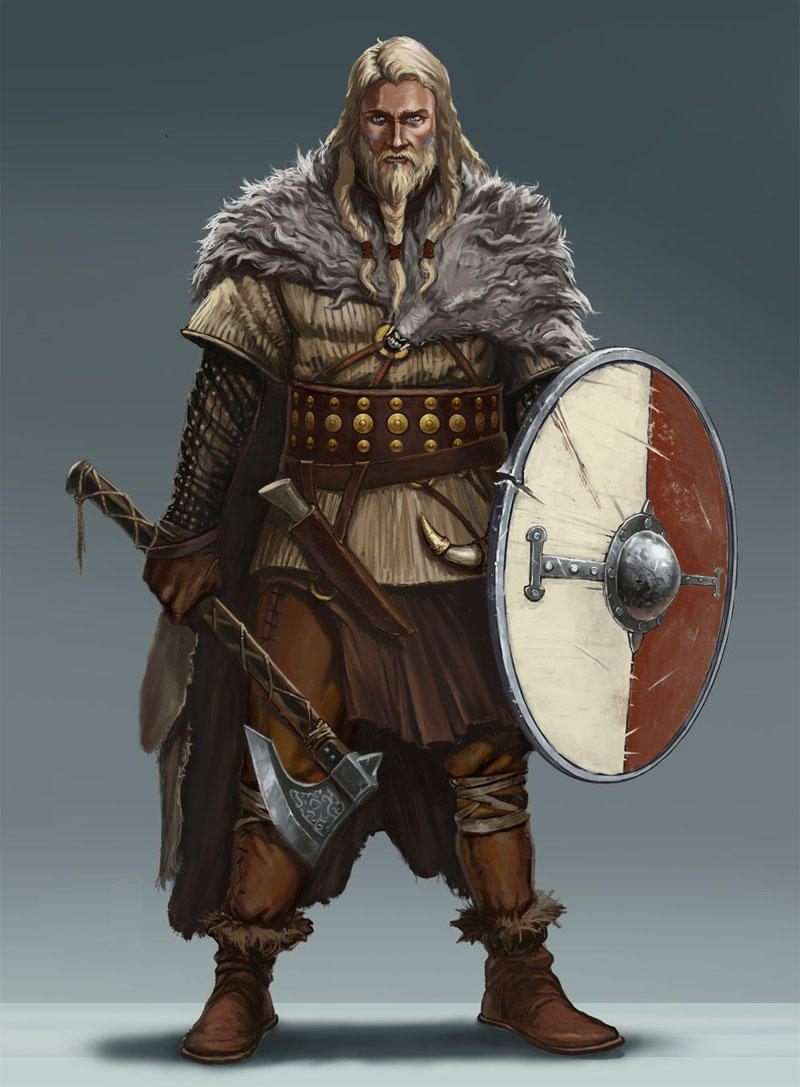
Back in Session 36, I gave my players an early Christmas present to celebrate nearly two years of campaigning. They were necklaces with the Nordic rune of their individual hero, which was revealed during a fortune telling encounter back in Session 22. These necklaces were also an in-game item given to each hero by that same fortune-teller. In game, each necklace imbued the wearing with a small blessing; extra hit points, resistance to a certain damage, use of a new spell, etc. Martic’s necklace allowed him to summon a “Hero of Vallhalla” once per day. This hero will fight for the player until it was destroyed and returned to Valhalla to await its next summoning.
This item is perfect for Martic’s player, James. I always intended for each player to not only have his own character to play but also to have an NPC or two to control that would harken back to the old-school days when NPC hirelings and squires were a thing. For instance, Gwen has Grum, Roland had Benedict, and everyone had their own tribal porter, until most of them got left behind in Session 37. But James doesn’t want the responsibility of playing another NPC. But this leaves him with half as many combat options as the rest of the players, and that’s not fair. Sure he has Summerwise, the psuedo-dragon he adopted back in Session 30, but it never affects combat (unless there are spellcasters) and I technically play Summerwise. Now James can have an actual assist in combat when he wants it and he can banish it back to wherever, whenever he wants.
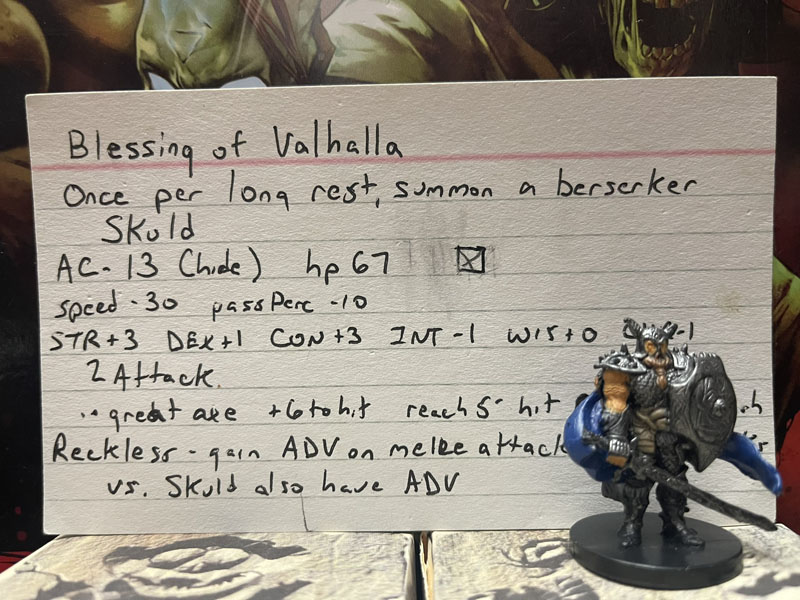
Anyway, back to the battle. Before he fell, Martic unleashed Skuld upon the world. Invoking the command word (it’s “SKULD!” of course), a bolt of lightning streaked out of the sky and struck the ground with a thunderous crack. Stepping out of the white-hot light came a bear of a man with a full red beard, Viking helmet, runed shield, and a wicked big axe. Think Thor in Avengers: Infinity War. Naturally, Skuld talks just as you’d expect with lots of “Sally forth into valor,” “Death before dishonor,” and “Stand back while the men handle things,” and so on.
After Martic went down. The combination of Skuld and Gwen (yes, Gwen) were able to take down Erolin and when Martic was revived, Skuld presented Martic with his new bow. “You look like you could use this new toothpick sling, my liege. I myself prefer steel on steel!” It was very sweet. Then Skuld was stabbed in the back by Moe the mercenary and died, calling out, “Avenge me!” before the lightning struck again to call him home. Thankfully, Martic did have his revenge. He slew Moe in three rounds, which was good because this was his only major kill of the encounter. But he did get a sweet bow out of the session.

Back to Gwen, she was putting up one hell of a fight. In addition to taking out Erolin and saving Martic’s life, she killed two undead, and one of the thugs. Then, just as the combat was at its fiercest but my players could see that glimmer of hope that the battle was turning in their favor, I decided to snatch that hope away when Wongo’s polymorph curse ended and the zebra turned back into Dyrax, the last of the red wizards who has been literally chomping at the bit to get into the fight. I figured my players would be taken aback by the insertion of yet another wizard into the fray. I did not figure that Gwen would annihilate him with a casting of the soul crushing blight spell. Seconds after reverting back into human form, Dyrax lay dead in the dirt, the rope leash still around his neck. He’d have been better off staying as a zebra.
But the MVP of the night had to go to Thames. Between his fireballs, lightning bolts, his incendiary cannon, and his little goofy homunculus griffon, Seppi, Thames was a wrecking ball to these wizards and their never-had-chance minions. He didn’t waste his time on the petty undead; let the others mop them up. Thames killed two thugs, then two of the bodyguard veterans. Durgan was killed by the pathetic pecking of Seppi and Therbin was killed when Thames cast thunderwave and the bodyguard was shoved into the pit with the shambling mound and that was the end of Therbin. Thankfully Therbin dropped his magic crossbow before falling in, which will go on to make Thames even more deadly.
But Thames wasn’t done. He also killed two of the red wizards. He took out Yamoch with his portable cannon fire. Granted he got the assist from Gwen who cast silence on this mage as well, rendering him useless for most of the battle. And finally, Thames got the killing blow on the head wizard Zamira with a lightning bolt to the face, making both sides, the young and the old, look like a blackened old prune. After an exhausting battle, the Red Wizards of Thay were eliminated and poor Zass Tam will have to get someone else to do his dirty work for him. Technically, there are still a few red wizards in Chult and they might cause a problem later, but for now, our heroes could celebrate.
They had defeated a dangerous enemy faction, they got a ton of treasure and some really useful magic. They obtained a sweet base of operations when the vegepygmies allowed them to stay, and they had collected two more Puzzle Cubes. The only one who wasn’t happy was Bag of Nails. “You promised me a good death. You owe me,” he complained as he slunk off back into the ruined city. But still, our heroes were happy and hopeful. All that remained was to surrender to the Yuan-ti, kill Ras Nsi, and pray that the other conniving snake woman would keep her word and hand over the last cube.

After the first good rest in ages, our heroes left Grum and Orvex in charge of their new base. They killed the ghouls in the pit, let the tiger and the shambling mound out to wander back into the jungle, but kept the glyphs and the locked gate in place. They left the eight cubes and most of their gear with Grum with orders to keep them safe until they returned. Our heroes only took their weapons and armor when they went off to the rendezvous with Fenthaza and her devoted Yuan-ti followers. Fenthaza was waiting ofr them. Our heroes were bound and gagged and then thrown in the mud to complete the illusion. Then they were pushed, prodded, and pulled into the bowels of the Yuan-ti temple and their date with destiny.

Next week, at long last, our heroes invade the Yuan-ti temple and finally have a showdown with their BBEG, Ras Nsi.
As always, never force your players to get captured when you can just ask them to do it willingly and Game On!
I expected my master to be bigger… and covered in fewer bugs – A slightly disappointed summoned Skuld.
Don’t forget to check out my Tomb of Annihilation Resources Page, filled with all the stuff I use to make this epic campaign even more epicier: My full Campaign Diary, plus Handouts, Maps, Charts, PDFs, Images, and more to use, abuse, or ignore at your peril. All the templates and instructions for my Trickster Cubes are found here as well.
And written specifically for this adventure, read my Explorer’s Guide to Chult to delve into all the legends, lore, history, religion, and culture that I used to bring even more life to this adventure.


Hurray! They beat the Red Wizards. Spectacularly. I love the Oathbow. Definitely one of the most overpowered weapons in D&D, right up there with the sword that can cast Prismatic Spray. Also, what was everyone else’s boons from their necklaces?
LikeLiked by 1 person
I only used the oathbow because I wanted the ranger to have something more special than a boring bow +1 and there are so few magic bows in the DMG. But this OP weapon will actually create real problems in the coming sessions. I might have discussed this in an earlier recap. The other boons are: Roland – 10 temp ho at dawn. Thames – 1 per day, resist to lightning magic and cast lightning bolt. Gwen – 1 per day resist cold and cast cone of cold. Thanks for checking in.
LikeLike
Thank you! I did see the boons, I think you put them in either Tomb 36 or 37. One of the 2. I thought when I first read it that for Thames and Gwen, it was like one of those charms: after you use it one, it’s gone. Thanks for clarifying. And yeah, D&D needs more magic items for archers.
LikeLike
Also out of curiosity, what stat block do you use for Grum?
LikeLike
Hestarted out with the Thug stat block but we have leveled him up sporadically. He is basicall a boring fighter with no feats two level behind the players.
LikeLike
The boons and the necklaces are permanent. Funnily, yesterday during our Strahd session I noticed that Ian was still weaing his Chult neckalce IRL. I was touched.
LikeLike
I keep in in my dice bag so I always have it on hand for D&D. It was a great gift.
LikeLiked by 1 person
I personally think that the staff letting you cast forcecage is even more ridiculous.
LikeLike
Up to 8/day btw. A forcecage lasts long enough for a short rest so you can put your bossfight on pause.
LikeLike
Hi, Gwen here. I’m not sure if it was during this encounter with the Yuan-ti or the next, but Fenthaza offered to turn one of the party members into a Yuan-ti pureblood. I offer I was very close to taking but ultimately passed on. The ritual would likely involve eating human flesh which Gwen was unfortunately familiar with.
LikeLiked by 1 person
I had forgotten that. Thank you. I’ll be sure to mention it in the next post.
LikeLike
Rich, when do you think Tomb 40 will come out?
LikeLiked by 1 person
Soon. The holidays have messed up my writing schedule.
LikeLike
Hallo, ich möchte mich noch einmal für diesen tollen Blog bedanken. Es steckt ja eine Unmenge an Arbeit drinn. Ich selber beginne gerade ToA zu leiten. Dein Blog ist mir eine große Hilfe, vielen Dank.
LikeLike
Hi Rich! I know you’re busy with work and putting the next Tomb, but I’m curious: what do you plan on doing after Strahd? Do you have a specific campaign in mind? Love all the work that you’ve been putting in, and I can’t wait for Tomb 40.
LikeLiked by 1 person
I am typing up Tomb 40 as we speak. Hopefully I can get it done in a couple of days. As to Strahd, I can’t wait to start posting about this absolute dick of a vampire. He totally sucks. Seriously, we are on about session 10 (I know, I am so behind) and the things I have done to screw with my players seem almost mean in hindsight. In my defense, I’m just playing my character.
As to what comes next, I don’t know. I expect to lose two players to college, which sucks and hopefully we can keep a group intact. As for which campaign, I’m also at a loss. I’d love to play Frostmaiden, Out of the Abyss, and even Descent into Avernus, but those are all heavy commitment campaigns and I think I need something lighter. I would love to take another crack at Waterdeep: Dragon Heist, and do a full four season campaign with all four villains, but only if both my boys could be involved. And I’m very tempted to do a complete homebrew campaign. My first idea involves a sequel to Tomb that dives even deeper into Yuanti society as the heroes try to stop Dendar the Night Serpent from swallowing the sun. The other idea is an Egypt/Arabia adventure that pits the heroes in the midst of a war between the various Egyptian gods, their cults and a cabal of all powerful genies and their elemental armies.
But let me ask you. What would you like to see us do?
LikeLike
Honestly? Anything would be good. I myself have a preference for Frostmaiden, but that’s just me. I love both the homebrew options. For the tomb one, where would it start? Would they pick up in Nyanzaru, or where do you think it would begin? I LOVE the Egyptian idea. Would you use that stat block in Villains, Minions, and their Tactics for one of the genies? But whatever you pick, I’m one hundred percent excited for it.
LikeLiked by 1 person
For the Tomb sequel, it would likely start in Nyanzaru, but I could have alternate starts at Mezro or Omu based on how the DMs campaign ended. Either way, while celebrating the end of the death curse a solar eclipse will occur. But the moon stays in the eclipse for a long time, like an hour. Enough to cause a panic. After some hurried research, the powers that be conclude that this is all part of the yuan-ti prophecy for their god, Dendar, to swallow the sun. This time the eclipse isn’t permanent, but clearly the bonds of Dendar’s prison in the Peaks of Flame are weakening. The heroes infiltrate the yuan-ti run country of Samarch, (connects Chult to the mainland) to get some macguffin then have to find Dendar’s prison.
In the Egyptian one, if you are talking about that three headed genie, he is absolutely in the adventure. As are the four elemental planes where these genies come from. Especially the famous but never included in an adventure, City of Brass. Not to mention all the pyramids, temples, and tombs dedicated to the various Egypt gods. And plagues. Lots of plagues.
LikeLike