
Gwen dies, we hunt down that bastard Withers, and we meet the ten-headed dragon at the end of Level 3. And there’s whales!
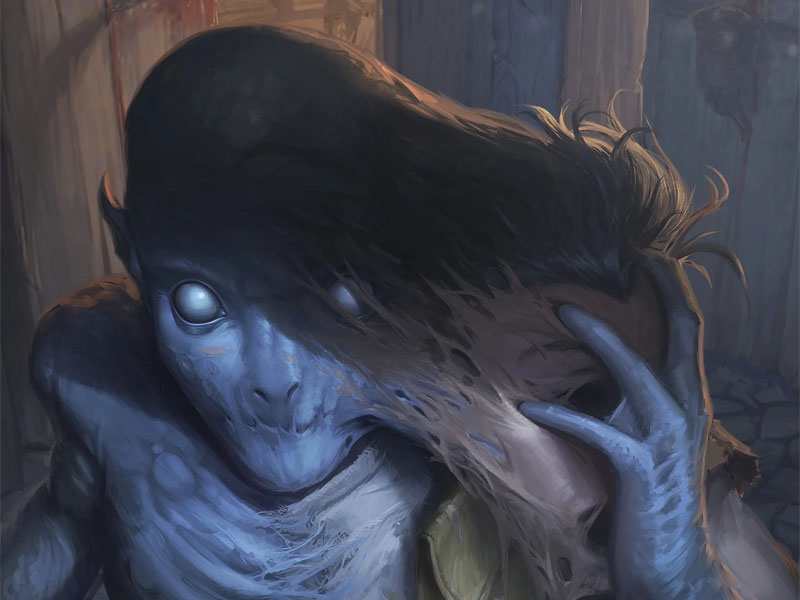
When last we left our heroes, we have been haphazardly clearing the Tomb of the Nine Gods. Thus far, they managed to avoid the instant death traps, but they have been a little reckless in combat and have been banged up way more than they should be and have had to rely on more short rests than I probably should allow. This issue was compounded by the fact the cleric, Gwen, is missing, replaced by a doppelgänger named Pox who cannot cast any spells. He has gotten away with the ruse by liberally using a staff of healing that strictly speaking, he should not be attuned to.
The player, Ian, has been enjoying the deception for the past few sessions. He has deliberately been making mistakes just to see if the players will catch on. Beyond the no spell issue, Gwen has suddenly become a front-line fighter, she no longer fails her ability checks, she knows facts about people she never met, yet can’t call her fellow companions by the right name. It’s as if she suffers from a peculiar case of very specific and inconvenient amnesia.
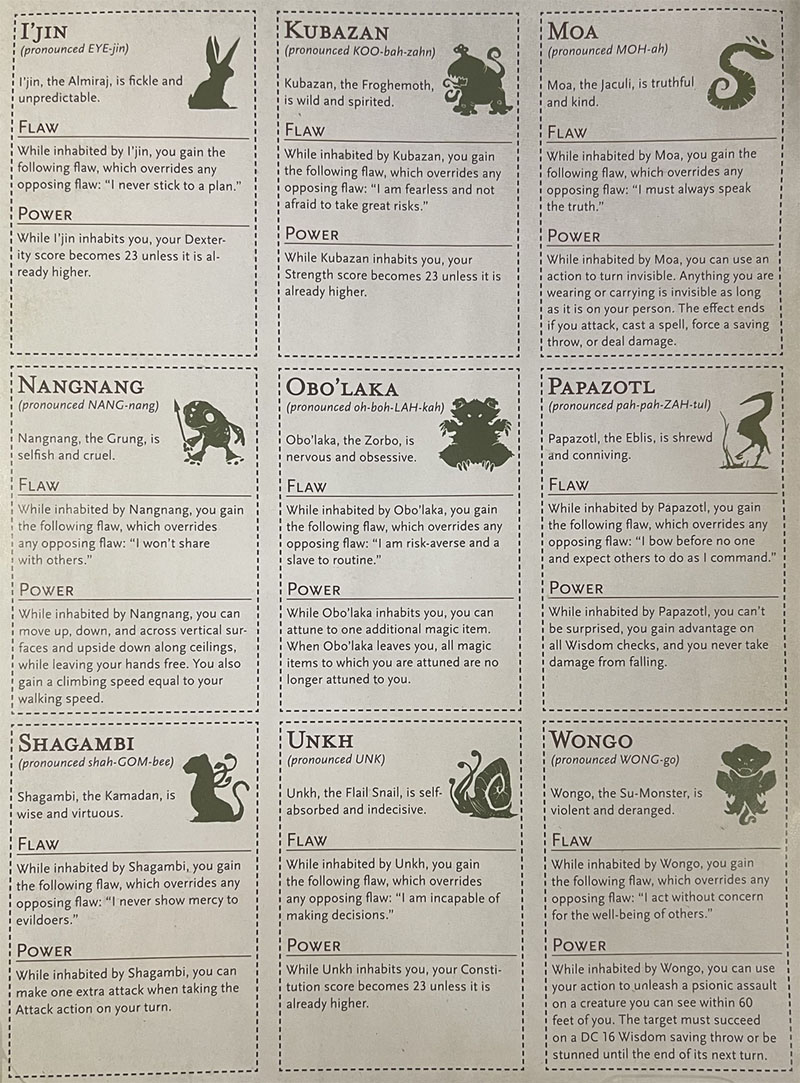
The only thing saving the doppelgänger from being exposed is the fact that several players are possessed by the spirits of the Trickster Gods entombed here. This has plunged the group into chaos, as everyone is acting strangely of late. One of the great gimmicks of this dungeon is that after the PCs explore a Trickster God tomb and survive its trap, they are rewarded with a pretty powerful magic item. Whoever touches the item is automatically attuned to it, plus they gain a significant buff relevant to that god, usually a permanent stat increase or special ability, like the ridiculous at-will invisibility. I’m looking at you Moa.
As a tradeoff, that PC is possessed by the spirit of the associated Trickster God, along with their particular personality, whims, and morality. This has produced some hilarious and confusing results. Our bad-ass assassin Bag of Nails was initially possessed by the cowardly Obo’laka. The reliable fighter Martic is possessed by the unpredictable I’jin. Even the sarcastic and evil NPC Savash is infected with the honest and honorable Moa. And Pox/Gwen is currently under the influence of the bossy, overbearing Trickster God, Papazotl. Our players have attributed all her weird behavior to this possession.
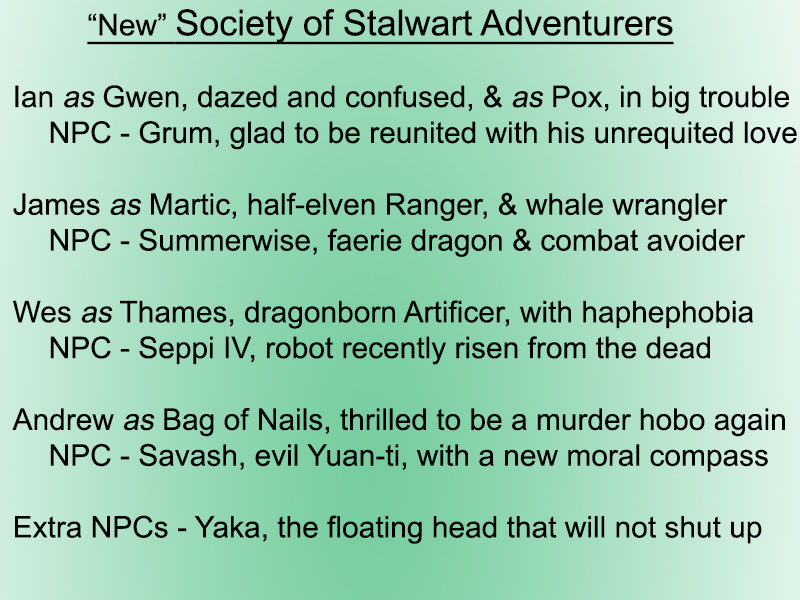
As far as the session went, it was pretty standard. They cleared the tomb for Kubazan, the Froghemoth Trickster God. The collected another mysterious crystal of unknown purpose. And they collected yet another hanger-on NPC in the form of a floating decapitated head belonging to an obnoxious jester named Yaka, who died hundreds of years ago and has decided to make up for lost time by never shutting the hell up.
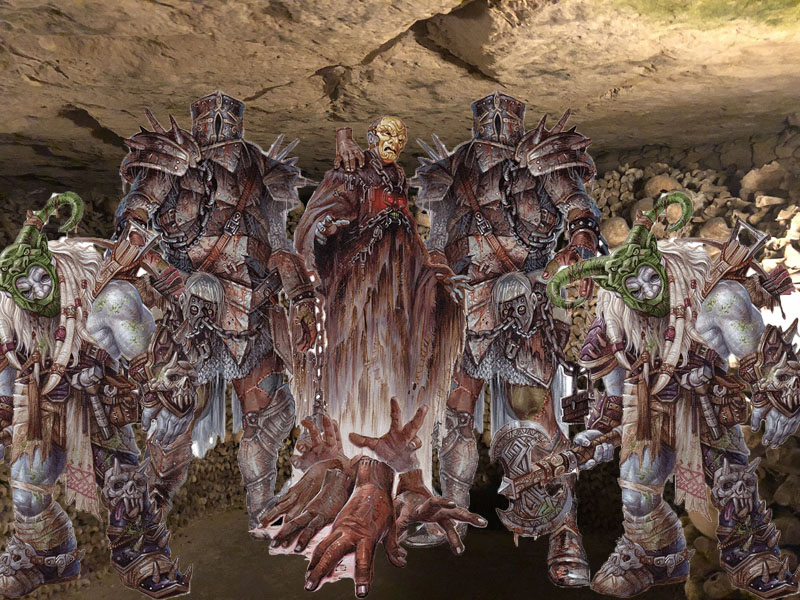
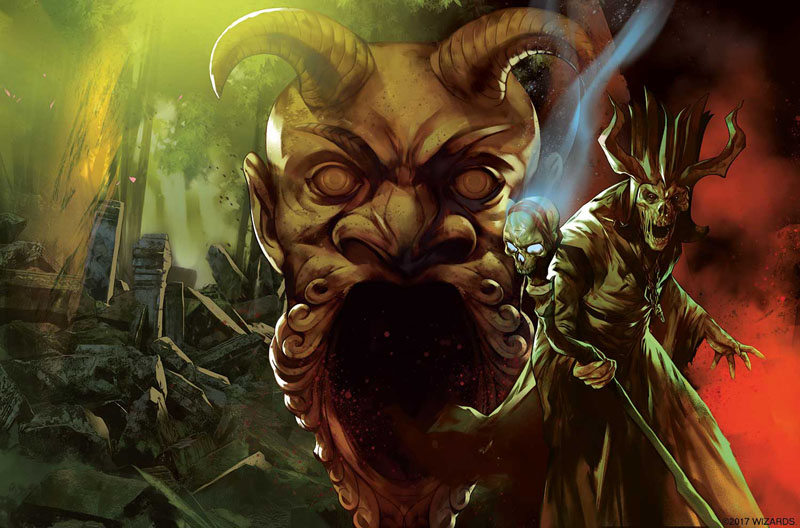
The important part of the session came when they found a secret door that led into a backstage area of the dungeon with hidden corridors and stairways that the Tomb Dwarves and Tomb Guardians use to get around the dungeon without being seen. It also hides the workshop where the Dwarves turn dead adventurers into golems that then become new Tomb Guardians. They also found the offices of the architect and master builder of this tomb. A wight wizard named Withers (say that ten times fast), who is furious with our heroes because they have overcome and, in most cases, destroyed all of Withers’s precious and brilliant death traps. Sorry, not sorry.
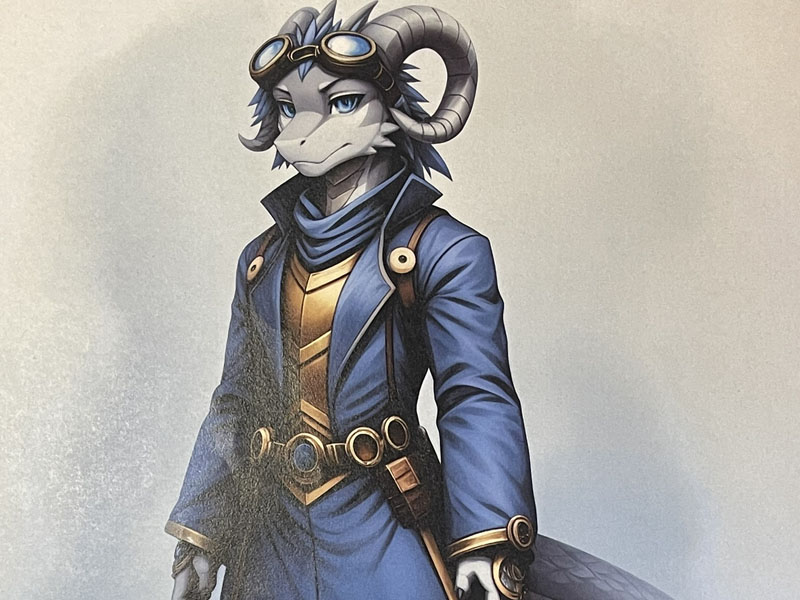
After the obligatory grandstanding and monologuing, a fight ensued. Withers failed to kill our heroes once again, but he was able to make his escape to continue his quest to murder our heroes another time. Count on it. Since the death of Ras Nsi in Session 40, our heroes need a new nemesis. Withers is no Nsi, but he’ll have to do. After the battle, as a final screw you to Withers, Thames, our vindictive dragonborn, destroyed the Tomb Guardian Making Machine by shoving an anvil inside and casting enlarge, which shattered the forge walls and crushed the cauldron beneath. There will be no new Tomb Guardians coming out of that thing ever again.
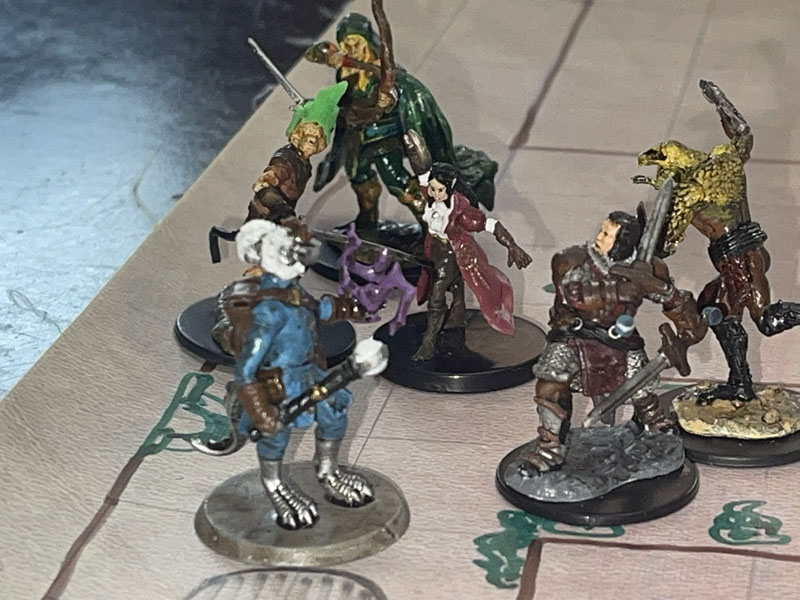
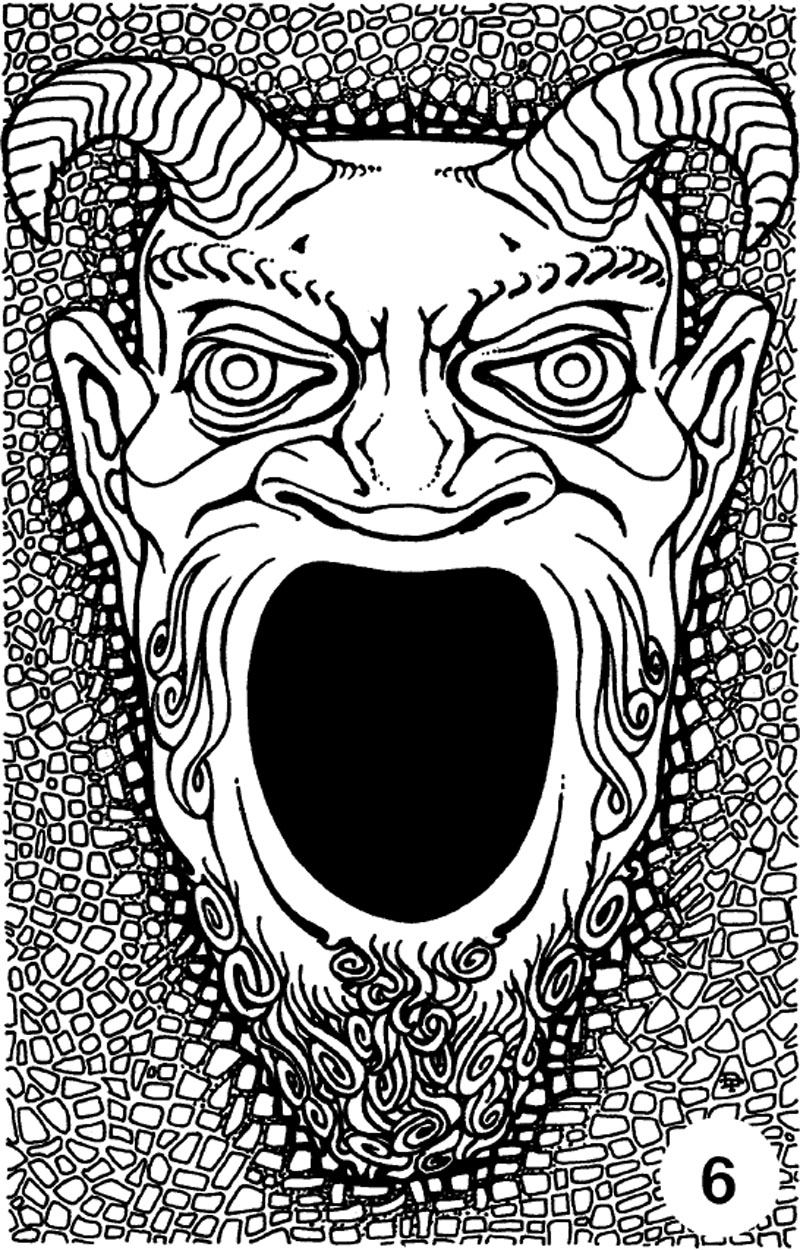
Our heroes fled the area before Withers could show up with reinforcements. They found themselves, yet again, in front of the Green Devil Face at the very start of the dungeon. The whole group was there, Martic, Thames, Bag, Savash, Grum, and Gwen. They were debating whether to rest again in the void beyond the Devil Face, when suddenly Gwen (another Gwen) comes running toward them with no clothes or equipment. Without a moment’s hesitation, Bag of Nails yells, “I stab Gwen!” Last session ended right here.
Welcome back! Okay, Bag of Nails, which Gwen do you stab? The one in your group, or the one running down the hall? “The one in the group.” Do you want to accuse her or talk to her in any way? “Nope. I’m just gonna kill her.” This is perfectly in line with Bag of Nails’s character, especially now that he is possessed by the spirit of the murderous Wongo. I really wish I had manufactured a better scenario were there was some ambiguity as to which Gwen was the real Gwen. I should have waited until they conducted the short rest. When they exited from the Devil Face, both Gwens would be there, presumably similarly dressed and the party would have to solve which Gwen was real and which was the imposter. But there was no guarantee that they would even take a rest, and both Ian and I were ready for the charade to be over.
I generally do not allow Player versus Player or PvP combat, but there are exceptions, and this was a big one. Some players had suspected that their Gwen had been taken over by a shapeshifter of some kind, but others had not, so the fight was awkward and hesitating, which was great. No one was certain if this was the right thing to do. Everyone was attacking non-lethally, except for Bag of Nails as expected, and also Grum, who felt shame at the betrayal and his own failure to protect the woman he has grown to love. For her part, the real Gwen did not fight, and pleaded to not kill her twin, while the fake Gwen was fighting for its life.
Just before it dropped to zero hit points, the doppelgänger surrendered, pleading, “No, please don’t kill me. I only want out of this dungeon.” Thames restrained the creature, who was still wearing Gwen’s face, when Bag of Nails bashed its brains in with Wongo’s mace, killing it instantly. Thames tried to stop him, but Bag dodged this grapple and no one else moved to do anything. Gwen is dead. The doppelgänger reverted to its true form upon death, so at least the group was assured that they killed the right Gwen.
What followed was a long bit of me not doing anything as the players recounted the story to the real Gwen, even though the real player was there for all of it, but his character was not. Out of game, the players all loved this deception after the fact. So many things made sense now that seemed so ridiculous earlier. I had a blast listening to the group retell the events of the infiltration, especially recounting the moments of realization that dawned upon them. All credit for this successful ruse was due to Ian. My only job was to stay quiet and not spoil it as it played out. The best part of this recap, was the fact that the real Gwen was not happy that they used her precious skull collection to save Martic’s life in Session 45.
Real Gwen’s tale was uncomplicated. Back in Session 44, she chased after one of the skeleton keys, caught it and killed it. Then she blacked out. She woke up naked, which is weirdly a trope of the original Tomb of Horrors. She was groggy, lost, and alone in the dark without a torch, unsure where she was or which tomb she was in. With no weapons, equipment, or even a light, she fumbled around in the dark for hours. hiding from every noise. She found her way back to the real Tomb, and was heading here hoping to find you at the Devil Face and she did.
For his part, Thames was just glad to have a person who could cast healing spells again. He’s very pragmatic. As for poor Pox, the cleric cast speak with the dead but the answers didn’t reveal much. As usual, Gwen led the interogation, “Why did you choose our party?” You were the first non-tomb dwarf I saw. “What unique item did Wither’s possess?” I don’t know anything about that. Then Bag of Nails asked, “Who is Withers?” Unh, He’s the undead thing we just fought; says he built this place. (Oh yeah, I forgot). “What were your plans to escape?” I couldn’t escape alone. I thought you could help me. But you morons don’t want to escape. You want to go deeper. You fools! And finally, “How did you get trapped in the tomb to begin with?” I entered with the Company of the Yellow Banner who were looking for the Eye of Zaltec. They wanted to resurrect the thing in the lamp that the ranger is holding. I wanted to steal the gem and sell it for a fortune. We got attacked by these four-armed statues on a lower level. Seward was killed and we got split up. That goat wizard, Devlin, and I ran into a gang of Tomb Dwarves. Devlin was killed and I barely escaped. I hid in the fake tomb and then I found Gwen.
Moving on, we got more important things to do. Like hunt down that A-hole, Withers. In the last encounter, Withers made a comment that they don’t have all the tomb treasures that they think they do. They had to do a quick recount. Martic has I’jins wand of wonder. Pox/Gwen has Papazotl’s amulet of health and it is still on its corpse. Savash has Moa’s staff of the serpent. And Bag of Nails has Obo’laka’s ring of protection. Hold on, where’s the ring, Bag? And why do you have Wongo’s mace of terror? What did you do? This led to another “discussion” that I had no part in while everyone yelled at Bag of Nails. None of the players were actually upset, but we gotta pretend, you know.
Back to our inventory, we have four Trickster items on our persons. Thames was forced to dump out the entire contents of his haversack of holding to see what was left. They found Obo’laka’s ring which we know is real, and Kubazan’s bracers of archery which we just obtained last session, so it should be real. This left just Nangnang’s pearl of power, which they collected during the time when there was great confusion over which tomb was real and which was fake. Gwen grabbed the pearl and nothing happened. No attunement, no magic, no possessing spirit. It was a fake. Damn you, Withers!
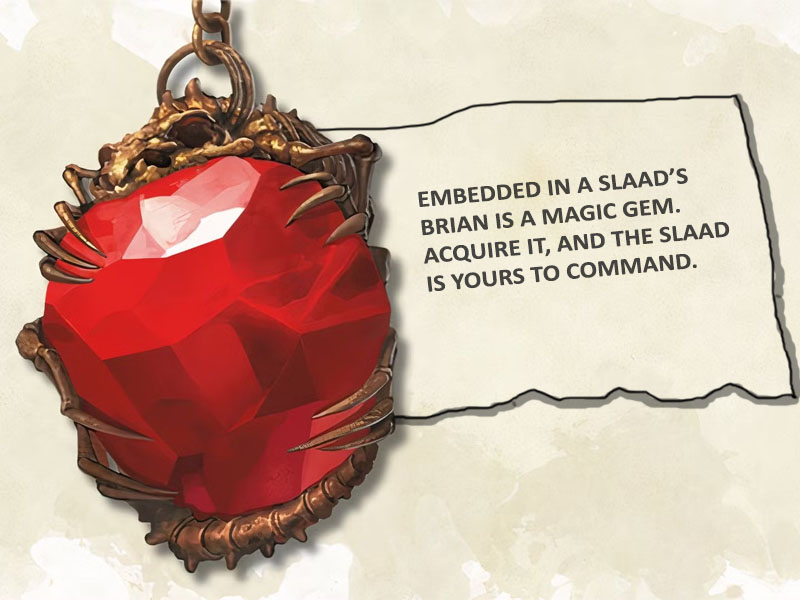
We gotta find this guy. They cast locate object looking for the magical gem that Thames once held in his hand but was then stolen by Withers. This gem happens to be the control gem for the invisible slaad that is guarding the real Nangnang’s Tomb and the missing pearl of power. This also happens to be where Withers is right now. It was actually pretty fun to pause the game while I calculated the distance from the party to this gem. I tell the group that the gem is 150 feet East and 25 feet down from their current location. Great! That means it is still in the real tomb. Let’s go get this guy!
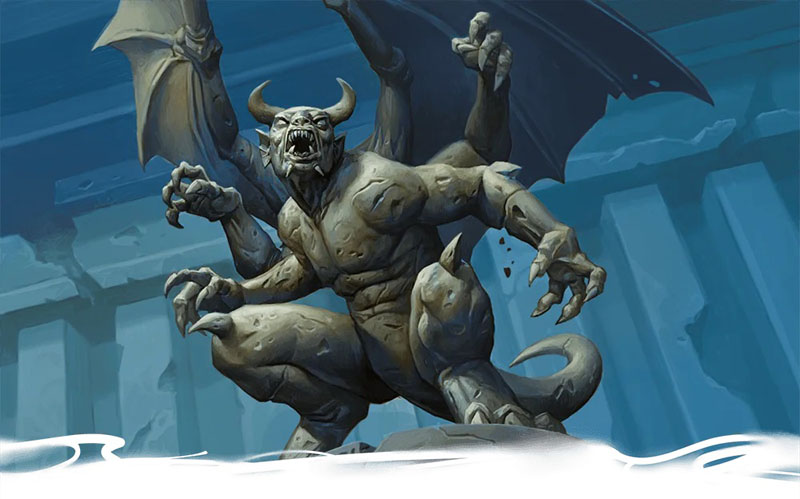
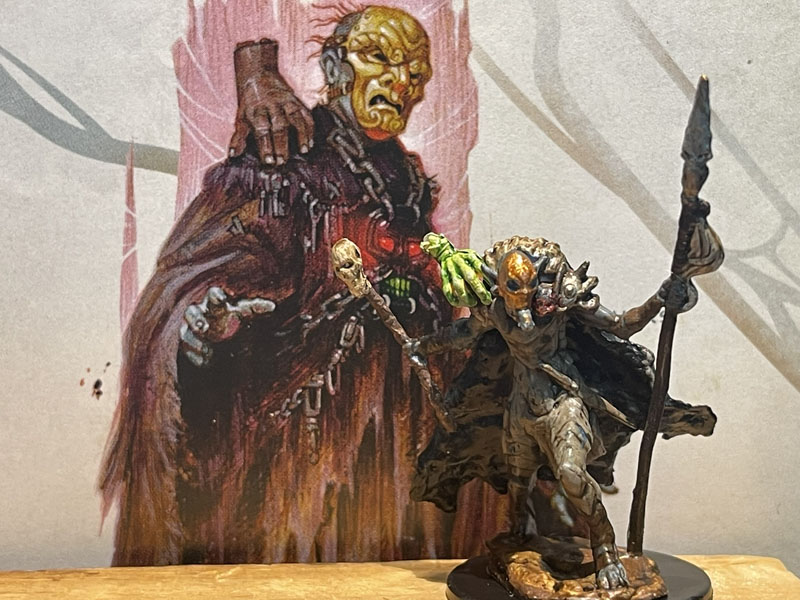
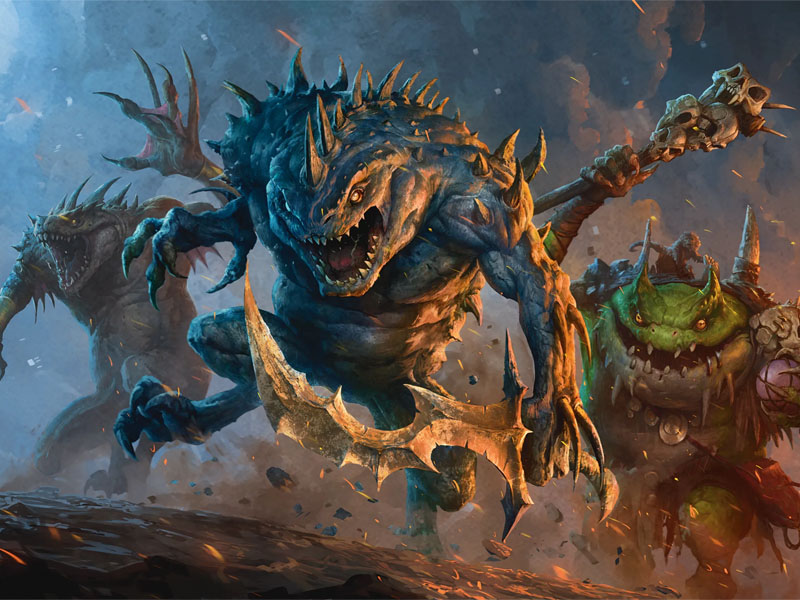
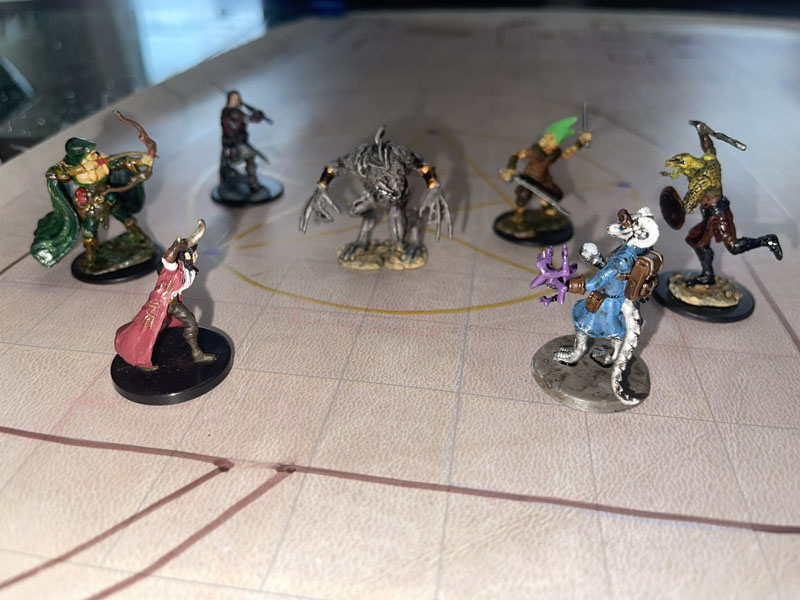
Running down to the second level, past the wine-soaked floors that have yet to be cleaned up by the maintenance dwarves (‘cause we killed most of them), through the wine trap room, into the crawlway, and into the real Nangnang’s Tomb. Inside the tomb, Withers is speaking with a hideous and huge frog-beast. This one is not invisible and is standing within the restraining barrier pentagram. For the first time, the party can see the grotesque nature of this behemoth. Standing over 10 feet tall, the beast hardly resembles the gentle nature of its original frog form. This hulking grey monstrosity is just a mass of fanged teeth, razor sharp claws, and seething hatred.
As the group stumbles into the room, Wither’s says to the Slaad, “I will release you from your bond. Just destroy these vermin (pointing at our heroes, naturally) and it is done.” Withers throws the leather pouch containing the control gem to the Slaad and kicks away the salt line barrier. The Slaad is free. Withers grins a wicked grin at our heroes and vanishes, once more touching the black skull amulet he wears around his neck. The Slaad turns to our heroes and says, “KILL!”
This fight was different than the previous slaad fight in the fake tomb. Back then they were fighting to survive. Here they were fighting to keep that gem out of the Slaad’s hands because they were terrified of what might happen if he can get a hold of it. This was exactly why I put the gem in the pouch, so neither side could touch it immediately. Also, this time the group did not have access to the banishment spell. The group will have to find a different way to deal with this thing. To make matters worse, the Slaad’s first action was to cast fear on the group. Everyone failed except Bag of Nails and Thames. These odds were not good.
The group was in trouble. Most spells allow a reroll to resist its effect each round. Fear only allows a roll when the victim breaks line of sight. The only way out of this room is via the crawlway ten feet up on the wall. Everyone tries to get into this crawlway, but they failed, so they were all trapped in the room. Bag of Nails decided to grapple with the Slaad and succeeded. But the Slaad did not care. He doesn’t need to move. He cast fireball on the group doing some significant damage and it doesn’t trigger a reroll to resist the fear. They are screwed.
Fortunately, despite Wither’s command and the Slaad’s own words, it does not care about killing this group. It wants to get away as soon as it gets at that gem. Once again, Bag of Nails was very helpful. Bag (big B) slashed at the bag (little b) with his claws. The bag tore open and the gem popped out. Bag and the Slaad both tried to catch the gem as it tumbled through the air. Both passed the sleight of hand ability check but the Slaad rolled higher, so the Slaad caught the control gem first. The Slaad cried out, “Freedom,” and disappeared in a wink of an eye as it casts plane shift. Unfortunately for the Slaad, it did not travel back to his intended plane of existence, as we will soon discover.
With the threat gone, Gwen recast locate object once more to track it and the gem. If the gem had left this dimension, the spell would fail. But instead, they learn that the gem is located (hold on while I calculate this)… Okay, now it is located 150 feet north and 50 feet down. So, it (and the Slaad) are still in the tomb. Somewhere. Below. The group intends to chase after this gem, and I can’t tell you why. Let it go. You don’t need the gem or to face the Slaad again. They are unimportant to the quest. But the heroes were determined to get that gem. Right after they loot this tomb.
The last time they were sort of here, in the fake tomb, Thames used his mage hand to empty out the treasures without touching the trapped urn containing them. Not today. This time, unpredictable Martic grabbed the urn and failed the very high saving throw against Otto’s irresistible dance cast on the urn. See, Thames was right all along. Don’t touch anything! And unlike the normal spell, this one did 11 points of damage each round to Martic as he performed his unwilling jig. Martic kept failing the save and Thames was forced to use up the only dispel magic scroll that they possessed. As an artificer, Thames never learned this vital spell, so using the scroll here felt like a terrible waste. But it did save Martic’s life. “Whatever,” groused a disapproving Thames.
To test the validity of this pearl of power, Gwen volunteered to touch it. She felt the presence of Nangnang as it tried to possess her, but Gwen was able to resist the effect. I give the players the option to purposefully fail this roll if they desire, willingly letting the spirit possess you, but Gwen choose to resist. But at least they know this pearl is real. Gwen did touch Papazolt’s amulet and did allow that spirit in, just as the fake Gwen had done. That item is better for Gwen’s stats and if I had to choose between Papazotl’s evil flaw and Nangnang’s even more evil flaw, I’d pick Papazotl too.
Our heroes were about to leave and chase after the Slaad and that gem. Gwen still had locate object active, and now the location has moved. 150 feet east and 25 feet up. But that is where we just came from at the Green Devil face! Let’s move!
Running back up to the Green Devil once more, our heroes came upon a disgusting and disturbing scene. Blood, gore, viscera, and shards of bone were spewed out all over the floor in front of the Devil Face, as if it had vomited out this putrid mass. Which is exactly what happened. Sifting around in the entrails, our heroes found bits of claw, gray skin, and shards of a large red crystal. Our heroes correctly assumed this was all that was left of the Slaad and the gem after it had been shoved through a meat grinder or something. Our heroes were uncertain what or how this happened, but they vowed never to sleep inside the Devil Face ever again.
Our heroes didn’t know this yet, but I was foreshadowing their fate should they ever find themselves in Area 57 The Oubliette. Anyone (except Withers) who teleports or plane shifts within the tomb ends up in this garbage dump of a room. I’ll go over my version of this room when we get there, and yes, we will end up there at some point. But once in the room, you have two choices, choose correctly and you will get teleported right to this location, as if the Devil Face had spit you out, whole and alive. Choose wrong and you are disintegrated forever, your fate unknown to others. I’ve changed that so that you are still spit out of this mouth but now you are shredded, eviscerated, and quite obviously dead. Something for other dungeon delvers to discover and for the Tomb Dwarves to clean up. When they get around to it. If there are any left alive.
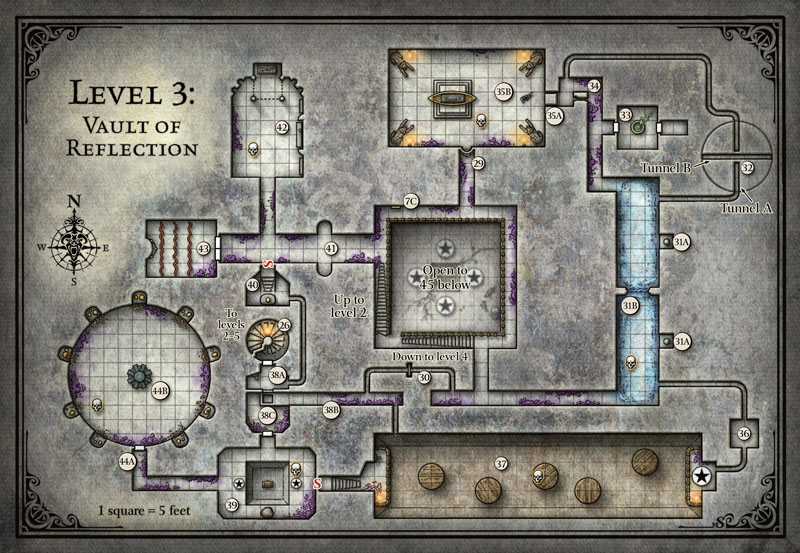
Disappointed that they won’t get their own enslaved Slaad to boss around, our heroes return to Level 3 to clear out that floor. They go back to Area 38A, murder the golem in the room and remove the iron lever, so that the trap in Area 38C can no longer be activated. They go into the trap. It does not trigger and they wrench open the hatch leading into Area 39 Golem Pit.
I made no changes to this room and just prayed that we would get through it quickly because I was sick of this third level and just want to move on. I did add that there was another skeleton key within this room. Oh yeah, I forgot we were still searching for these things. This skeleton is inside the transparent pit alongside an unmoving clay golem. Hey! Did that skeleton just give me the finger? Lemme at that guy!
For me, the best part of this trap is that it brought back the Trickster God spirit advice, which have been absent the past few rooms because no one had any relevant Trickster possession. Moa infected Savash attempted to be thoughtful and remind the group that they need adamantine or magic weapons to hurt the golem. Thanks, dude, too bad the adventure failed to provide any adamantine. But we already got plenty of magic; we’re Level 8 PCs. Next Gwen, repossessed by Papazotl, demanded that someone go stand on the empty plinth. When no one volunteered, she said, “Fine, I’ll do it myself. Now go turn one of the god statues like Acererak wants.” I’m with Gwen; let’s get this over with.
Someone randomly turned the Torm statue, teleporting Gwen into the pit, where the clay golem proceeded to pummel the crap out of her. “Turn the other statue,” she yelled! The others obliged and turned the Azimuth statue (so glad they included these irrelevant Forgotten Realms gods into the adventure at this stage of the game), which randomly selected the inconsequential skeleton key to teleport out of the pit and into the room, wherupon it immediately opened the secret door out of the room and attempted to run away. Needless to say, chaos ensued.
Bag and Savash ran after the skeleton. NPC Grum grew a spine and demanded that they teleport him into the pit to save Gwen. They got him down there, but when they tried again to teleport Gwen out, they randomly got Grum out instead. They gave up on that plan, and eventually got the golem out of the pit (along with Gwen eventually) but their two front line fighter were off chasing a skeleton. Without them, this fight took forever.
Meanwhile the skeleton key made it down to Area 37 The Winds of Pandemonium. There it turned on the wind turbine and broke the lever so that any pursuers can’t turn it off. Then it showed off its spider climb ability (a thus far unseen trick) and tried to climb over to that little hole in the wall that out players came out off the first time they were in this room. Unfortunately for (and unbeknownst to) the skeleton, Bag of Nails also has this ability and was not affected by this trap. Bag caught up with the skeleton, grappled it, and yanked it off the wall, where it was caught up by the raging winds and shattered against the rear wall before falling in a heap on the floor, sixty feet below.
Back with the golem, this fight was a slog. Sword, sword, arrow, arrow, bolt, bolt, cannon blast, slam, slam, guiding bolt. This thing lasted ten rounds and only once did I get to use the golem’s haste ability, dodging two arrows, a bolt, and a cannon blast. Finally, Bag and Savash showed up, and in two crits, took the construct down. When it was all done, it was a simple matter to go back into the pit, and use the golem’s silver key on the chest, avoiding yet another metal dissolving trap. This is getting old WotC; even the OG Tomb of Horrors only used this trick once and this dungeon does it at least six times, including in the next room. For now, they collected another crystal gem, bringing their total up to eight. Before they exited, Bag says to Gwen, “Welcome back. I brought you something for your collection.” Bag tossed the severed head of the Pentagram skeleton key to our grateful cleric.
Onto to the next room, Area 44A, Eyes of the Beholder where our heroes learn that despite collecting 8 crystals gems, they are two short. The magic lock that bars entry to the final room requires ten. I knew I should have just given those gems out when they failed to find them in the proper room. They cast locate object again and learn that the missing crystals are 140’ east and 50’ north of their position. Backtracking through all these empty, broken rooms and areas, they find the crystals hidden behind an illusory wall in Area 31 Reflected Halls. Then it’s back all the way to the crystal door and our destiny with the ten-headed dragon.
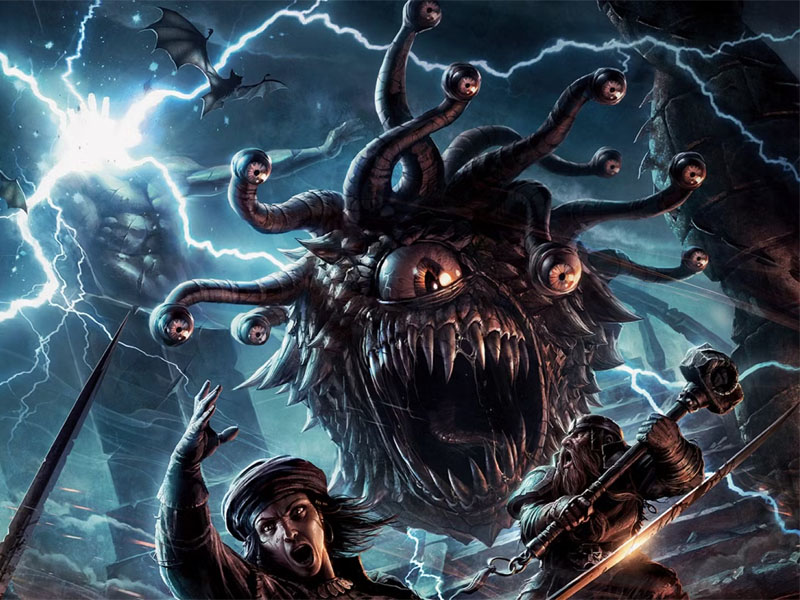
Throughout this level, the floating dead jester Yaka has been warning our heroes about the deadly ten-headed dragon in the final room. Our heroes are pretty certain that it is a beholder, but Yaka insists it is a dragon. I don’t know why I kept up this subterfuge other than to prove that Yaka has no idea what he is talking about. Regardless, this is one of the deadliest rooms in the dungeon with no real way to prepare your players for it. As such, if I really wanted to be mean, this could have been yet another TPK, and the end of the campaign for our heroes. I did not change the room, but I had already decided to be willing to allow any creative solution to retreat, since a frontal assault, (our initial plan) was doomed to failure. Let’s do this!
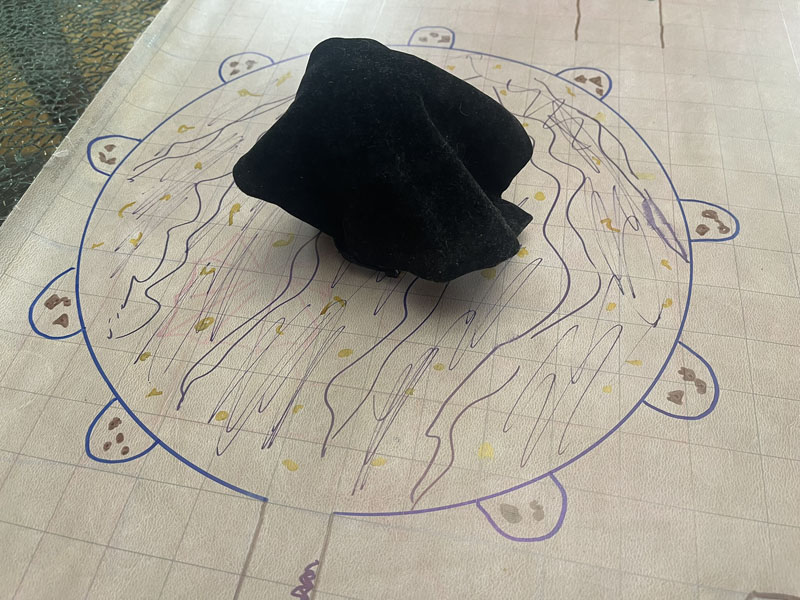
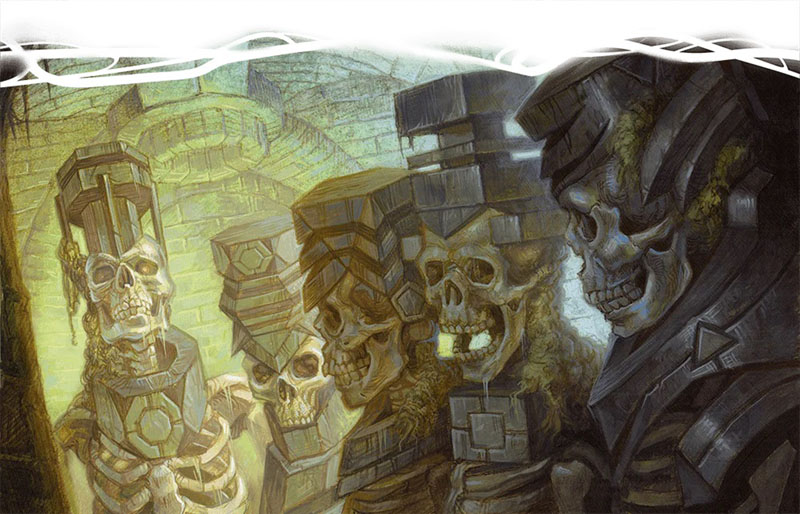
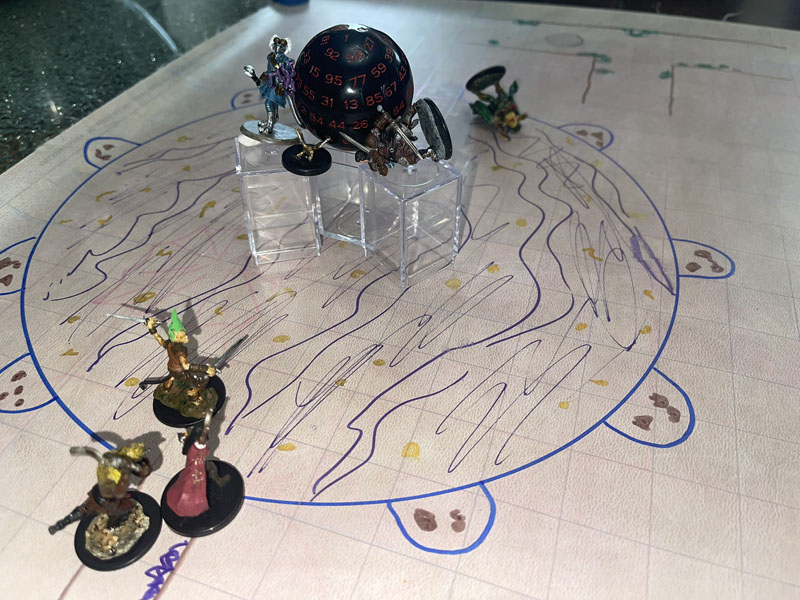
Area 44 Vault of the Beholder. Of all the traps and funky rooms in this dungeon, this is the only one that I wish came with some art. Mere words just cannot convey the sense of unsettling infinity that this room tries to describe. The room is a half dome but the floor is mirrored so that it looks like a sphere. I added that the curved walls are painted with a cloudy, translucent purple and with the hundreds of candles in the room it looks like the inside of a galaxy inside a snow globe. Then there is the mysterious orb-shaped object covered by a black shroud, hovering in the center of the room, 20 feet off the floor. What could that possibly be?
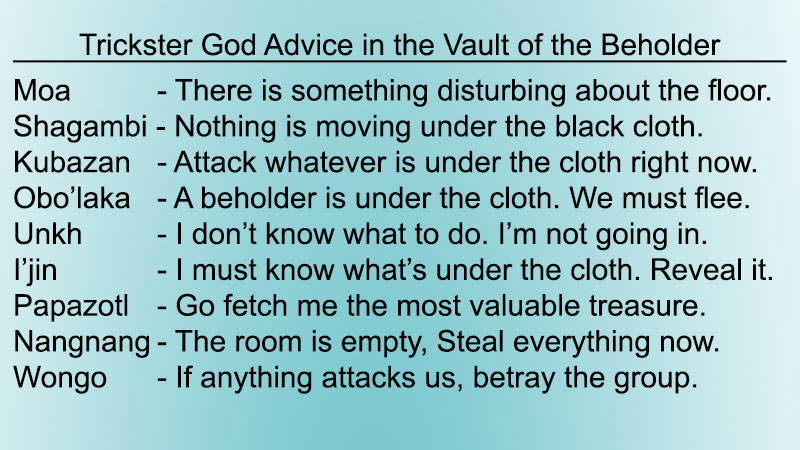
The book provides advice/clues for three of the possible Trickster god possessions, but this room should absolutely have advice for all nine. Who knows what gods your players may be possessed by at this time? It is best to be prepared for all possibilities. Below, I have a chart for the potential advice from all nine gods upon entering this room. I kept the provided advice for the three gods listed in the book, and invented the other six.
That being said, I am very conflicted about this room. It has a one of the most lethal monsters in the game that is several levels higher that the challenge rating appropriate for the party’s level. (CR13 versus 8th level characters.) Plus, there are environmental features of the room that will turn this simple boss battle into a bloodbath. There’s the permanent invisibility of the monster, the frictionless floor that makes it nearly impossible to stay on your feet, and there is the gravity well under the cloth that once again penalizes anyone wearing metal armor or wielding metal weapons. Since there is no forewarning about this room or how it works, be prepared to pull a punch or two until your group can retreat, regroup, and come up with an actual plan.
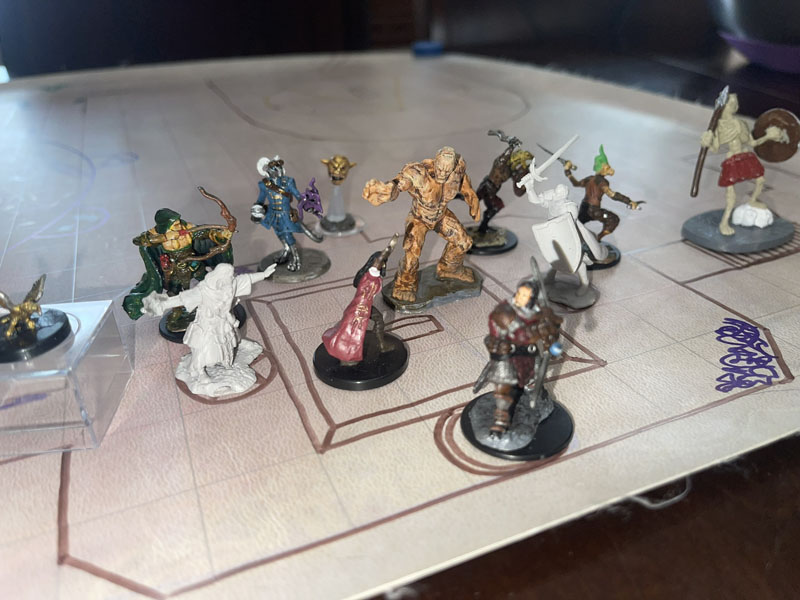
For us, the entire front line entered the room, where most of them failed to stay on their feet and began sliding across the room. Only Bag of Nails was able to use his shoeless clawed feet to dig into the floor and maintain a foothold. Martic, Grum, Thames began sliding toward the far wall. Gwen and Savash were in the rear and both stayed in the doorway, afraid to enter the room.
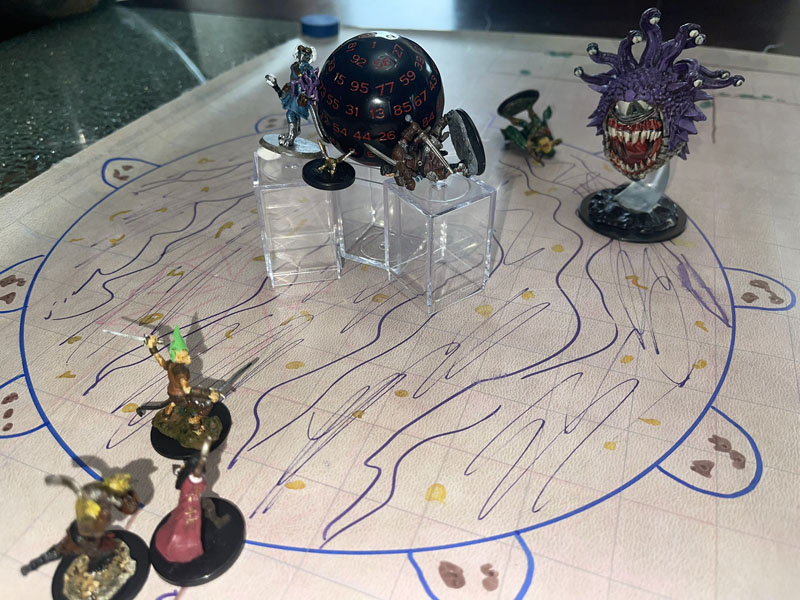
As half our heroes were gliding across the floor, the black drape was magically whisked away, revealing the giant black orb floating in the center of the room. That’s not a beholder! No, it’s worse. Fortunately, for our party, only Thames, Gwen, and Grum wear metal armor. Martic, Savash, and Bag wear studded leather and Gwen is outside the room, so they are unaffected. Thames and Grum are not so lucky. As they slide across the floor, the giant magnet that is this sphere grabs them and yanks them 20’ into the air, slamming against its hard surface for 2d6 falling upwards damage. Worse, they are now pinned to the surface of the sphere, unable to free themselves or move. Even Seppi IV, who is made of metal, was sucked toward the sphere and is stuck there.
That’s when the invisible beholder attacks. Suddenly, beams of light begin shooting out of thin air, randomly striking our heroes. The book allegedly give combat tactics for the beholder, but really it only gives a few bits of trash talk for the beholder to say, such as, “You are no match for Belchorzh the Unseen and his death rays!” I don’t call them “terrible eye rays” as the book suggests. That sounds too dumb for even an insane eye tyrant to say. By the way, I pronounce its name as “Belch-zorj” although it is apparently supposed to be “BEL-korj). Tomato, Tomahto. But the beholder only speaks Deep Speech and Undercommon, which I guarantee no one in your group speaks, so just have this guy speak in Common.
As for legit combat tactics, since my beholder is insane, it does not have any coordinated attack strategy. It is completely random. I have seven possible targets, so I use a d8 to choose my victim (1-4 are the four players as they are seated clockwise from me around the table, 5 is Summerwise, 6 is Seppi IV, 7 is Yaka, 8 is DM’s choice.) There are ten possible eye ray attacks, which uses a d10. I rolled the dice out in the open, but I rerolled if I got any duplicates, including for the victim. I want to spread the damage out across as many people as I can.
In Round 1, Martic made his save against the Paralyzing Ray, but was still sliding helplessly across the floor. Gwen made her save versus the Enervation Ray, taking only 18 points of damage; hardly worth the effort. Although it is always satisfying when there thematic reason for the save. A cleric of Death making a save versus necrotic damage feels right. Lastly, Thames failed his save against the Disintegration Ray. Incredibly, he survived the damage, but barely. He will not survive another.
For their turn, Thames and Grum wasted it trying to free themselves from the magnetic sphere. Martic could no nothing until he stopped sliding across the room, while Gwen and Savash had no targets and no options, so they did nothing. Bag of Nails choose to fire blindly into the room and inconceivably, hit the beholder for twelve points of damage. This will be the only damage Belchorzh takes today.
Round 2. I do have a combat tactic rule that Belchorzh would attack anyone who dared to damage it in the previous round. The beholder turned his first attack upon Bag of Nails who failed his save versus the Sleep Ray, dropping him to the ground and out of the fight. Effective, but not as fun as blasting him with a high damage attack. Next, Belchorzh blasted Summerwise with the only eye ray, he could survive; the Slow Ray. I don’t know what he was even doing flying around the room to begin with, he always avoids combat, so he flew out of the room as slowly as possible. The last ray was the deadliest. Another Enervation Ray blasted poor Grum as he hung helplessly to the black sphere. He failed his save and with the damage he took earlier, Grum was knocked unconscious and dying, with no way to get to him and help him. With two heroes were incapacitated; we need to get out of this room right now!
Fortunately, Thames and Martic have a plan. First, from the doorway, Gwen and Savash were able to grab the sleeping Bag of Nails and pull him out of the room. Next, Thames asked where the black curtain was that was initially on the black sphere and how much it weighed. Guessing where he was going with this, I told him, “Over in the corner and ten pounds.” Thames cast mage hand and used the cloth to recover the black sphere. Once the gravity sphere was covered again, the magnetic ability ended. Thames, Grum, and Seppi were released. Seppi flew off, Thames was prepared and took half damage, but Grum slammed onto the floor, taking damage and an automatic fail on his death saves.
Thames wasn’t done. As his object interaction, he asked he could hold onto Grum’s body. Yes. He asked if there is any recoil when his blast cannon (currently held by Seppi) fires? Yes. As my bonus action, Seppi flies over to me and Grum. Then Seppi lines up a shot to hit the wall opposite the door we came in. Awesome. When the cannon fires, the recoil sends you three sailing across the floor toward the open door and salvation. Roll an attack roll, DC12, to see if your aim is true, or if you smash into the wall near the door. 18! You sail through the door and land in a heap in the hallway just as Gwen and Savash are trying to get the unconscious Bag to his feet. All of you are out of movement and are still in sight of the invisible Belchorzh. Martic, you are still on the far side of the room, up against the wall. What do you do?
Martic pushes off the wall like a coiled spring, gliding at maximum speed toward the emergency exit. As he slides, he empties out the contents of his waterskin onto the floor. I have no guesses as to what he is planning. But then, just as he reaches the hallway, he pulls out one of his last Deck of Illusion cards; a magic item that I gave him way back in Session 2! The last time we saw these cards was in Session 34. These cards have to be placed in water to activate. The water is supposed to be in like an ocean or a lake, but I had made no rules about the amount of water needed. Randomly selecting a card, it sails through the air and lands in a tiny puddle of water.
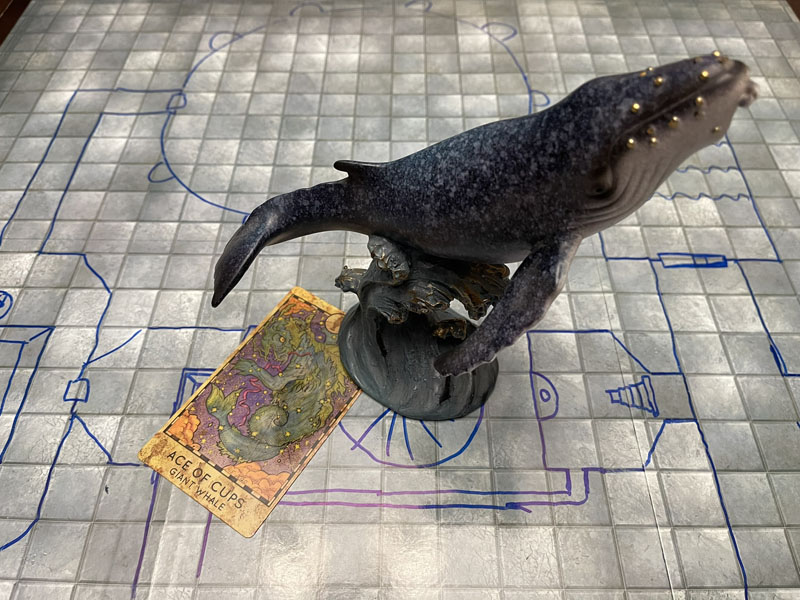
Suddenly, an enormous blue whale fills up the entirety of the room. It reminded me of the scene in The Hitchhiker’s Guide to the Galaxy when two ballistic missiles, intended to kill the heroes of that story, were improbably transformed into a bowl of petunias and a very surprised whale. I like to pretend that our whale was just as surprised. As was Belchorzh, who spent the round trying to figure out what just happened. With a giant wall of a whale blocking his vision, our heroes (not the hitchhiking ones) were able to run down the hall and escape the vile rantings and aptly titled death rays of Belchorzh. Fortunately, Belchorzh does not give chase, and our heroes are able to stabilize Grum, who had just one death save left. Our heroes are severely hurt and low on resources (again) and need to rest. But where?
Next week, Iconic gargoyles punish our penny-pinching party, and one hero maims himself to beat an unbeatable foe.
As always, never fear the absurd, and Game On!
It is important to note that suddenly, and against all probability, a sperm whale had been called into existence, several miles above the surface of an alien planet. And since this is not a naturally tenable position for a whale, this innocent creature had very little time to come to terms with its identity. This is what it thought, as it fell.
Ahhh! Wooh! What’s happening? Who am I? Why am I here? What’s my purpose in life? What do I mean by who am I? Okay, okay, calm down, calm down. Get a grip now. Ooh, this is an interesting sensation. What is it? It’s a sort of tingling in my… well, I suppose I better start finding names for things. Let’s call it a… tail! Yeah! Tail! And hey, what’s this roaring sound whoosing past what I’m suddenly gonna call my head? Wind! Is that a good name? It’ll do. Yeah, this is really exciting. I’m dizzy with anticipation! Or is it the wind? There’s an awful lot of that now isn’t it? And what’s this thing coming toward me very fast? So big and flat and round, it needs big wide sounding name like, “Ow”, “Ownge”, “Round”, “Ground”! That’s it! Ground! Ha! I wonder if it’ll be friends with me? Hello, Ground! –SPLAT–
Curiously, the only thing that went through the mind of the bowl of petunias, as it fell, was, “Oh no, not again!” Many people have speculated that if we knew exactly why the bowl of petunias had thought that we would know a lot more about the nature of the universe than we do now.

Don’t forget to check out my Tomb of Annihilation Resources Page, filled with all the stuff I use to make this epic campaign even more epicier: My full Campaign Diary, plus Handouts, Maps, Charts, PDFs, Images, and more to use, abuse, or ignore at your peril. All the templates and instructions for my Trickster Cubes are found here as well.
And written specifically for this adventure, read my Explorer’s Guide to Chult to delve into all the legends, lore, history, religion, and culture that I used to bring even more life to this adventure.


Hi Rich, I stumbled across this blog a couple of weeks ago, and have been working my way through from the beginning – I’m still in the middle of Waterdeep: Dragons Heist… I can’t even remember what I was searching for at the time, but I wish I’d done it sooner! Keeping this going for so many years is a fantastic achievement.
I played RPGs in my youth (Warhammer FRPG rather than D&D in my case) and then gave it up for many years before, mid-pandemic, thinking “I wonder what D&D is like these days…” Far too much money later, I now DM two games for adults (and play in a third!) and two after-school groups for 9- to 11-year-olds. I love that you started playing with your kids.
LikeLiked by 1 person
Thank you for your support. This makes the blog worth doing. I also loved Fantasy Warhammer in my youth. Skaven rule! Very similar story to yours, though you play in way more campaigns. How do you have the time? I was shocked when I learned that Thaco was dead. Were you? Keep up the good work indoctrinating kids into the cult. Though I pray that Hasbro doesn’t ruin the game for younger players with their subscription service BS. What campaigns are you running? Keep in touch.
LikeLike
A completely insane and randomly deciding beholder sounds like so much fun to fight! That is something I think a recap can’t do justice. Good to see the series going strong! Thames PLEASE stay alive you’ve made it too far to die now.
(Side note, not to toot my own horn or anything but I wanted to thank you for making these recap posts/especially that Witchlight one because it got me to do my own recap blogging series for my own Witchlight campaign and stay more consistent… And let me just say… My group and I have finished Wild Beyond the Witchlight!!)
LikeLiked by 1 person
You’re right the recap does not do this fight justice. I was also too busy running it to take good notes for either fight. But my guys are always good about reminding me what they did that I forgot.
I love that you guys finished Witchlight. Can’t wait to read about it. I swear I will get back to that campaign and wrap it up eventually.
LikeLiked by 1 person
Wait, session 47? Holy crap, but I’ve been reading this blog a long time. (I joined at the start of Phandelver). Congrats on such a long-running blog!
LikeLiked by 1 person
I’ve been enjoying your story immensely! And my group is currently trying to speed-run the tomb, so I have been helped a lot by your insights about running this adventure. Thanks so much for sharing this!
To be fair, I don’t think they’re intentionally trying to speed through, but they’ve found the maintenance tunnels and are driving steadily downwards.
LikeLiked by 1 person
I love the maintenance tunnel of the tomb. This is the first “funhouse” dungeon that has a practical reason to exist and still function. It makes the tomb feel like Disneyland built by a madman. My group will also attempt to use these tunnels again but Withers has a surprise for them.
Thanks for reading and sharing and let me know how it all works out.
LikeLiked by 1 person