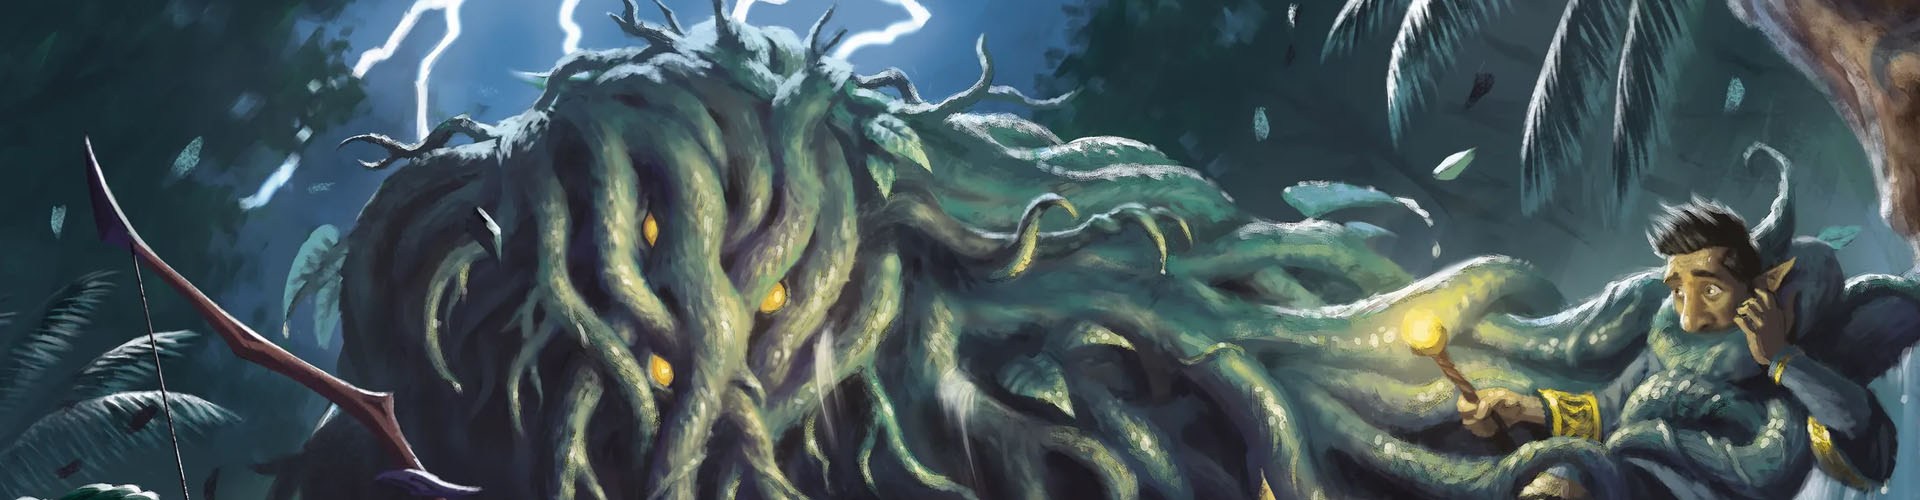
This week, Withers is done dealing with our heroes shenanigans and sets one final trap in an epic mini boss battle.

When last we left our heroes, they had cleared out the first four level of this ultimate dungeon when they barely survived a nasty elemental trap and an endless army to find the last tomb of the Trickster Gods for whom this Tomb is officially named. They were also finally betrayed by the Yuan-ti spy, Savash, when he disappeared with the magic artifact the evil snakemen needed to enact their own end-of-the-world scenario. But one apocalypse at a time; we still need to defeat Acererak and his Death Curse.
Our heroes tried to sneak down to the next level, when the architect of this tomb and the inventor of all these death traps, Withers, blew up the stairs leading down in a giant explosion. Now the only way to access this next level is via an open pit that feels like an obvious trap. But Bag of Nails is pissed that his fur got singed in that explosion and is already securing a rope to rappel into the void.
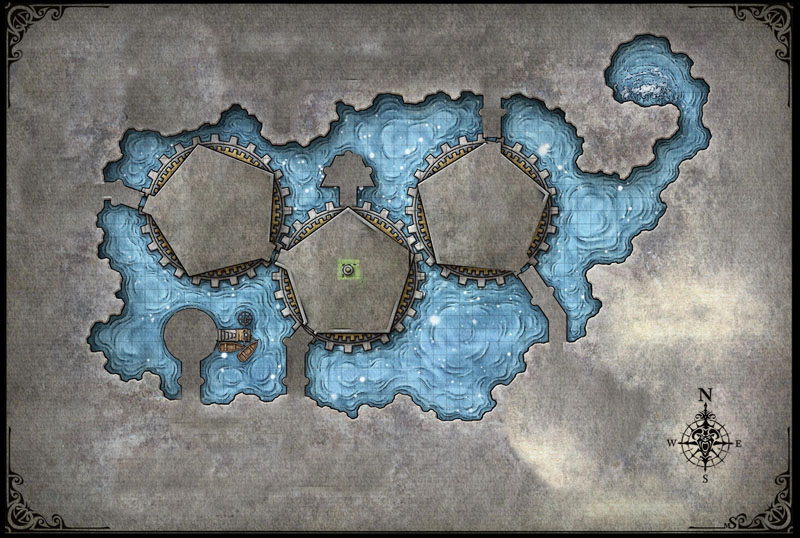
Before we get to the chaos that is about to ensue, let’s review how we got here and how this level works. The first four levels of the dungeon, despite their zany traps, have been a standard 10’ high dungeon that has basically four major encounter groups that radiate out of a central stairwell along the cardinal directions. This fifth level is presented like a wide open cavern but then hide it by stating that the ceiling is only 15’ high and that the pit leading down to it connects directly into the first “room”. This is a mistake because it never gives the players a chance to appreciate the large scope of the area, especially after having trudged through countless sessions of enclosed dungeon hallways.
My Level 5 is a huge cavern, 50’ tall and when the players attempt to rappel down into it, they descend out of the ceiling to reveal the entire space, including what appear to be giant gears grinding above an enormous underground lake. I created a special player map that shows what this looks like from above, hiding the rooms that exist inside those gears. Back in Session 22, my heroes received a prophesy that specifically mentioned something called the “Gears of Hate.” Hopefully, they can recall the clues given then about this area. Also, as my group descends into the cavern they realize that they are inside an invisible column that prevents them from moving in any direction other than straight down into the gaping hole in the roof of the central gear. This the players on track, allows me to set up my trap, and maintains the dungeon as the developers intended.
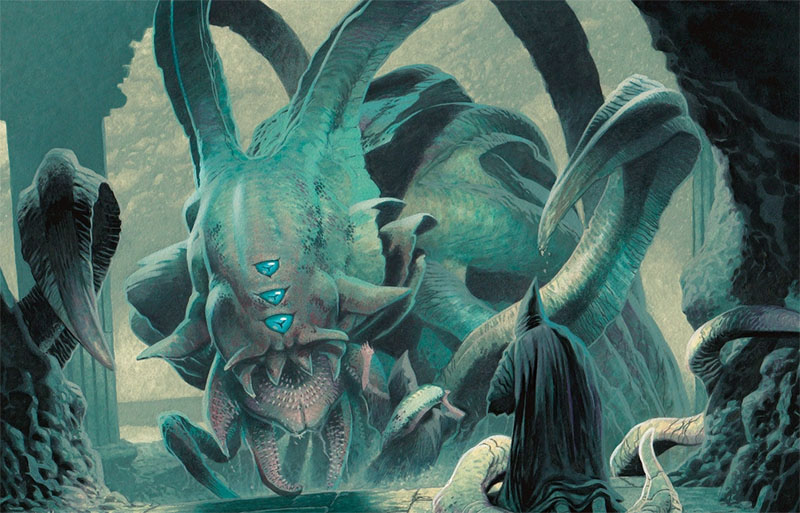
Aside from these gears, the main feature of the level is the aboleth that lives in the lake. Another captured monster similar to the beholder on Level 3, the aboleth has no lair actions and wanders the lake perpetually bored and driven insane by captivity. The aboleth’s insanity has given it a split personality; one angry and evil, the other innocent and childlike. Periodically, I had the aboleth connect with a random PC via telepathy, rolling a 50% chance to get either persona. Its full name is G’lyh’rul, pronounced guh-LEE-rool. To further divide the two, the nice one calls himself Gilly and the evil one calls himself Leerule.
To simulate this telepathy I would text the random player that some “thing” is trying to talk to them but the voice is only in their head. To Martic I sent, “A childlike voice in your head says, “Hi! My name is Gilly. Who are you? Have you come to play with me?”” But a half hour later, Gwen got a message that read, “Who is this? My name is Leerule. Reveal yourself so I may enslave you!” Sometimes the player would respond, but for the longest time no one shared what was happening, afraid that the rest of the group would think they were insane. Once they realized that everyone was having these shared encounters, they were convince that there were two dangerous things living in the lake, never suspecting a single aboleth.
Onto Withers and the main event. Since the death of Ras Nsi, I need to have another antagonist for my players to hate. With the real big bad guy, Acererak, off gallivanting the cosmos and essential waiting for the player to arrive in the last room of the dungeon, I’ve relied on his minions to be the focus of my player’s wrath. Ras Nsi was easy. He was already a major player in Chult and responsible for all the undead that plagued the players in the early game. But Withers is a nobody. Just a slave with a mind for devious traps, that Acererak turned into a wight so that his traps could be reset and repaired for eternity.
But I wanted him to be something bigger than that. He became the one responsible for all my player’s pain. It started with fleeting glimpses of the Tomb Dwarves, the zombie slaves who built and maintain the dungeon. Through overheard conversation they have a name, Withers. When they finally met the guy after breaking in to his office, he is furious with the annoying players who keep breaking his traps. “Why can’t you be like good little heroes as just die?” Withers fights dirty, using all his resources and minions to set up ambushes and traps. Most annoyingly, when he about to lose, he runs away like a coward, seemingly able to teleport at will which no one else can do in the dungeon.
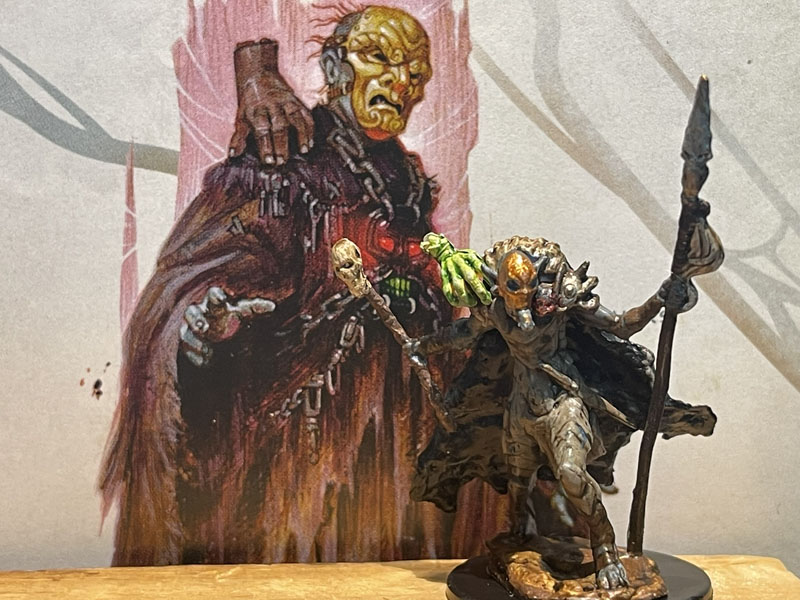
There last encounter with Withers was back in Session 46, and he has left my players alone for a while. (Mostly so I can focus or just running the actual traps in the dungeon, and not Withers’ quest for revenge.) I’ve managed to keep his name alive through various means. Even Yaka, the floating head that was alive at the time this dungeon was built and now follows the heroes around like a lost dog, knows this guy. “Withers? There is nothing funny about the guy. He is a total ass!” But here at the start of Level 5, before the players sidetracked by the planned encounters of the level, is the perfect place to have a final ambush, and it is the best time to stage another epic battle which we also haven’t had in a while.
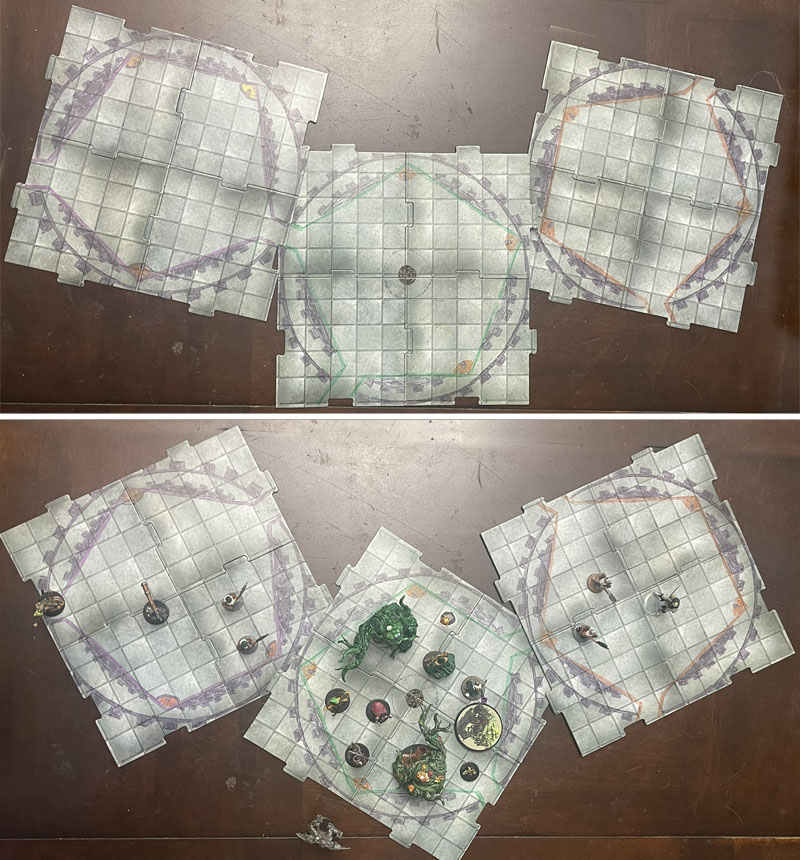
The book states that Withers often uses the control panel in Area 61 to lead heroes to their demise and was directly responsible for the death of Lord Brixton in Area 63. But then it offers no suggestions about how to do this for your players. Here is my plan for Withers’ Final Ambush. By blowing up the stairs that lead to this level’s back door, our heroes are forced to rappel into the central Gear, called the Cog of Rot (Area 58). Once there, an underling hiding above will cut the rope and Withers will spin the gear so that it opens onto the Gas-Filled Room (Area 63). This will activate the shambling mounds in the Cog of Rot. Periodically, Withers will rotate the gears, opening up other hallways, where reinforcements are waiting to rush the party. Withers will use his lightning bolt spell to damage the heroes and heal the shambling mounds. Finally, he will lead the players into the Cog of Acid (Area 59) where he plans to finish off these heroes once and for all.
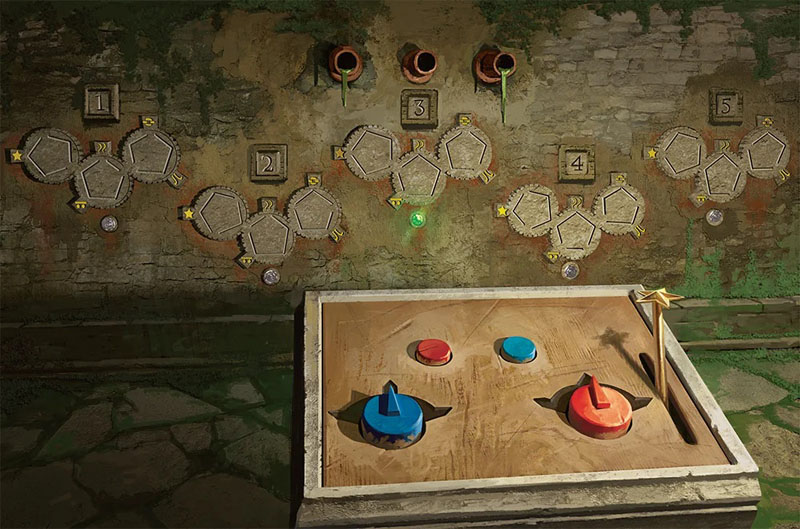
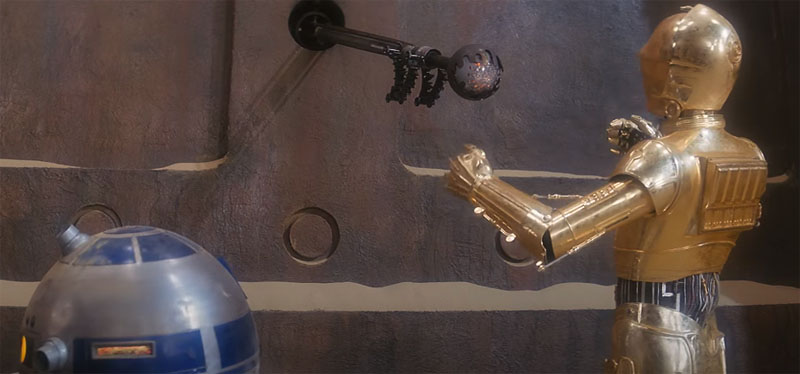
To facilitate this plan, I made three significant changes to this area. First, I changed the starting configuration from Position 3 to Position 5. (See the above diagram). This provides no exit from the Cog of Rot, temporarily trapping the players in this room. Position 3 was written in so that players could access the empty Control Panel room, but this room is no longer empty. Second, when the gears turn it is very fast. As a game mechanic, whenever the gears spins everyone must make a DC15 DEX save or be knocked prone, sliding 5’ from their original position and taking 3 point of damage. This will create an interesting environmental hazard for the eventual combat. Third and most important, I added a camera system to these three cogs. There is a view screen in the Control Room so Withers can watch the chaos and Withers can even cast spells through the view screen into the cog itself. These cameras look like a beholder’s eyestalk to give a nice, creepy callback to Belchorzh in Area 44.
As for the monsters, the only ones original to the written adventure are the shambling mounds. But also as written, there is no way to activate them unless the PCs accidentally do it themselves. Another reason to place an enemy within the Control Room. I added Withers, plus a half dozen Tomb Dwarves that make up the last of his maintenance crew. If they all die here, there will be no one left to restock the dungeon. This is everybody’s Last Stand. I also have the sole remaining Four-Armed Gargoyle that our heroes failed to kill back in Session 48 and one (maybe two) Tomb Guardians. These are the last of these as well, since Thames maliciously destroyed their golem creating kiln back in Session 46. If my players have it too easy defeating these guys, I can also use the invisible stalker and the drow mage Tlad Xolbrys who both escaped the massacre that occurred in the Mirror Room during Session 49. Withers will have found both of them and offered them their freedom if they help to kill our heroes. You can find a PDF copy of these Battle Stats here: ToA Withers Ambush Battle
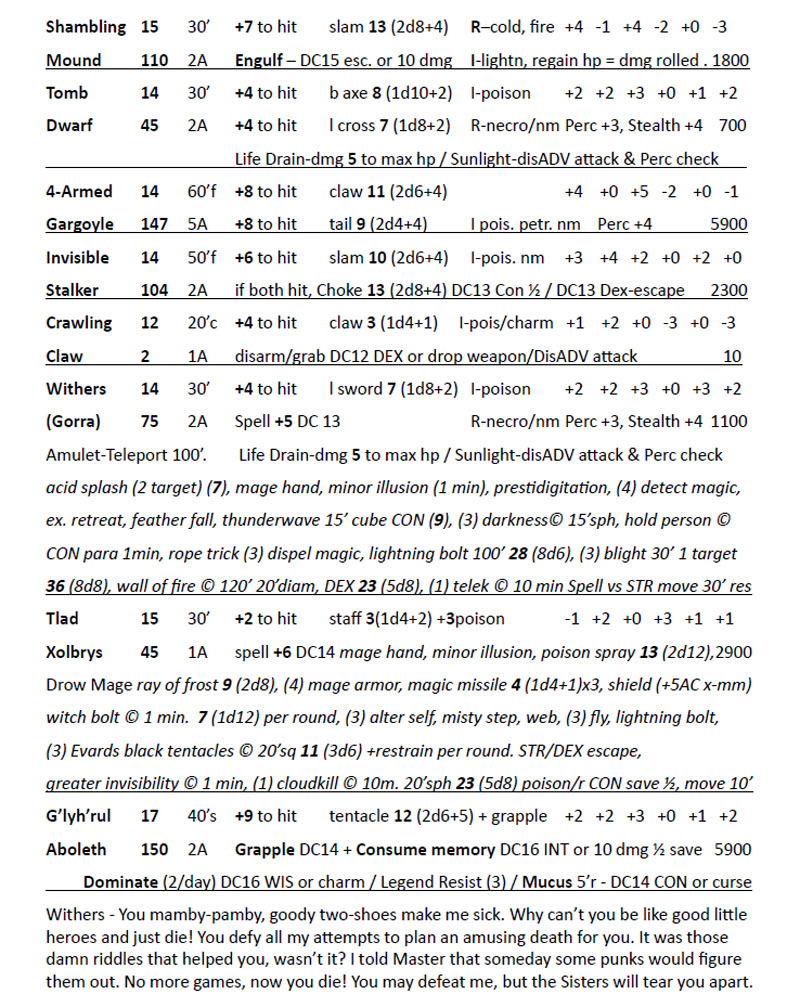
The basic plan is for everyone to rappel down into the open cavern, except for Gwen who will remain up top to secure the rope. The rest climb down and get a full view of the underground lake, the giant gears, and dozens of pipes, valves, and vents going every which way in the cavern. In my world, Acererak’s machinery is run on steam. He’s such a punk. Get it? Steam Punk. Nevermind. Our heroes realize that they are in some invisible tube, and the only exit is to drop into the central gear at the bottom.
Doing so, the first thing the notice is the heat. It is as steamy as the jungle in this gear. They are surrounded by vegetation and there are two exits from this “room”. The first is to the northeast but it is blocked by the other gear in that direction. The second exit opens right onto the lake, but it too is blocked by some sort of invisible wall. Beyond the door they see that they are about 5 feet above the surface of the lake. As they watch, some sort of large aquatic beast break the surface but submerges before they get a good look at it. Next they notice the three fist-sized crystals that are placed up on the ceiling in the corners of the gear. Suddenly one of the crystal blinks, and a wheezy, grave voice mocks them.
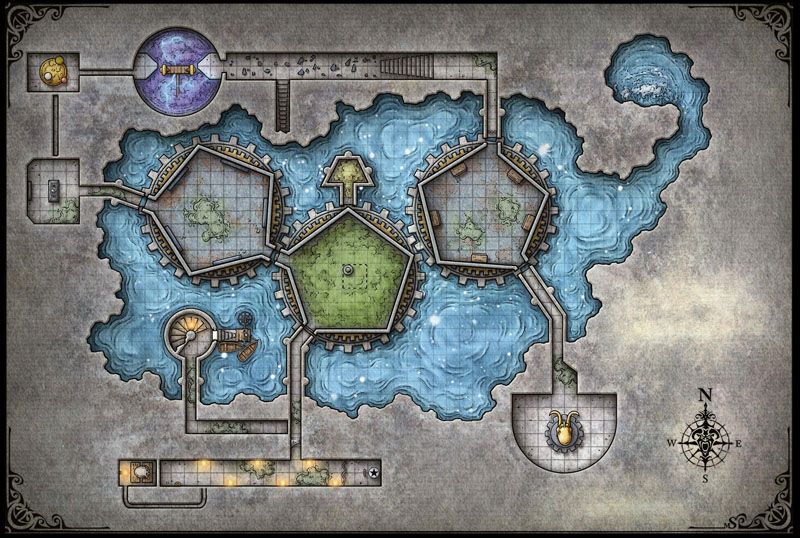
“You mamby-pamby, goody two-shoes make me sick. You defy all my attempts to plan an amusing death for you. It was those damned riddles that helped you, wasn’t it? I told the Master that someday some smart ass adventurers would figure them out. Well, not today! No more games. No tricks, riddles, or clues. Today, you die!”
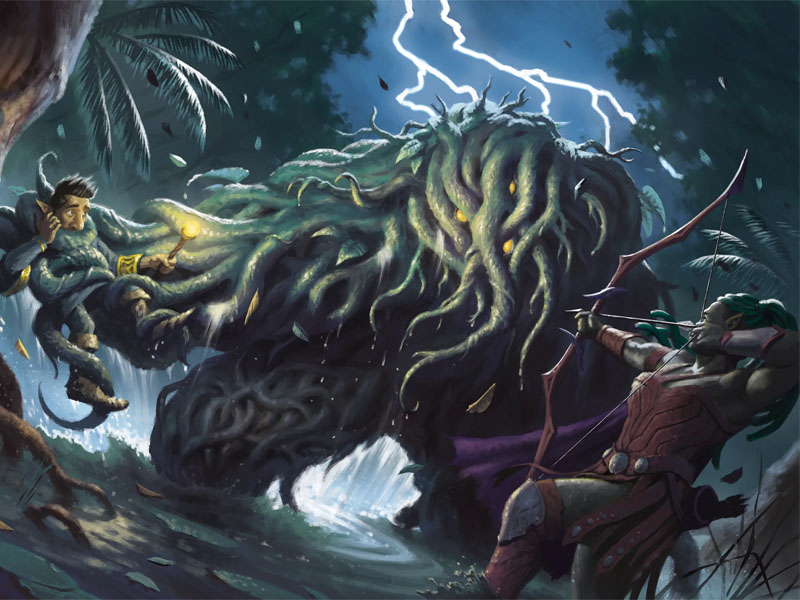
And with that the room started spinning. It rotates over to Position 1. Everyone rolls a DEX save and half of them fail, fall, and learn about this particular hazard. The doors are now open to the north and to the north east. Out of the northeast door charge five tomb dwarves looking to end our heroes’ reign of destruction through their precious dungeon. The north door opens onto a small chamber filled with a noxious green gas. The gas spills into the room and everyone rolls a DC13 CON save. Those who fail take 9 (2d8) points of damage, and those who pass take half that. (I added this detail as well.) Even worse, the poison gas billows over the ground and three shambling mounds rise up out of the vegetation. Roll initiative.
Let’s cut back to Gwen on the upper level. She needs her own action, because I’m a giver and don’t want anyone to feel left out. She is unable to see what is happening below, but she knows something is wrong. Suddenly, she is attacked by an invisible enemy who never says a word. It took forever for them to realize that this was the invisible stalker from before. She has no way to tackle this creature by herself and she is a dismal climber; she knows she will fall if she tries. So she does the only sane thing and leaps into the pit, plummeting sixty feet to join her friends. Everyone panicked except Gwen. Especially Thames, who was all out of feather fall spells. They had forgotten that her power, bestowed by the Trickster God Papazotl, is that she no longer takes falling damage. Gwen bursts through the ceiling like a rock, and then unfurls her arms to swoop gracefully to land in the middle of a chaotic battle. “I should have stayed up top,” she exclaimed. She is immediately followed by a severed rope, trapping them on this level. At this time, the invisible stalker does not come down to join the battle, having performed its duties, but I might bring him back if I need it.
As Gwen is falling, the gears shift again, triggering another DEX save or fall event, sealing them back in the room at position 5. The tomb dwarves are susceptible to this like the PCs, but the shambling mounds are able to root themselves to the ground and remain standing and fighting. The fighting continues for a few rounds, one dwarf is dead and two mounds are severely injured when the gear shifts again, this time to Position 3, the original position. Now exits exist to the northwest and the southwest. From each door, a Tomb Guardian lunges into the fray.
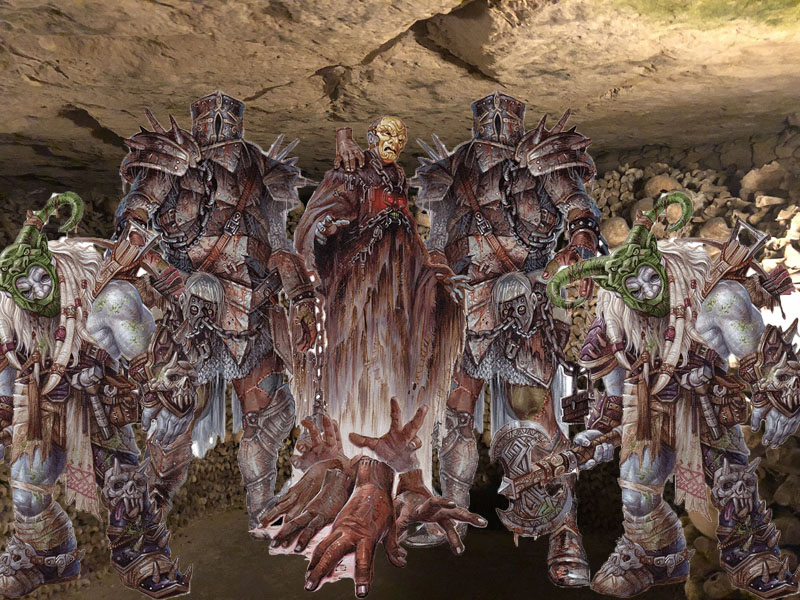
Our heroes realize that this is a fight for their lives and they pull out all the stops. Gwen has already cast spirit guardians, Thames cast haste for the first time ever, and he had already been saved from a devastating crit thanks to death’s door. Bag of Nails had just used his action surge to kill a dwarf, and Martic has grabbed his oathbow and named a bunch of people who have wronged him, starting with those pesky dwarves, then moving on to the mounds.
Two shambling mounds were nearly dead, and a tomb guardian was critically injured when the next “Screw You” shot from Withers came at them like a lightning bolt. Because it was a lightning bolt cast at them, coming out of one of those all-seeing eyeballs. But it didn’t target the heroes directly. Withers was aiming for his allies, because the shambling mound and the tomb guardians are both healed by lightning. Ain’t he a stinker? With three crystals positioned around the oddly angle pentagram shaped room, Withers was able the select the best vantage point, to cast the spell and affect as many people as possible. These new strikes could come from anywhere, and the heroes had no way to predict where the best place to avoid them was. So they did the next best thing.
“Take out those damned eyeballs,” they yelled in unison! These camera crystals have AC14, and 20 hit points, which means that our heroes wasted several attacks by the weaker Summerwise and Seppi, who failed to take these things down, allowing Withers to cast several more spells before the cameras could be destroyed and his remote spell casting could be stopped. Withers was also able to cast a blight spell on Gwen that knocked her down to zero hit points. Martic scooped her up and used his magic bugs to float both of them up and away from the melee monsters. It kept her from dying but it also took them both out of the fight because the Tomb Dwarf that Martic had just made his favored enemy simply moved under Martic, who was now unable to target him.
But then, Bag of Nails, Thames, and Dragonbait got a total of four crits in the same round on the shambling mounds, prompting another lightning bolt to go whizzing around the sealed room. Then Grum went down, felled by a tomb guardian. Thames had to sacrifice an inspiration point to keep Grum alive during his initilly failed death saves. Then Dragonbait fell. Gwen was revived to heal that companion. Finally, after a combination of Thames’s bolts, Seppi’s cannon and Martic’s bugs the three crystals were destroyed, blinding Withers from the room.
This prompted Withers to open the passageway that leads back to the control room, Position 3. This seemingly setback was an inevitable part of Withers’ plan to goad our party into the next room, where he plans to finish off these annoying heroes. Withers stood in the doorway and launched a wall of fire at our heroes. “C’mon, I’m standing right here, if you have the guts to walk through a wall of flame!” Fortunately, every one made their saving throw. Two heroes would have fallen if they hadn’t. Then Thames pushed the last tomb dwarf into the flames, killing it, before catsing dispel magic to drop the flaming wall entirely. Meanwhile Bag of Nails got a killing crit on one of the shambling mounds but was subsequently engulfed, knocked unconscious and began dying by another one. The entire battle was a complete see-saw of triumphs and setbacks like this.
Now our heroes had two objectives; kill the shambling mound to save Bag and also chase after and kill Withers, In the end, they could only succeeded in one of those. Gwen saved the tabaxi by casting death ward, then a revived Grum got the killing blow on the shambling mound and was able to free his feline friend. Meanwhile, Martic tried to figure out the trap in the next gear. It looks like there are several dragon statues with open mouths along the wall, presumably ones that fire the five elemental dragon damage types. Wrong! It’s just acid. But it doesn’t matter because the trap doesn’t work; much to the surprise and anger of Withers.

As soon as Martic, Gwen, Bag, Thames, and Seppi entered this next chamber, Withers spun the gears to Position 4, trapping everyone in two separate rooms. Withers gloated, “Ha! You so-called heroes are so predictable. Good luck surviving when the air turns to acid. Suck on this!… What the hell!… What do you mean, it’s not working? When did the acid run out? Why didn’t anyone tell me? Now I look like an idiot… I don’t want your excuses. Get out of my face! (This is followed by sounds of a minion dying.) Fine! I’ll do it myself.”
This new gear also has three crystal eyes arranged around the area. Withers begins casting acid splash through these eyes in a last ditch effort to kill some heroes. For their part, the heroes ran around the room, trying to avoid getting bunched up and presenting multiple targets. By this time, everyone was in the single digit hit points. This part of the battle was pretty tense, since they had no way to target Withers directly. I focused most of my attention on Martic, whom has avoided the most damage thus far. But I was able to catch Seppi with some splash damage killing this fourth version of Thames’ homunculus. R.I.P. Seppi IV. You were the shortest lived but most beloved of all the Seppis.
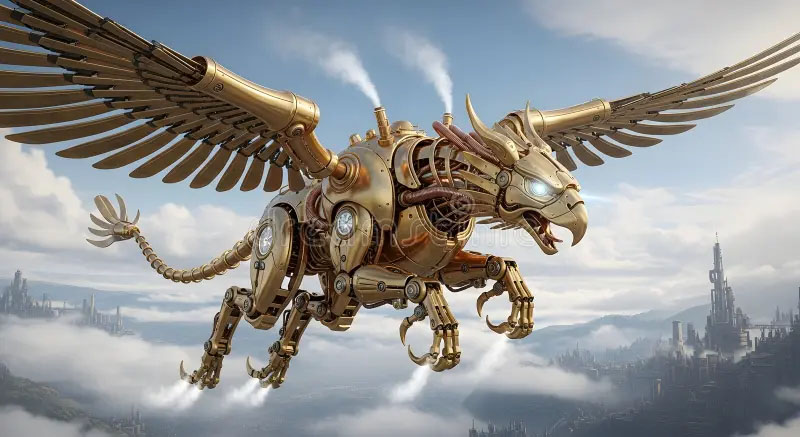
As for why this room is broken, the book states that the room is busted, but offers no explanation as to why. I don’t mind when the players don’t know all facts, but the DM should. I wish the book had a single line stating, “The DM can create a reason for the malfunction.” Then the omission would have been intentional and not felt like an oversight. At least my way gives a reason, has a means of informing the players, and further builds on Withers’ persona as an overworked, beleaguered civil servant.
Eventually, the heroes were able to destroy the crystal eyes in this room as well. These silly things worked out way better than expected. My biggest issue with evil wizards is that the party will expend every action to kill this guy, which gives me two maybe three rounds to cast spells and die. This fight has lasted longer than 12 rounds, an eternity in D&D and we still weren’t done and Withers was still alive. But all good things must come to an end. The room spins again back to Position 3 and Withers steps out with another two tomb dwarves, the last of their kind.
To no one’s surprise, everyone unleashed upon Withers whatever they could throw at him and he barely survived this single round. But he did survive and was even able to stun Thames with his last hold person. But I don’t want Withers to die just yet and I have one last trick up my sleeve. Looking past our heroes, Withers yells, “Where have you been. You were supposed to be here ten minutes ago! If it’s not too much bother, could you please kill these fools?” Our exhausted heroes look behind them to see…
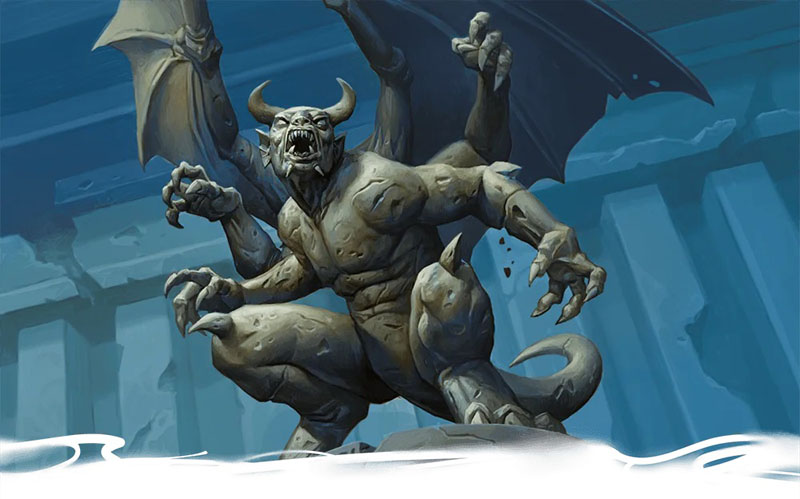
Looking back at Withers, he runs away yet again, taunting our heroes, “This should put you out of my misery. But if you happen to survive this, the sisters will tear up apart. Good bye forever.” Suddenly, a metal door slams shut blocking out heroes from chasing after Withers and trapping them with the very annoyed gargoyle. One of the tomb dwarves attempted to run away with Withers and is immediately crushed by the door, cutting him in two. If I can’t kill a hero with an instant death trap, I can at least kill an unnamed NPC. And yes, this door is in the written adventure and not just a piece of cheese I added to help Withers escape.
The fight with this last gargoyle took everything my players had just to survive. They burned through every spell, every last special ability, and several healing potions just to defeat this quadruped juggernaut. After the final blow was struck, we took stock of what had occurred. Among the dead were, three shambling mounds, a half dozen tomb dwarves, two tomb guardians, and a single four-armed gargoyle. No heroes died, but I was able to bring four heroes down to 0hp, paralyzed Thames (he got better), and brought Bag of Nails the closest he’d ever been to dying. Everyone’s health was under 20 hit points, and every resource had been used, Withers was still alive, perhaps still hiding behind this stupid metal door, but we needed to rest badly, and we were trapped down here on a level that we have not explored at all.
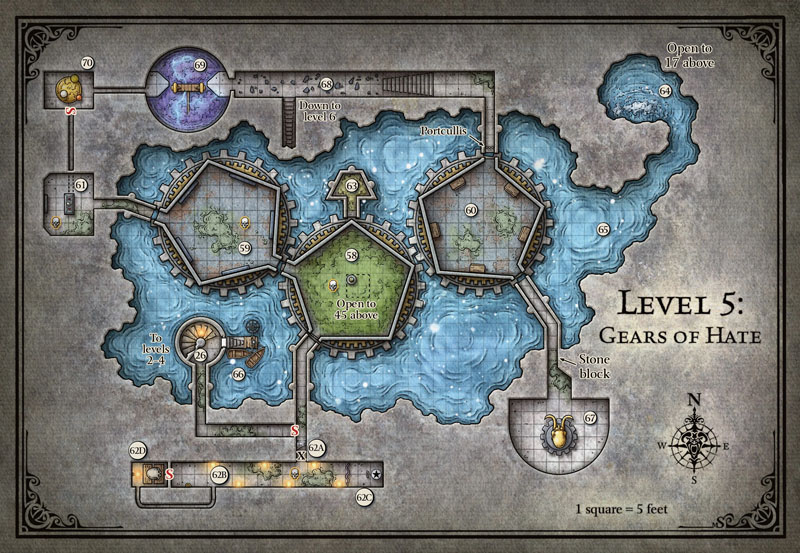
After vainly attempting to breach the sealed door and with great trepidation, our heroes moved away from these gear rooms and down the only exit available to them when the gears are in Position 2, like the book originally intended. They moved down the south west corridor stopping at the wide hallway covered in slime that leads to the most second most iconic trap of the original Tomb of Horrors (Area 62A). But they wanted nothing to do with this very suspicious hall, and instead found the secret door that lends west then north.
This leads to a spiral stair (Area 26) that is now collapsed and choked with rubble. This is the result of the explosion Withers used to funnel our party into the trap they just survived. A single door is unblocked by the rubble. The door opens onto a small dock (Area 66) that sits on the giant subterranean lake the feeds power to the giant gears that our heroes can finally see up close now. Our heroes ignore the diving cage and head for the rowboats tied to the dock, temporarily forgetting that some massive thing is swimming around.
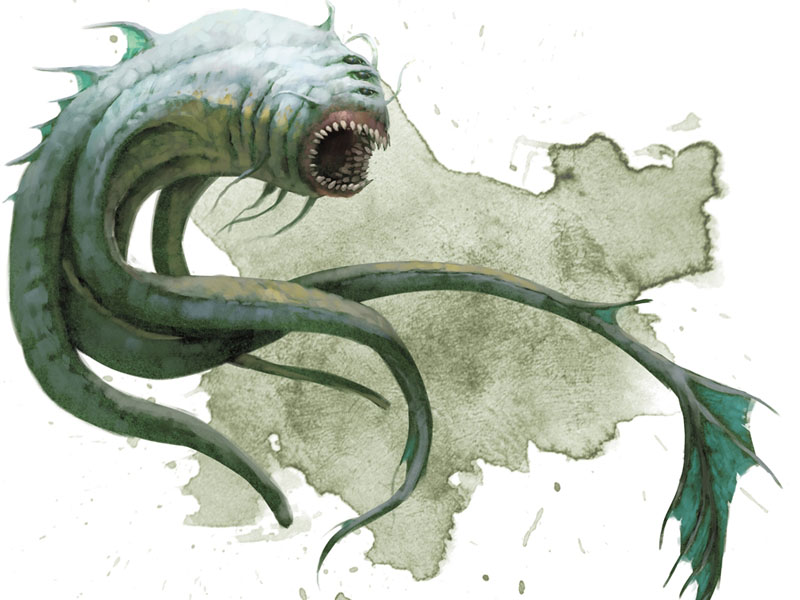
Fortunately, when I rolled for the creatures demeanor, I got the childlike Gilly, who did not attempt to overturn the boat and enslave them all. Good. They were in no condition to deal with that encounter. They paddled around exploring the lake and the gears from this side. They learned that they could scramble up the rocks to get alongside the gears, but even when there was an access doorway into the gear, they could not get inside due to some invisible force field. They also found that there were four tunnels that can be entered via these gears, but unless the doors lined up, the tunnels are inaccessible. The tunnel that lead to the docks was obvious, as was the one that opened to the currently sealed control room. But the other two remained a mystery. There was an open (but still blocked) doorway into the third gear (Area 60), and they could see that it held five large wardrobes, but their purpose remained unknown.
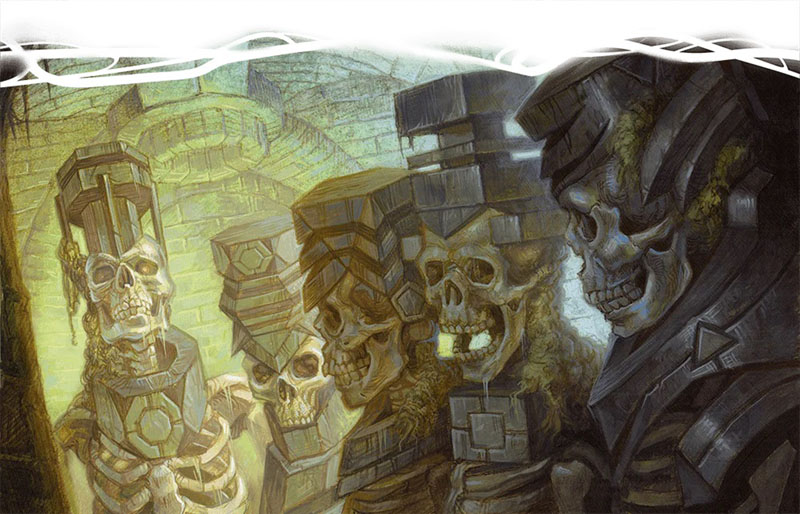
They also found a hidden grotto in the northeast corner of this cave. A giant waterfall fed into this underground cave, plunging from over 100’ somewhere up in the dark. My group deduced that this waterfall is the same that began up on the first level. Back in Session 45, our heroes had killed and then lost one of the weird skeleton keys that roam these halls when that skeleton fell over the edge of this waterfall. Diving down into the brackish water, they find that same skeleton (this one has a triangle shaped head), chop off its skull and add it to Gwen’s collection. They still have no idea if these things are important, but collecting skulls has been Gwen’s macabre hobby since the beginning of the campaign, so that is convenient. And yes, they are important.
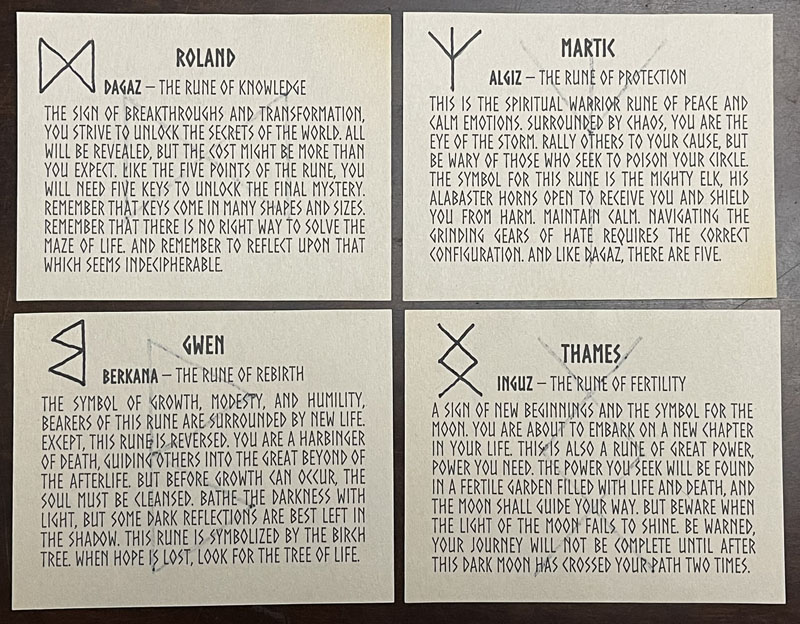
The only other thing I added to the area was designed to pay off one of the prophesies our heroes received back in Session 22. Back then, I wanted to infuse a little randomness into the adventure, similar to the Tarokka deck in Curse of Strahd. I held a legit random drawing of actual Nordic runes (another strange theme of this adventure) then I tried to devise events and encounters that would satisfy those prophesies. One of the runes was a symbol of safety represented by the birch tree, which distinctly does not grow in the jungle of Chult. I intended to use it some point in the jungle, when our heroes were being chased by something large and deadly and this anachronistic birch tree would lead them somewhere to hide.
But that moment never occurred and I was running out of options to use this prophesy. So here it is. While they are exploring the grotto, Martic, the one who was given this prophesy, can see a gossamer outline of a birch tree, glowing on one of the rock walls. Martic points this out and orders everyone to row to that birch tree. On the wall in the base of the tree, our heroes find a secret door that leads to a warm and secure cave. Inside that cave is a dome made out of a pair of giant elk antlers. This detail is also in one of their prophesies. Martic assures everyone that they will be safe here for the night. Thames asks how he knows this, but Martic keeps this a secret. It is a gift from Ubtao, and the only such one they will receive.
I never mind giving out an extra chance to rest, especially after go off script with such a deadly encounter like Wither’s ambush. I want my players to experience this Tomb as close to the written adventure as possible. I will certainly tweak it here or there, or clean up obvious errors, but if I make it too soft can I really say that my players survived the actual tomb? But if I make it too hard, such as expanding upon this underdeveloped Wither’s storyline, that isn’t fair either. Throwing in a extra chance to rest is my way of balancing that out. And since their usual resting spot on Level 3 is no longer available, this was a good compromise. And with Gwen and Martic’s prophesy fulfilled this felt like it was always meant to be a part of the adventure.
Next week, Three trecherous traps, two pachyderm perils, one lost soul, and a trip to Acererak’s garbage dump
As always, plan merciless encounters, but be prepared to pull back and Game On!
BTW, later on in the adventure when my players tried to abuse my generosity and get another rest in this cave, they find that the cave and the glowing tree are all gone which gave more evidence of the supernatural vibe of the adventure.
As usual, don’t forget to check out my Tomb of Annihilation Resources Page, filled with all the stuff I use to make this epic campaign even more epicier: My full Campaign Diary, plus Handouts, Maps, Charts, PDFs, Images, and more to use, abuse, or ignore at your peril. All the templates and instructions for my Trickster Cubes are found here as well.
And written specifically for this adventure, read my Explorer’s Guide to Chult to delve into all the legends, lore, history, religion, and culture that I used to bring even more life to this adventure.


One thought on “D&D Diary – Tomb of Annihilation – Session 51”