Three treacherous traps, two pachyderm perils, one lost soul, and a trip to Acererak’s garbage dump
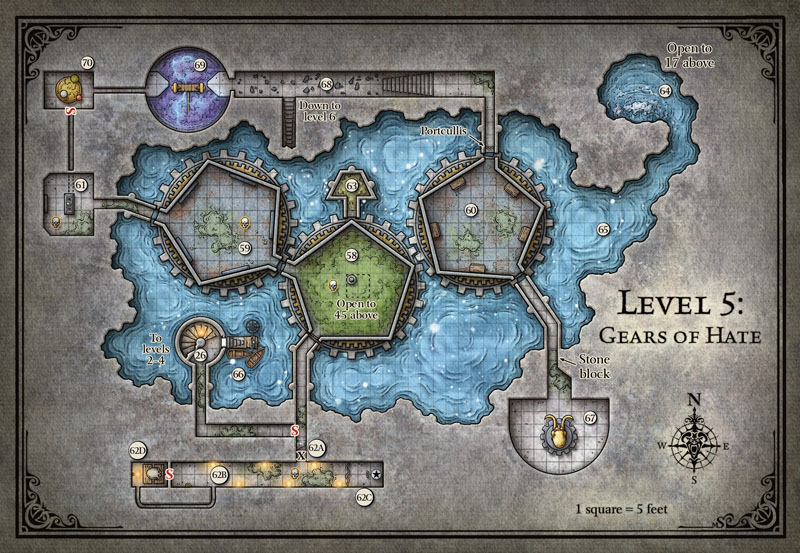
When last we left our heroes, they had just barely survived a deadly ambush by Withers the undead architect of this tomb and all its devious traps. And you thought it was Acererak all along. Nope. It was this guy. Well, this guy hated our heroes (‘cause they keep breaking his traps) and he wants them dead. So he had set up another trap on the fly that involved the rotating gears found on Level 5, several environmental hazards such as poison, acid, and shifting gears, then assembled every monster he could find, including shambling mounds, a four-armed gargoyle, and the last of his tomb dwarves and tomb guardians. Our heroes managed to defeat them all, but Withers escaped once more. I couldn’t bear to see him die just yet.
Withers and his servants may be gone, but there are still plenty of things here that can kill my players and prevent them for stopping the world-ending apocalypse that is the Death Curse. Oh yeah, that’s why we came down here in the first place. That tends to get forgotten as you muck about in this tomb. Our heroes were in dire need of a rest but they were trapped here on the 5th Level with no such option. I threw them a bone and created one that they found in a tucked away grotto of this giant underground lake. Fully healed and rested, our heroes sally forth once more in search of the way out.
There is no other exit back into the dungeon level proper except via the docks that we used to get onto this lake in the first place. As our party rowed back to those dock, we finally had our only encounter with the creature that lives just below the surface of the water, though you would be forgiven for thinking that there were two. A captured aboleth makes his home in the murky depths of this lake, and he has been driven mad by captivity. His personality has been split in two. His true name is G’lyh’rul, but now depending on his mood, he either presents himself as an inquisitive child named Gilly, or an ancient tyrant called Leerule. Several in the group have had telepathic encounters with both versions, but they are unaware that they are one in the same. Today sadly, as our heroes attempt to reach the safety of the docks, they get Leerule, who is not happy that these mortals have dared to trespass on his lake.
An angry voice inside Thames’s head yells, “I’ve warned you before Gorra about using my lake. I should sink your boats and consume anyone on it. Maybe that will teach you a lesson you’ll remember Gorra!” Gorra is the real name of Withers, but the aboleth is the only one who still uses that name. This is an unnecessary detail that is best never mentioned. Just have the aboleth call out for Withers. Then maybe a roleplaying option could exist. As it stands, Thames who has never roleplayed subterfuge or dishonesty says, “My name is not Gorra, I am Thames Dasow. Nice to…”
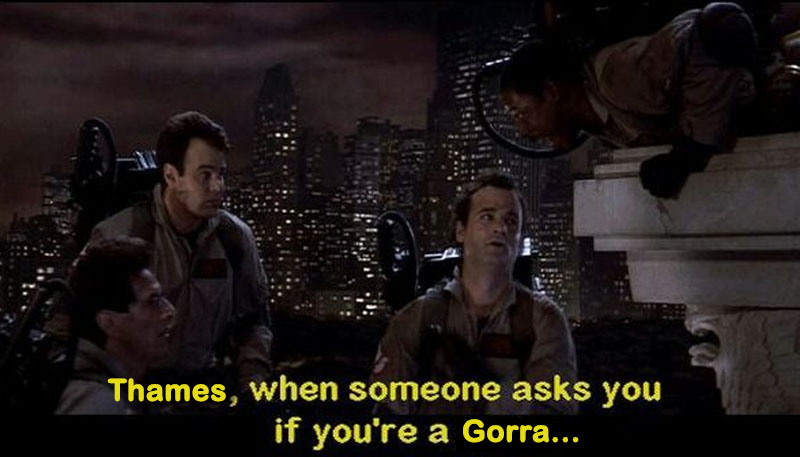
Thames was cut off. “If you are not Gorra, then you all will be consumed!” Roll initiative. I am not enthusiastic about this combat. Unlike the beholder battle from Session 48, this does not need to be a fight to the death, or even a fight at all. But I do want it revealed that Leerule and Gilly are the same person. There is no point in setting up a secret if that secret is never revealed.
We run through the motions of a few rounds of combat including a bit when one of the boats is capsized and they have to swim for one of the giant gears before they drown. Several heroes are “dominated” by the aboleth who then orders those heroes to fight his friends. This needs to end quick. I don’t need another bloodbath. Before this gets too silly, a new voice is pleading inside their heads. “Stop, please. Why are we all fighting? I want us to be friends.”
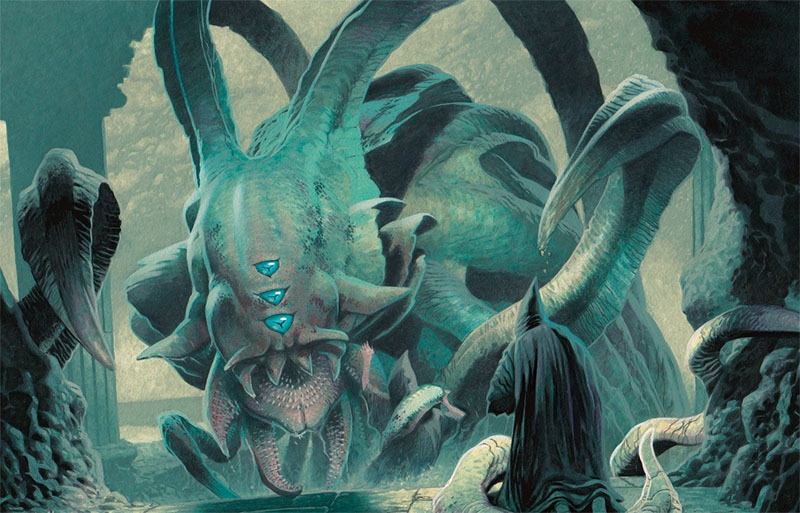
My group finally understands what is going on. They are released from their charmed state and make friends with the innocent Gilly. He is able to fill in more of the story of how this tomb came to be. This info would have been provided by Lukanu if she hadn’t died in Session 49. Gilly is giddily gleeful at the centuries of suffering and misery during that time, but it is the glee of a child who doesn’t know better, which made it even creepier. They are able to get back to the docks before the Leerule persona returns to ruin it. Then they lie to Gilly and promise to release the aboleth from this prison once they have completed their mission to cure the Death Curse. Gilly might not hold a grudge, but Leerule certainly will.
I completely ignore the dock door that will likely trap players into the deathtrap that is Area 57 The Obliette. I find this method to be a cheap trick by the DM and I have a better trick that is more fitting of Withers, that we’ll see in a bit. Going back into the dungeon without issue they make their way back to the second most iconic trap of the OG Tomb of Horrors and my new favorite mini. Area 62 – The Stone Juggernaut.
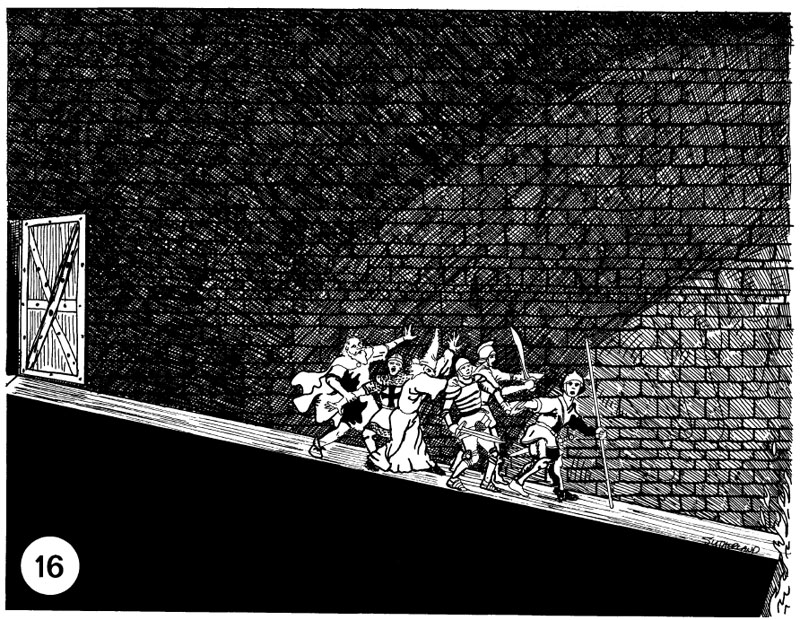
The concept of this trap and “monster” have been completely nerfed from the same trap in the OG Tomb of Horrors. In the original, the trap is triggered when your foolish PCs (who should know better by now) travel down a sloping dead end hall with no means to find the trap or how it is triggered. When the juggernaut is released, it rolls down the hall and crushes everyone to death with no chance to save or escape. Now the trap in this tomb has a recognizable trigger, the “monster” does not automatically kill, and there are several save opportunities and at least five different ways to escape this trap.
I don’t know how I feel about these changes. The first version of this trap is just mean and miserable, but that was the whole point of that dungeon. For anyone looking to play that old-school style, the new version of this trap just feels so wimpy. But it does get to combine a bunch of elements from the original in a new scenario, which you can use to your advantage in setting up the trap for any players who may have played Tomb of Horrors. And the new way at least plays fair with the players and can still be quite tense and exciting if done right.
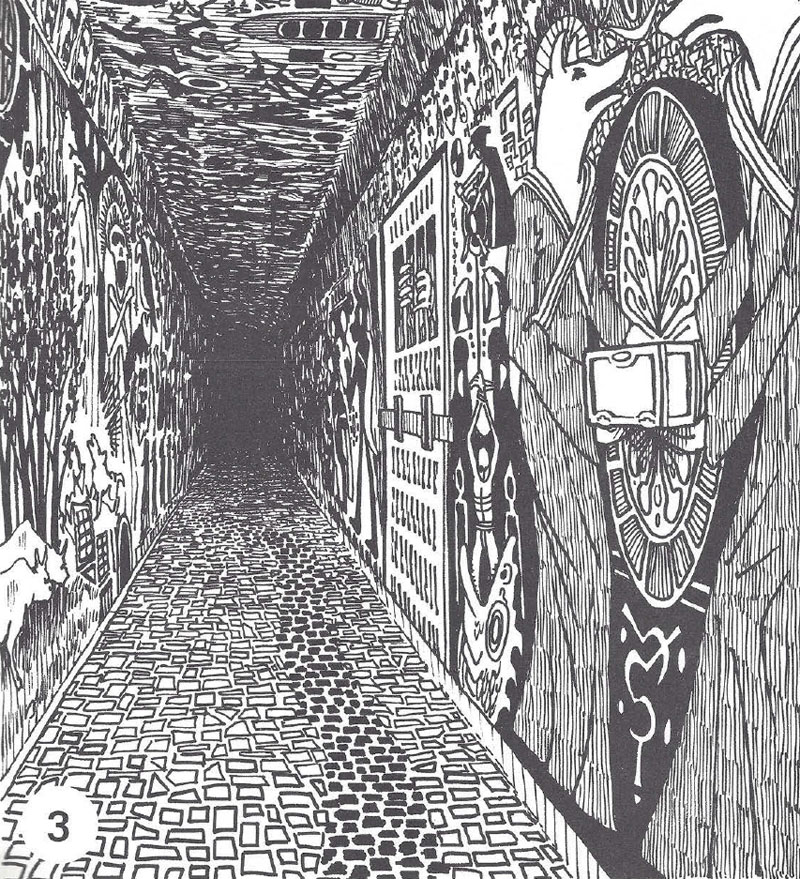
To start with, the hallway has painted murals all along the walls and even has a jackal holding a chest in its imagery. This tableau is straight out of the original Tomb, so you can show them the drawing of that room as seen above. I have flipped the image so that this jackal is now on the correct left side of the hall. In the original, the jackal and the chest are a false door, but this time the secret door is real, but may also trigger a deadly trap. The chest has a keyhole. The players can unlock the chest using a jade key found in Area 53, Nepaka’s Tomb. The lock can also be picked, but if they fail poorly, the trap will trigger.
There is also a big clue here that you must make your players aware of. Outside the hall is a message that reads, “Awaken Nepaka.” This will hopefully make your player realize that this room and Nepaka’s Tomb on the level above are connected. Specifically, items in that room will function in this one. I also had Dragonbait refuse to enter the roomMy group split the party, with Gwen and Thames investigating this area. They found the secret door, which is really a half-sized door leading to a crawlspace. They also found the keyhole in the chest, but they don’t realize that they already have the key. They did find the necessary key, but they party inventory sheet has gotten sloppy over time and the missed it for now. Martic could attempt to pick the lock, but he is at the end of the hall with Bag of Nails investigating the mysterious purple curtain
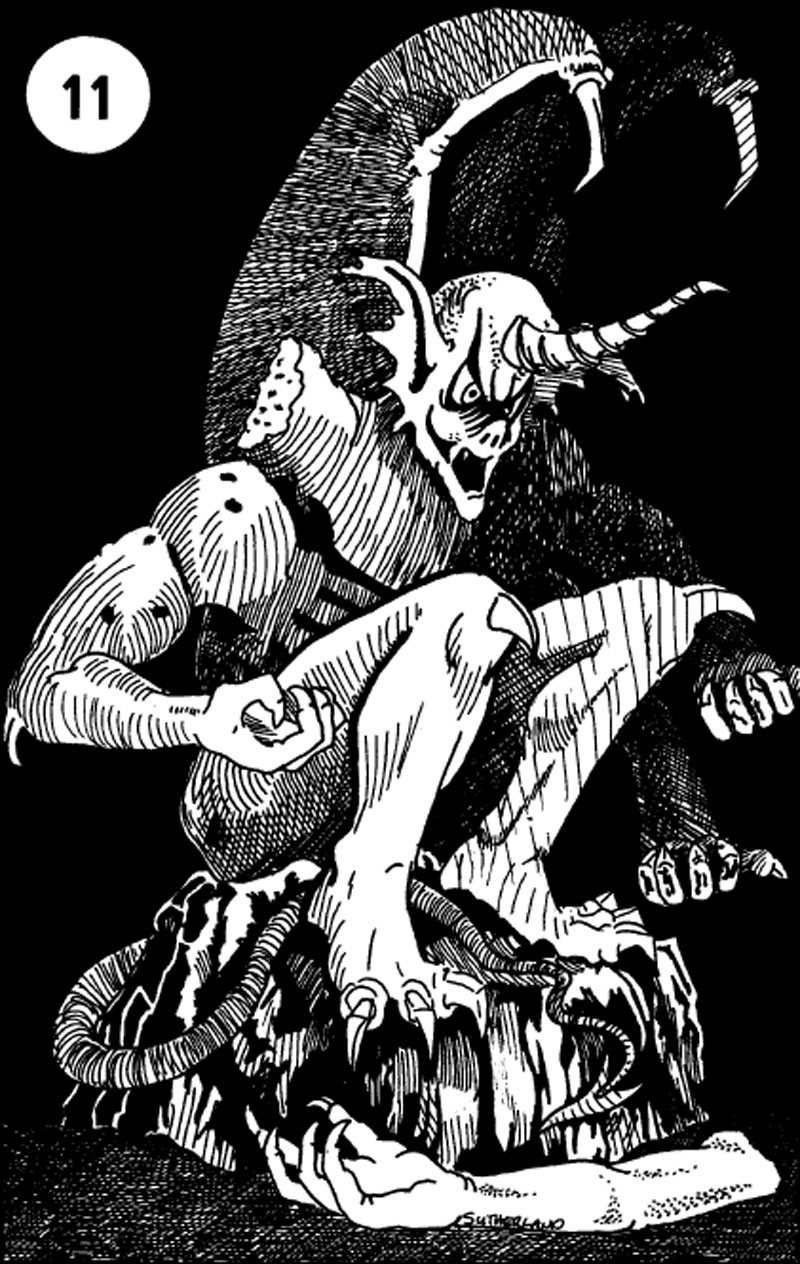
Behind the curtain is the next element “borrowed” from the original Tomb. It is a statue of a Four-Armed Gargoyle. But this is just a statue, it does not come to life, and one of its arms has been broken off and lies on the floor at its feet. The jackal chest and this statue are from two completely different rooms in the original Tomb, so players will have no idea what to expect in this version of the tomb. Of course, they wasted several minutes convinced that the statue would come to life and attack them like every other gargoyle in this tomb, but it did not. Bag of Nail refused to read the riddle and attempted to pry open the closed fist on the broken arm to no avail. Martic read the riddle and tried to figure out what it meant. Then Gwen found the secret door and the encounter turned into a Bag of Nails marathon.
The group had found that jade key back in Napaka’s Tomb. She unlocked the chest with the key, which opened up to a small crawlway and avoided activating the trap. For now. Excited, Bag of Nails ran down the hall, through the crawlway and into the hidden back room, where he found a giant stone monstrosity that blocked the entire room. This is the very nostalgic, and currently inert, Stone Juggernaut.
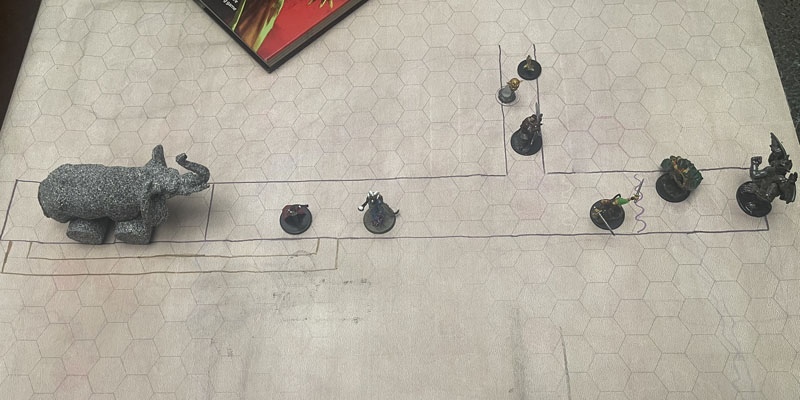
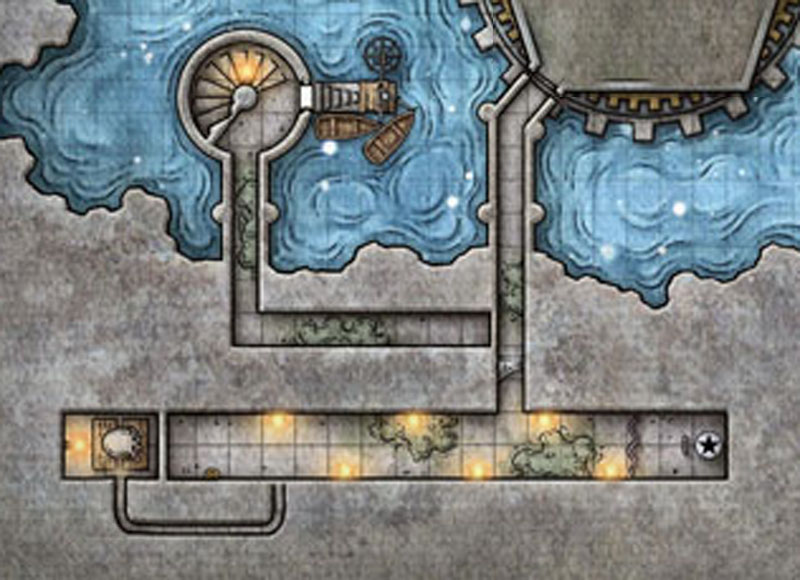
I feel that the book makes a mapping error that I wish I had fixed at the time. Now, the Juggernaut fills the hallway completely. There is a mere millimeter between this stone behemoth and all the walls and the ceiling. When this thing is rolling toward you there is zero chance to slip past it by any means, resulting in what should be an instant crushing death. They weakened this as well, but we’ll get to that. The Juggernaut sits in its perch behind a secret door waiting to be activated. It fully blocks the 10’ section it sits in. But the crawlway exits into a small section behind the Juggernaut, providing unobstructed access to the sole treasure in the area, one of the barely mentioned but apparently legendary artifacts; the Eye of Zaltec. This giant ruby is the quest item for the failed Company of the Yellow Banner storyline and only way to save the soul trapped in the Ghost Lantern which our heroes currently own and added that quest to their already lengthy quest journal. How does the Eye of Zaltec affect the Ghost Lantern? There’s no time to cover such trivial details! Fuggedaboutit.
Well, there’s the gem, sitting right there, untrapped, unguarded and ready for the taking. The players did everything right. They got the right key, they found the secret door, and they can get the gem without ever activating this trap. But that is so boring! I wish that the map showed that the crawlway opened up ten feet to the east; where it is now blocked by the impassable Juggernaut. They can see something glowing (the gem) just beyond it, but they cannot get to it until they somehow move the Stone Juggernaut, by activating the trap naturally. Below, my modified map shows what I am talking about.
I didn’t realize this issue at the time, so I pivoted to something else. When Bag o Nails grabbed the gem, he instantly realized that it was a fake, a cheap glass copy. On its satin pillowed pedestal (I changed this from its dull as written shelf), it glows like a legendary gem should. But as soon as he takes it, it loses its entire luster. This is nor the real thing. Bag can sense that it is somewhere nearby, but where and how to get it he does not know. That stupid three-armed gargoyle probably holds the answers. So, he puts the gem back on its pedestal and runs back through the crawlspace, past Gwen and Thames who are huddled in this cramped space (Bag used his feline ability to climb over them) and back to the far end of the hall.
Meanwhile, Martic has been busy disposing of several (mostly) worthless gemstones into the still attached hands of the gargoyle. At least the adventure had the good sense to provide ample opportunity to collect these baubles throughout the tomb. Each time, the gargoyle grinds the gem to dust and they know that something will likely happen soon. Bag realizes this and runs back to the crawlspace to hide with the others, leaving Martic to his fate. Finally, with the ninth and final crushed gem, something happens. The severed gargoyle arm opens its closed fist to reveal the true Eye of Zaltec, glowing in all its glory. With no further precaution, Martic grabs the gem, activating the trap; releasing the Stone Juggernaut, which rolls inexorably toward the jewel thief.
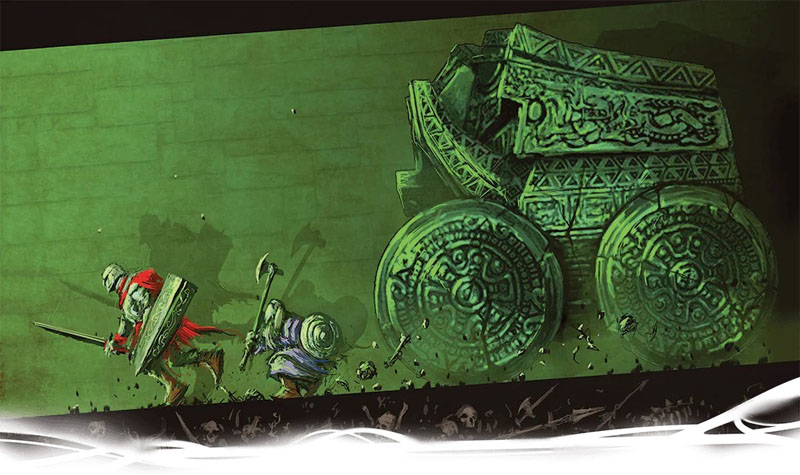
The Juggernaut moves fast (50’) but the hallway is long (80’) and Martic should be able to run to the hallway exit before he is crushed to death. Except… He did not count on the sleeping gas that was also released when he grabbed that gem. Please give me a DC15 Constitution saving throw. A Three! And you’re all out of inspiration, correct? The Juggernaut will reach you at the end of the second round, where you will be ground to a pulp. Technically, the thing is supposed to succeed on an attack roll (which is stupid) but then makes a bonus attack against prone creatures who get a saving throw (which is stupid) and then its max damage is 80 hit points which might be halved (stupid) and does not even instantly kill you. I don’t like instant kill traps, but this one should absolutely be one of them. If the giant stone steamroller shaped like an elephant rolls over you then you are dead! Don’t tell your players this because you might get a stupid player who yells, “Bring it on! I can take it.” The Stone Juggernaut is a no attack required, no save, instant death trap. Leave it at that.
I ask my not-unconscious heroes if anyone has a plan to save their fallen comrade. Despite running back and forth three times already, he hasn’t reached his cardio goals and will give it a shot. He sprints down the hall again, using his Action Surge to get to the Martic in the first round. But the Juggernaunt has already travelled half the distance (and he didn’t even Dash). It already rolled past the crawlspace with Gwen and Thames (who did nothing) and is just about to seal off the only other exit from the Instant Kill Death Trap. Fortunately, Bag of Nails goes first in the initiative order. (Bag always goes first in initiative order; it is very frustrating.) Unfortunately, dragging Martic’s body will halve Bag’s speed; even taking the Dash action will only get these two right to the hallway exit, but not beyond it.
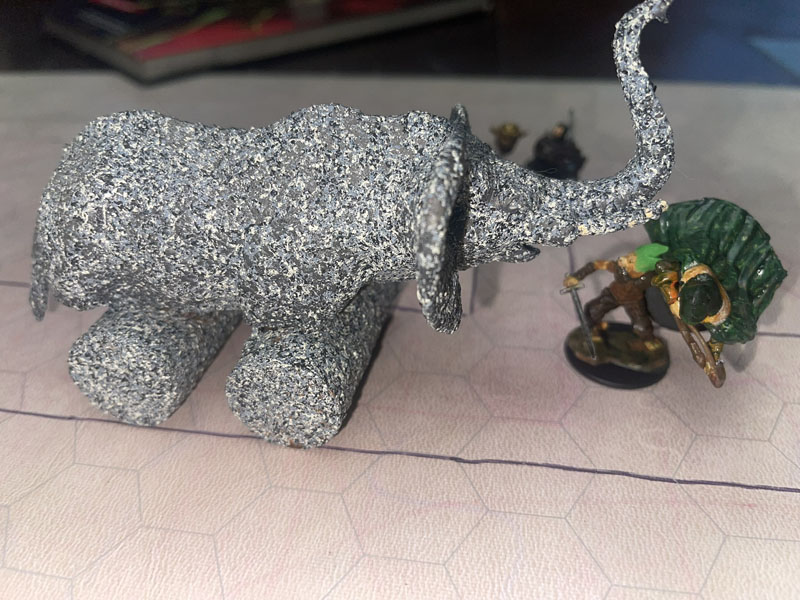
But I am a merciful DM, who loves a narrow escape, so I allow a DC17 Dexterity saving throw for Bag of Nails to dive through the open doorway, just as the unyielding Juggernaut charges past. This is the same save to take half damage on the Juggernaut’s crushing roll attack, so it felt appropriate. Bag barely passes with exactly 17. The fast feline flings themselves to safety just as the bone-crushing contraption roars past their position. They survived! From there it is a simple task to get the other two out of the trapped hallway. The Juggernaut rolls back and forth (’cause it can apparently do that), trying to catch anyone foolish enough to stand in its path. But Gwen and Thames are no fools. The simply wait until the not-terribly bright rolling rock is at the far end of the hall, and easily jog out of this no longer deadly trap.
Of all the traps in this dungeon, this was one of my favorites, but I certainly won’t put this on my list of most deadly traps. Sure if this thing catches you then you are likely dead. But with so many ways to avoid this trap entirely, and the weakened damage output of the “monster”, it just can’t rise to the level of a Total Party Kill. Unless everyone is standing together when one of the sleep gas traps explode and everyone fails every save, you just won’t kill more than one hero with this trap, if any at all. And that’s before I mention all the ways there are to stop the Stone Juggernaut completely. They could have used the immovable rod that can be found in Omu. (My players did not.) Or you could use the adamantine scepter, also found in Napaka’s Tomb, to utterly destroy this driving dreadnaught. My group did have this, but never thought to use it.
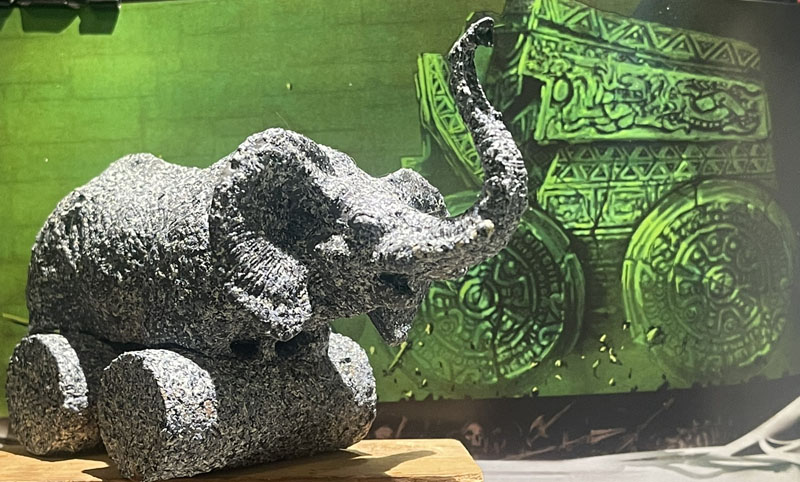
Our heroes head back to the Control Room where Withers staged his ambush last session. An hour has passed so they path is now unblocked and they finally get to explore this area. Except that the control panel has been disabled (there is missing dial) and worse, there is yet another Tomb Guardian here in the room! But this Guardian is different. It is missing an arm, its armor is piecemeal, and the whole thing appears to have been hobbled together in a rush with broken equipment. Thanks, Thames! This thing is in no condition to fight and it even speaks. “Wait, please. I’ve been ordered to give you this.” The golem hands the party a scroll then continues, “Withers is impressed that you’ve managed to stay alive as long as you did. He would like to meet and discuss terms that will allow you to leave this tomb. That is spell scroll will teleport your group back to the upper levels.”
Our heroes had no desire to accept any terms but they really wanted to have another crack at killing Withers. This felt like another trap and they knew that teleportation spells led to bad things which they learned from the two slaads that tried to escape the dungeon using plane shift back in Sessions 43 and 47. But this spell was a group wide dimension door. Maybe that was the exception and they really wanted to kill Withers. To my shock, surprise and delight, our heroes took the scroll, cast the spell, and walked willingly through the dimension door and into…
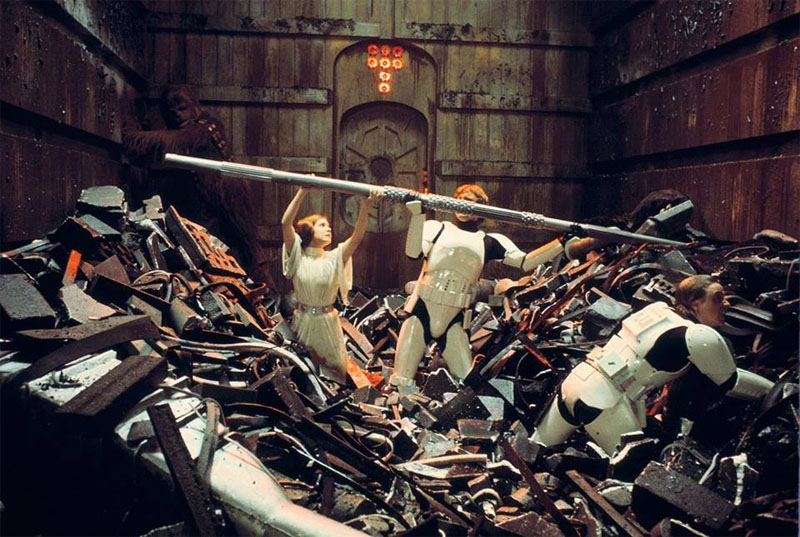
Area 57 The Obliette. I couldn’t believe it! This is one of the worst rooms in the dungeon and its sole purpose is to kill PCs. There are only two ways to end up in this bleak, hopeless and random death trap. Cast a teleportation spell (excluding misty step of course since everyone uses that OP spell) or fail to open one random door (Area 66) properly. I’d alluded to the teleportation trap and I just didn’t like the idea of a random door leading to your doom. (Though I liked the idea of it essentially being a mimic shaped door that eats shellfish or else.) But I loved the idea of this “gifted” scroll being just another one of Wither’s on-the-fly traps. It really made coming to this room feel like a personal vendetta and not just a random occurrence.
As written, this trap is one of the most lethal and whether you live or die is completely random. I hate it. But I love the meta concept of this room. This is Acererak’s garbage dump, his Death Star trash compactor, his MCU Void. Everything that this tomb need to dispose of, broken traps, dead mangled heroes, fools looking to escape the dungeon by cheating, and now these victims duped by Withers, end up here. The room is filled with all manner of gory trash. Have fun describing the specific examples of things that your group has destroyed during their time in the tomb. For us, this room has been activated twice by NPCs, so all the debris in this room comes from the latter part of this dungeon. There are several broken sarcophagi, a shattered mirror, a half-dissolved grandfather clock, dozens of terracotta statues, a score of dead skeletons, zombies, and ghouls, plus the bodies of Lukanu, Sack of Screws, Zaal the minotaur, a flesh golem, several four-armed gargoyles, Belchorzk the beholder, and the enormous corpse of a zombie T-Rex that almost takes up the entire room. There is also a living otyugh creeping around feeding but it ignores the party.
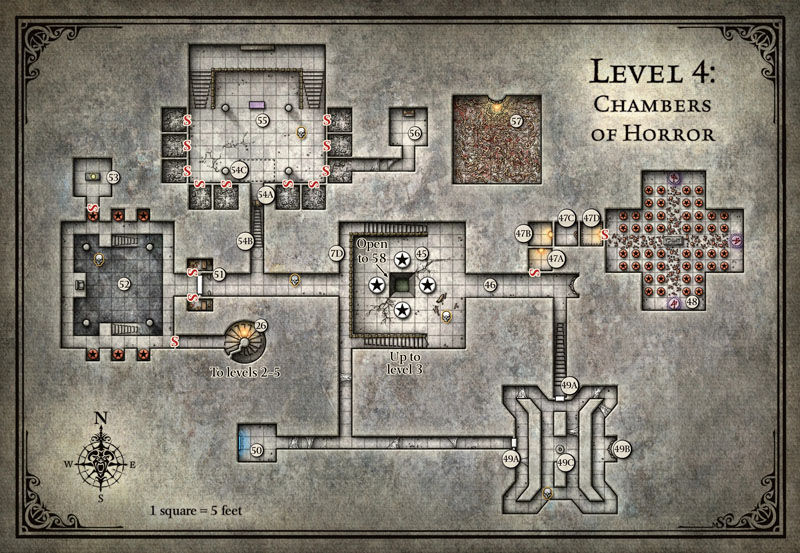
With all the specific examples, my group realizes that they are trapped in the tomb’s trash heap. But how do we get out? In the book, there is a single Green Faced Devil on the wall (with very prominent nostrils you must add). Each nostril has a moveable lever inside. One leads to escape, the other to instant death. Pulling a level activates a giant vacuum in the Devil’s mouth that sucks everyone inside. If they picked the correct lever (which happens to be on the right) then everyone is teleported safely to stand in front of the Devil Face on the very First Level (Area 5). If you pick the wrong lever, you are sucked inside and utterly destroyed (obliterated) with no chance of survival. There is actually a pretty easy (DC11) save to avoid being sucked in, but that is lame.
There are no hints, no clues, no riddles to try and choose the correct lever to pull. This is why the saving throw is as easy as it is. But I still hate it. Every other death trap in the dungeon is deadly due to the foolish tactics of the players or their inability to decipher the various clues given. The tomb is mean but it plays fair. But here, due to some random occurrence or bad luck, you end up in this trap that is a straight 50% chance of survival. Flip a coin and find out. For this single room only, the dungeon changed all the rules. Bad form, old sport. Let’s fix that with…
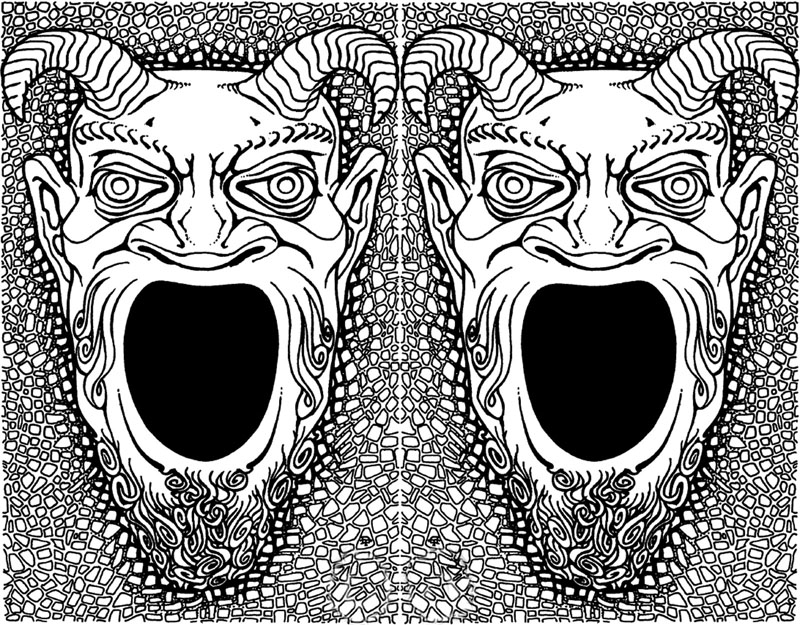
I stole this riddle from the movie Labyrinth. In my new trash room, there are two Green Faced Devils. And they speak in unison! “One devil leads to salvation, the other to oblivion. Ask one question, but know this… One face always tells the truth and the other always lies. Which lever do you pull?”
I wish I had changed “Ask one question” to “Ask as many questions as you dare.” This would have led to much more roleplay with the two Devil Faces and also not revealed that you can solve this riddle with just one question. For instance, if the players ask, “Which Face is the safe one?” Both Faces would reply, “Mine!” If they ask, “Which Face will kill us?” Both would claim, “The other one.” The confusion this encounter sows is hilarious and would have been even better with more talking between these two groups. In my scenario, The Right Devil Face lead to safety and happens to be the one who tell the truth, but out heroes don’t know any of this.
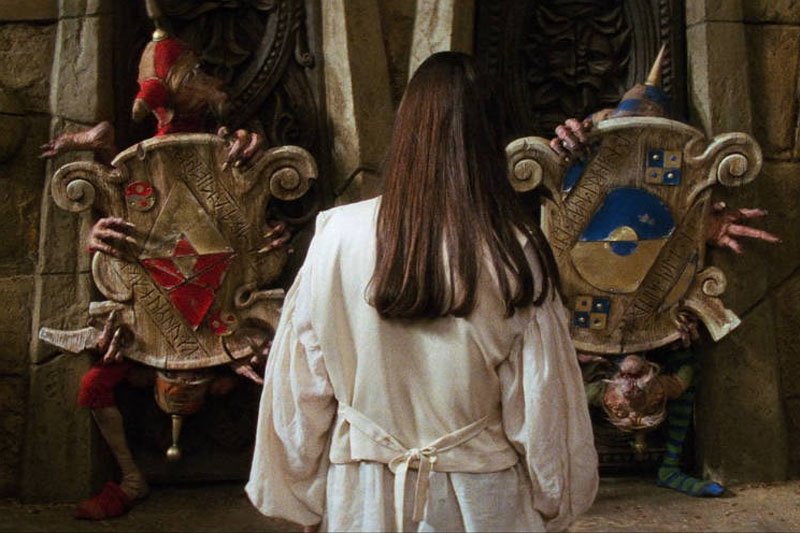
The question really stumped my players for quite a bit. I was worried that it would be too simple, but no one could remember the answer. They all knew there was one, but it took them a while to figure it out. There was a tremendous debate about exactly what they should ask and they were terrified of screwing up. (Another reason to let the players ask as many questions as they want.) In the end, it was Gwen who guessed the correct question to ask. To the left Devil Face, Gwen asked, “What lever would the Right Face say leads to our salvation?” Regardless of which face they had asked both Faces would answer, “The Left lever leads to safety.” This means that the Right Devil Face is the correct one to (The Left Face is lying, and the Right Face would tell the truth that the Left Face would lie.)
Without hesitation, Gwen pulled the Right Lever. The Right Devil Face opens his gaping maw even wider and everyone was sucked inside its black void. First Gwen and the still unconscious Martic, followed by Grum who jumped in to protect Gwen, Dragonbait, Summerwise and Bag of Nails who just said “Fuck it. Let see where this goes.” Everyone except Thames, who was not certain that Gwen’s logic was sound. He passed his save to avoid being sucked in and refused to let go until he was certain that everyone was alive. I finally allowed that he could still sense Summerwise’s presence and it was feeding an emotion of happiness. Thames let go and was swept up into the nothingness, then found himself sliding along the floor in front of that very first Devil Face on the First Level of the Tomb. Withers’s plan had failed again.
They were alive! Martic opened his eyes. “What am I doing lying on the floor?” After a quick catchup (the player was still at the table during the previous events, so it was really quick), they took a look around. On the floor was a little blue dial wrapped up in a bow. A gift from Withers. Martic snatched it up without thinking. My only thought was: Damn, I should have put a trap on it. They ran to Withers’s office and to a few other spots but Withers was nowhere to be found. They did not think to check out the parallel universe tomb where Wither’s office is still intact. Their thirst for vengeance unquenched, they rappelled back down to the 5th Level and back to the Control Panel.
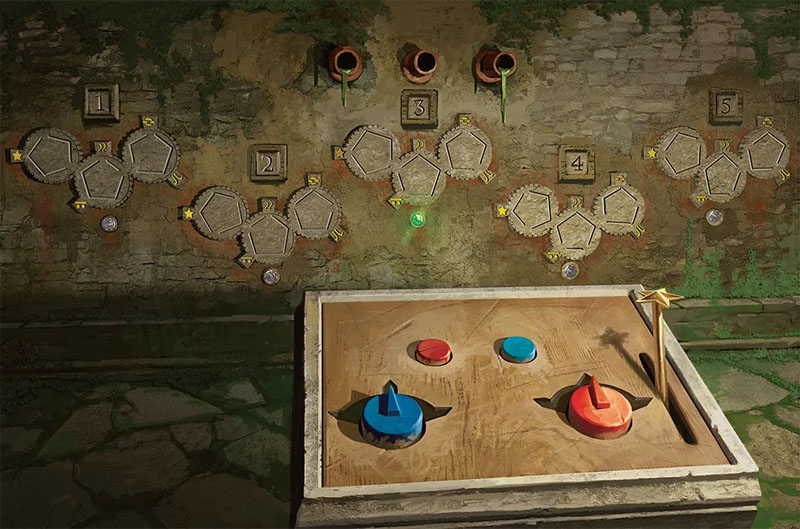
The mangled tomb guardian is gone. They repair the panel and through some trial and error (mostly error) they figure out the main functions of the machine. The best moment was when they accidentally released the acidic slime and everyone had to scramble up on the furniture until I allowed that they could plug up the holes with some extra clothing and outfits from their packs. During the chaos, Martic broke off the star shaped lever on the control panel and couldn’t repair it. He kept the broken stick which will come in very handy very shortly.
They realized that in order to travel further into the tomb then someone will have to stay behind to operate the machine, while the other travel through the gears. There is no direct path. After another long debate, they decided that Summerwise shall stay behind in the control room while the true heroes go off and play. Plus, the psychic link between the fairie dragon and Martic will allow for full communication with both groups.
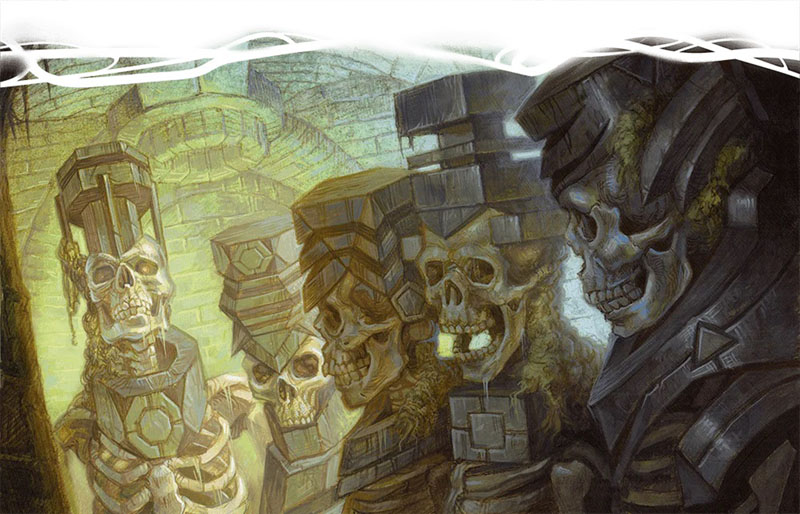
Starting in the Cog of Rot, they opened the passage to the Poison Gas room. They had spotted something in this room during last session’s fight but could not investigate it at the time. Of course, the whole party entered the room and the whole party took poison damage. There was a corpse in the middle of this noxious room. Before they could check it out, a random skeleton attempted to run out of the room. It had been hiding here the whole time immune to poison. And it wasn’t any random skeleton. It was one of the special skeleton keys that have been failing miserably at avoiding our heroes. This is the fifth one they’ve found. Each one has had a weird geometric shape carved unto their skulls, triangle, square, pentagon, hexagon, and now an octagon. It must mean something, but they don’t know what. Not that it matters, because the good cleric, Gwen has an obsession (she calls it a hobby) of collecting skulls. This skeleton was summarily killed, beheaded, and added to the collection.
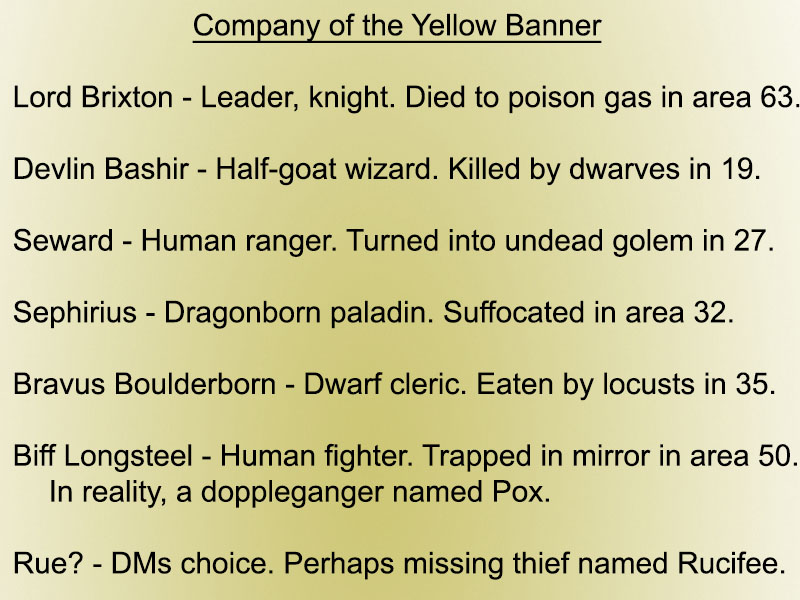
As to the corpse, it belongs to Lord Brixton, the last of the doomed NPC adventuring party, The Company of the Yellow Banner. The members of the group have all met their demise here in the tomb, one of them at the hands of our heroes when they killed the doppelganger, Pox, after he tried to infiltrate our group (Session 44 – Session 47). This is the last we shall ever hear from these guys, and I wish that they could have had more relevance to the campaign as a whole. If I could do one thing over at the start, I would have introduced this gang in Port Nyanzaru. They could be friendly (or not) rivals to your heroes. If you don’t want to have a specific guide be available, then the Yellow Banner hired them. You could have your party find a rich ruin only to learn that it had already been looted by the Yellow Banner. The possibilities are endless and nothing makes a fantasy world come alive more than the realization that other people are doing things when the PCs aren’t around.
Moving on, our heroes enter The Cog of Blood (that sounds ominous). They immediately guessed that they would have to open and likely fight whatever comes out of all five wardrobes. The third Harry Potter movie, Prisoner of Azkaban in the scene were the students have to face the boggart in their wardrobe kinda ruined the surprise here. They don’t want to have another giant battle right on the heels of the one they had last session, so they moved on to the next available room, where they had an even bigger battle that will very likely kill them all. Welcome to:
Area 67 Hall of the Golden Mastodon. This is it; the most deadly trap in the entire tomb. And the most inconsequential. Yet another dead-end trap based around one of the legendary treasures that your player will know nothing about until the moment they enter the tomb. Although, this is the only treasure that is mentioned anywhere in the book prior to entering this section of the adventure. The Chalice of Ch’gakare is like a royal scepter. Whoever owns the Chalice can claim the right to the Throne of Omu. Your players may hear about the chalice from the exiled queen living at the cliff side monastery of Kir Sabal. My player would have learned this lore, had not Gwen chosen to bitch slap the queen, sparking an international incident and nearly getting the group thrown off the cliffs to their death in Session 36.
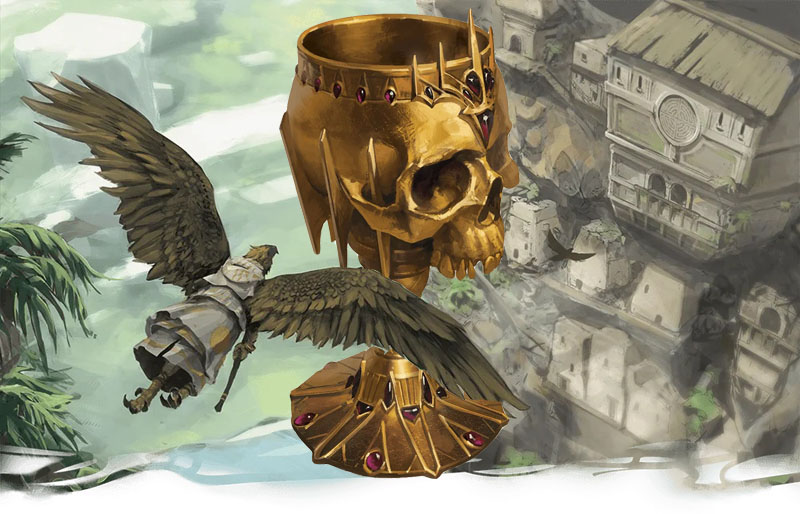
But it’s not important at all. It’s just another trinket that doesn’t matter given the alleged stakes of the villain’s schemes. But your players don’t know any of this and the will wander into the room, set off the inevitable trap, and suffer an inescapable Total Party Kill. This is what makes this trap so deadly. Most traps have a possibility to kill one or two players at a time, and usually after a bad decision by that player. This one punishes you for merely exploring the area and unleashing a horde of insurmountable monsters that will absolutely overwhelm your players in time. Even in the other combat related traps, specifically the thus far avoided Cog of Blood, the party is given the chance to recoup after each battle and fight them at their own pace. This trap releases wave after wave of exponentially tougher monsters with no break in their relentless assault. If you don’t prepare for it, everyone will die in this room.
It started off exciting enough. In the center of this room stands an enormous gold plated statue of an elephant with jewel encrusted tusks. Murals around the room depict some demi-god named Ch’gakare and this mighty mastodon fighting a horde of devils. A smart group would investigate the room carefully, but that has never been my group’s forte. Bag of Nails cannot resist his female urges and climbs atop the pachyderm like a giant scratching post. Martic, possessed by the impulsive god I’Jin, thinks this is a great idea and follows suit. As luck would have it there is a peculiar star-shaped indentation on top. As luck would have it, Martic just happens to own a star-shaped level that he pulled out of the Control Room. Martic impulsively jammed the stick inside the hole. Okay, here we go…
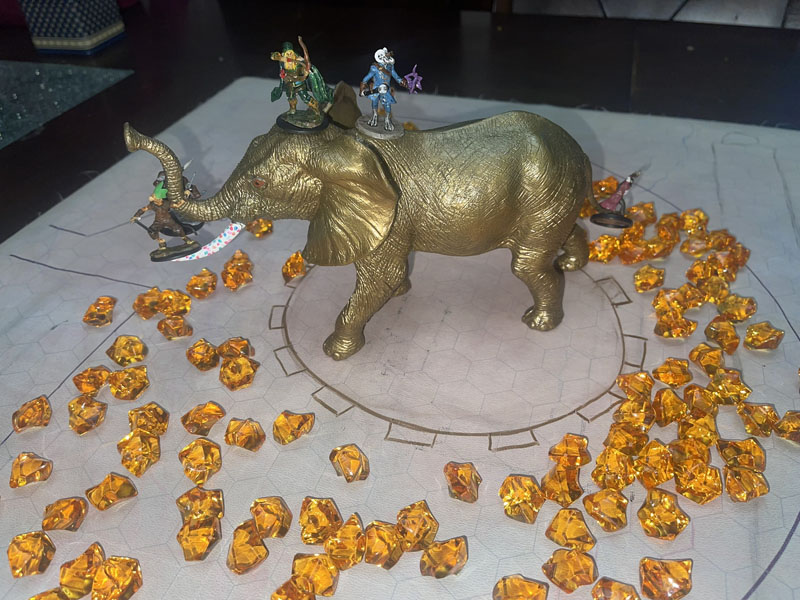
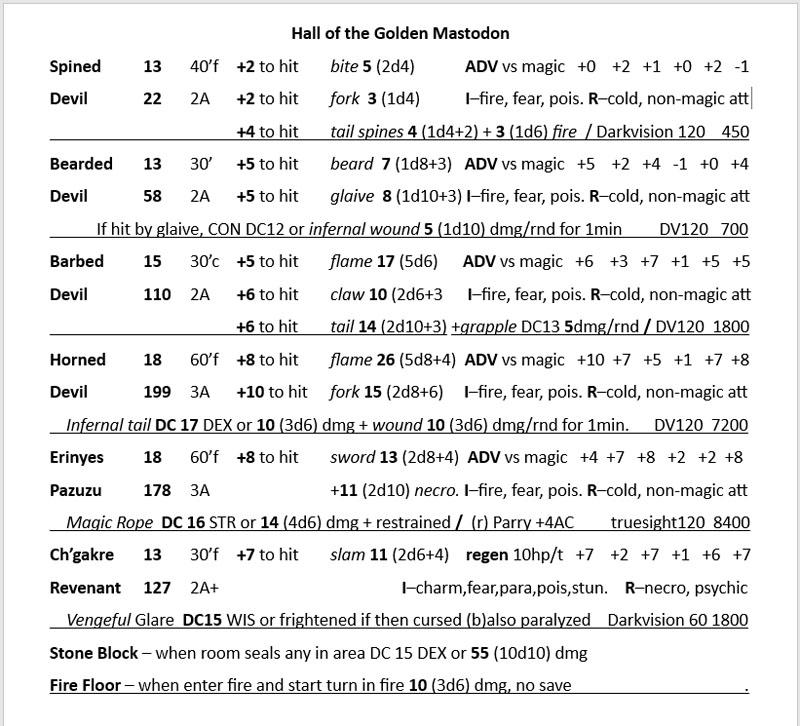
The room is sealed with a giant stone block. Thames had to save or die to avoid being crushed. Next, the entire room is engulfed in flames. Everyone takes damage except Martic and Bag who only are saved due their perch on the elephant. There is no save versus this damage; everyone takes the full amount. The only safe space is on the back of that elephant. Yet once again, Gwen is incapable of getting her ass out of the fire literally. Even with Grum’s “assistance”, she could not get onto the elephant until the third round. Thames also failed, but used a BONUS misty step action to leap up on to the statue. (I hate you Tasha’s Cauldron of Everything!) If that had been their only issue, they would have been fine. But it’s not. On every round, the stuffed mammoth spins on its base stopping to face a different mural around the room. My boys are lucky that I didn’t impose a Dexterity save every round to stay on the elephant. Gwen would have fallen back in and been roasted alive by Round 5.
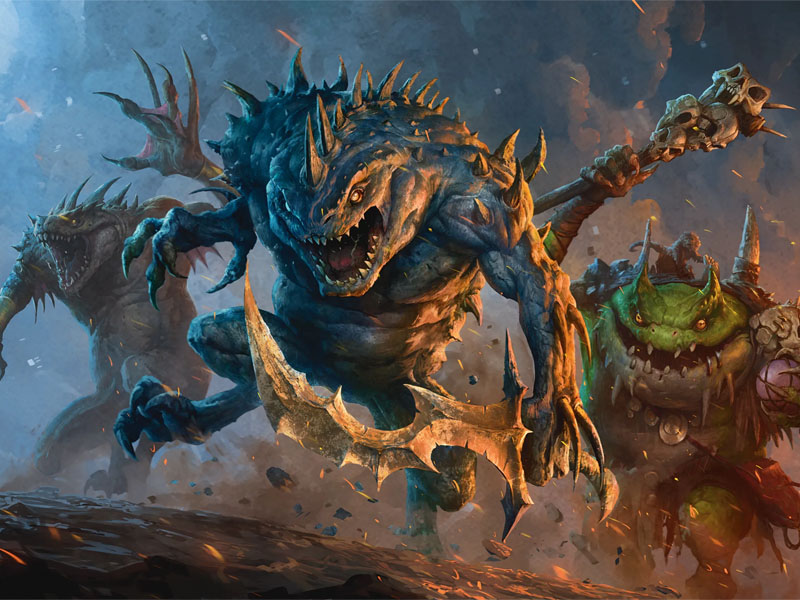
When the mural stopped at each new mural, (five murals in five rounds) whatever creature was depicted in the scene leaped out of the painting and began mercilessly attacking everyone in the room. Being devils, they are all impervious to fire and had no problem attacking at range while mocking the cowardly heroes to come down and fight like men. First there were 4 spined devils, then 3 bearded devils, followed by 2 barbed devils, a single horned devil, who could probably kill the party all by himself, and finally the absolutely ridiculously OP erinyes. In the all-important action economy of 5th edition D&D, these devils had 24 attack options per round compared to the player’s measly seven. The challenge rating for this fight is an absurd 40! That means this battle is a proper challenge for four players if they are all 40th level PCs. The entire adventure only takes player up to level 11! (It goes to 11.)
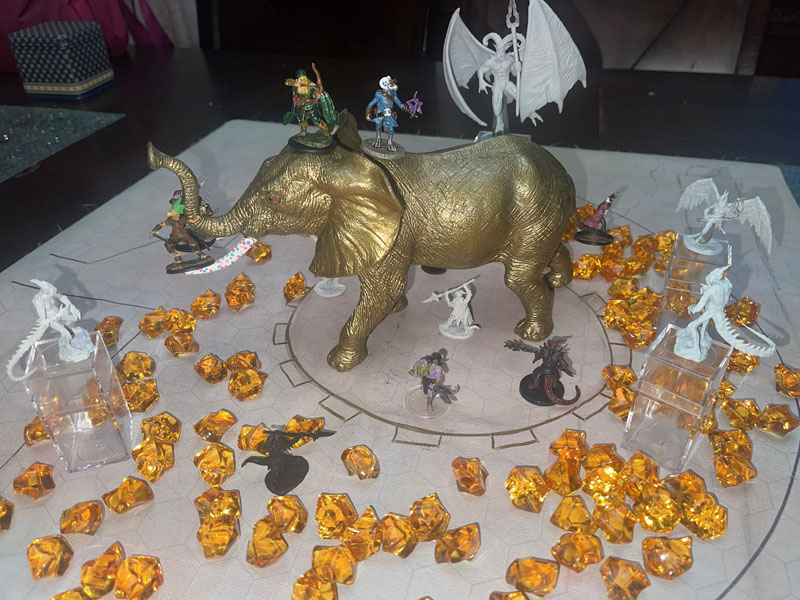
I actually kept copious notes for this fight but it was irrelephant. The battle was a rout. Grum and Gwen went down almost immediately. Gwen was caught by Bag who seriously considered throwing her to the fire before shoving one of their last healing potions down her throat. Revived, Gwen cast some group healing and merely prolonged the inevitable. Our heroes did everything they could but it was to no avail. I was busy trying to surreptitiously spread out my attacks and their damage to avoid the dreaded domino effect, when one hero falls, then another and another. Even still, Grum went down again, then Dragonbait. In that time, only two devils, one spined and one beared, fell. When the giant horned devil arrived, they knew they were screwed. Gwen begged, “I wish to make a deal!” The horned devil growled, “Talk to Pazuzu.” Then Thames fell and began dying.
They had to wait until the next round, focusing all my attacks on Martic and Bag, whom I almost killed as well, before Pazuzu the Erinyes arrived. And yes, the name is stolen from the demon in The Exorcist. The erinyes pointed at Gwen and commanded, “Come with me,” as both the devil and the cleric disappeared. Actually we walked to the back room to discuss terms of surrender.
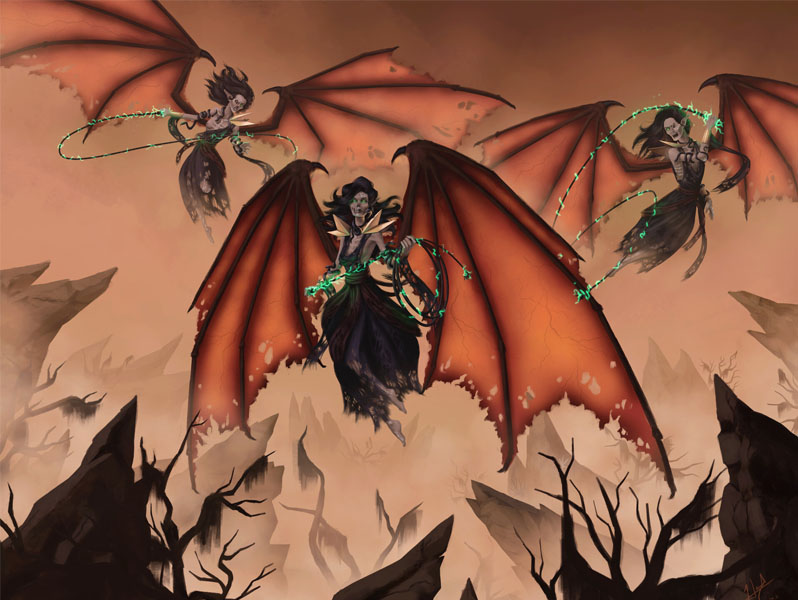
The book makes it clear that negotiating with these devils is a possible scenario. But if anyone is willing to forfeit their soul to save the other then the punishment is immediate. That hero is dead and gone from that moment on. But I disagree with this philosophy. From a practical standpoint, there are only 3-5 session left before the end of the campaign. Unless you have been solidly building on having party NPCs in your group, for instance Grum in our campaign, then who is the player expected to play this late in the game? And if you don’t have a cache of NPCs to choose from, where is your new hero supposed to have come from? Earlier in the tomb, there are a few options to introduce new PC. They could have been an added member to the Yellow Banner company. Or a solo adventurer lost in the parallel tomb, captured in Wither’s office waiting to be turned into a tomb guardian, or trapped in the magic mirror, where our group found Dragonbait. If I had to replace a PC on this level, I would have them come from one of the extra-dimensional wardrobes in the Cog of Blood. Even so, I would not be satisfied playing a one-shot 10th level player for just a session or three. Or just do what we did.
During our negotiations, Gwen brought up the excellent point that the Death Curse must be affecting these devils as well. If all soul are being trapped by Acererak somehow, then there can be no new souls entering hell. Pazuzu admitted, “There has been a drop off in our quotas, yes.” Gwen proposed that if the party should be spared because we are working to release all these lost souls, many off which will presumably end up in hell where they belong. This conversation was perfect Gwen, a cleric of Kelemvor, the god whose singular job is guiding dead souls to their final destinations.
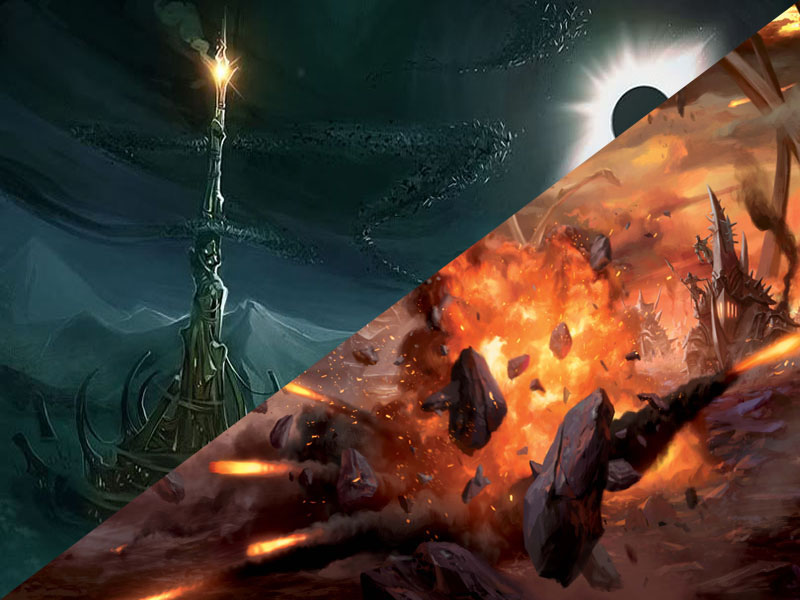
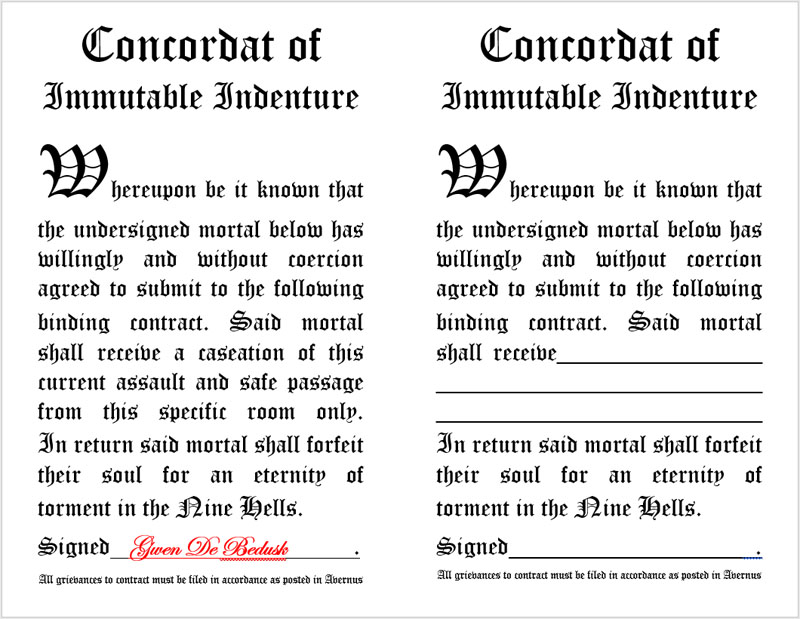
Gwen made some excellent points and attempted to save everyone in the party, herself included, but Pazuzu couldn’t walk away empty handed with just an uncertain promise to defeat the Death Curse. No she needs something right now to bind this arraignment. Pazuzu and her devils will spare every member of the party, Gwen included, they will end their attack and allow the group to travel safely from this room. In return, when either Gwen dies by other means or the group defeats the Death Curse, whichever comes first, then Gwen De Berdusk, cleric of Kelemvor, shall forfeit her soul for an eternity of torment in the Nine Hells.
With a handshake the deal was struck. Now, it would be very cool, if after the terms were agreed upon, you were to produce a document to fully bind the contract. I just so happen to have a blank such document right here, if only you would but sign on the dotted line and don’t mind that fine print at the bottom. It’s just standard boilerplate, something the boys in legal require we add in there. Signed in blood of course, but I suppose a red pen would do. ToA Devil Contract blank
Back at the table, suddenly Gwen reappears in the room standing right where she was on the elephant. All the devils, including the dead ones, disappeared, and the fire vanished with a wisp of smoke. Bag of Nails looked at Gwen in shock and said, “What did you do?”
Next week, we go on a merry romp in the outer planes, disturb a modron march, and lose another soul.
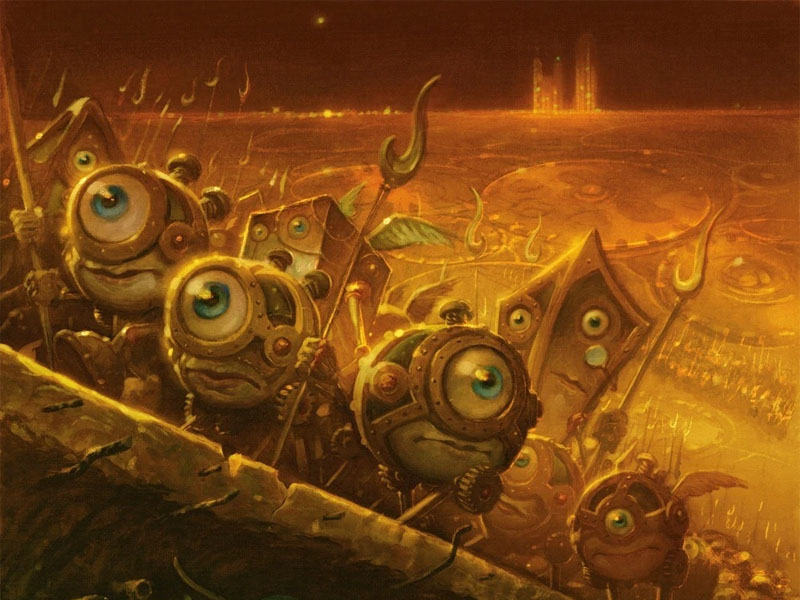
As always, in every group, someone will be willing to sell their soul if the price is right, and Game On!
I consorted with dark powers for our safety – Gwen, refusing to state directly what she had done.
As usual, don’t forget to check out my Tomb of Annihilation Resources Page, filled with all the stuff I use to make this epic campaign even more epicier: My full Campaign Diary, plus Handouts, Maps, Charts, PDFs, Images, and more to use, abuse, or ignore at your peril. All the templates and instructions for my Trickster Cubes are found here as well.
And written specifically for this adventure, read my Explorer’s Guide to Chult to delve into all the legends, lore, history, religion, and culture that I used to bring even more life to this adventure.


Brilliant, so many ideas to use here, as my party is already on level 3. The oubliette as written would be so tedious to run, your version is so much better.
I love your juggernaut.
LikeLiked by 1 person
I glad you enjoyed my brilliant ideas. Right in time for you to steal them. But I do hope you can find some use for them in your campaign. The oubliette is such a problem. I love that this is the first adventure ever to address how tombs such as this keep resetting themselves. You want to show this room to the players but the only way to get them here is by some form of dirty trick. Tricking them then giving them just a flat 50% chance to survive seems mean and unfair. And is also out of character for Acererak who always gives the heroes agency in their own demise. Let me know how the rest turns out.
LikeLike
Your use of the word “irrelephant” was sublime, well done hahaha
LikeLiked by 1 person
Auto correct was very unhappy with me
LikeLike